The new Avalon M-Tre
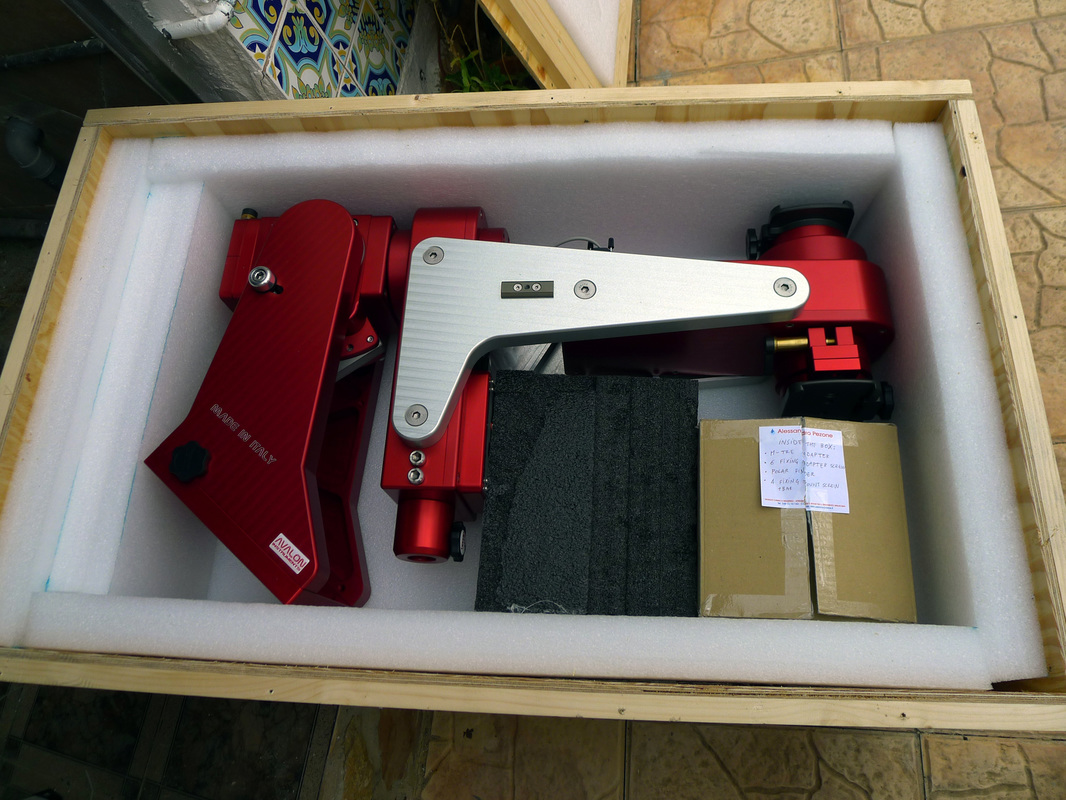
I am proud to announce that I have just taken delivery of a new M-Tre mount from Avalon Instruments of Italy. I have got it for testing prior to it's general release. Nothing can do this mount more justice initially than just to show you a couple of boxed pictures!
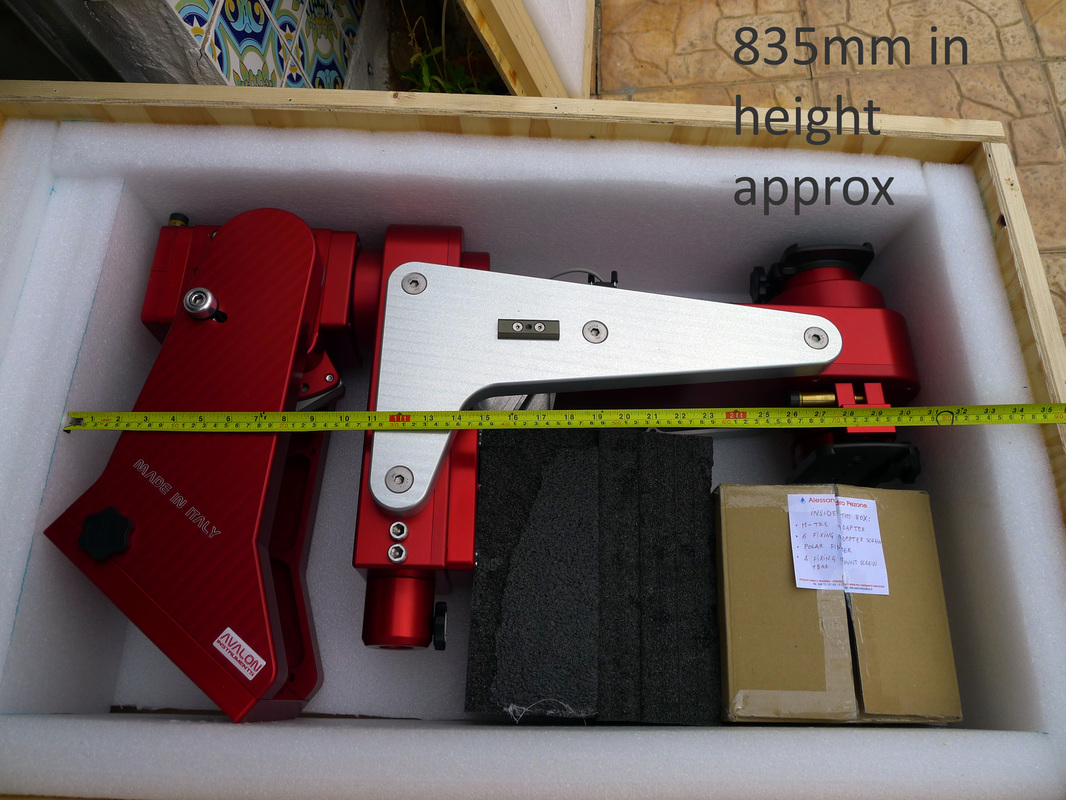
The box is well made and the packaging is perfect for the job. This is a heavy box - 75kgs in total. I have shown the height of the mount in the second picture, but haven't yet taken it out to see how heavy it actually is.
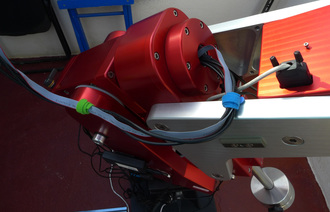
In the box the mounting plate was included along with all relevant screws for mounting and a polar scope. The Polar scope attaches to the side of the mount as the middle is free to run the cables.
The mount weighs 35kgs without the base plate adapter, so it's pretty heavy - Only 3kgs less than a Paramount ME. Avalon have said to me that the weight capacity is 35kgs as well.
Video supplied by Avalon regarding the fixing of the M-Tre to the pier
The M-Tre mounted in the observatory
Firstly, I really do need to thank my friend Colin Cooper for his help in this. He shortened my pier, made me a new mounting plate and helped me with the initial mounting and balance....I do appreciated his time and effort helping me with this.
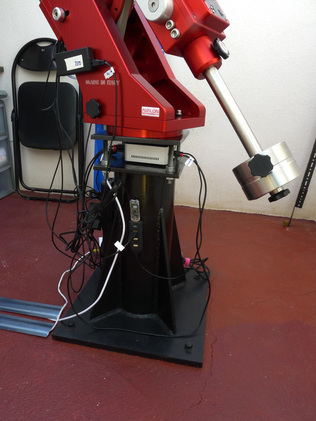
This took some fairly major work as my pier was too high for the M-Tre and it wasn't possible to close the roof. The pier was cut down and a new adjustable pier plate was welded to the top. We set a north position and marked it on the pier, from there we were able to drill and tap the holes on the pier plate so that the M-Tre adapter plate would fit on.
The new adapter plate on the pier is now fully adjustable for levelling which I didn't have before (and so the mount was never quite level) - This one is bang on!
The mount is a rather chunky 35kgs, but fitted on the adapter plate perfectly.
When it came to mounting the scopes, this was interesting. I was initially planning on having them dual mounted, the ODK10 on the main mounting saddle and the Tak FSQ85 on the underside saddle. A couple of things soon became apparent with mounting in this configuration
- There was insufficient weight on the ODK10 saddle to be able to get balance easily and so I had to add 4kgs of weight on top of the ODK10.
- It was difficult to balance with the long counterweight bar as it was too long. I did find a piece of lead that I managed to attached instead of the counterweight bar, but both of these solutions looked pretty poor and so it was back to the drawing board. If I had the shorter counterweight bar instead of the long one from the Linear it's possible that this would have balanced properly. But I would still have required weight on the ODK10.
- The adjustments on the arm of the M-Tre would have gone in the wrong direction to aid in balance as far as I could tell.
- As I only have one camera and actually don't want to be imaging from both scopes at the same time, moving the camera from one scope to another would involve rebalancing each time on the DEC axis, which I really wanted to avoid if possible.
- The mounting underneath configuration and the scope positioning once balanced gave me issues in my small observatory and the scopes were just too close to the wall. I didn't feel comfortable with the opportunity for them to hit the wall in various positions.
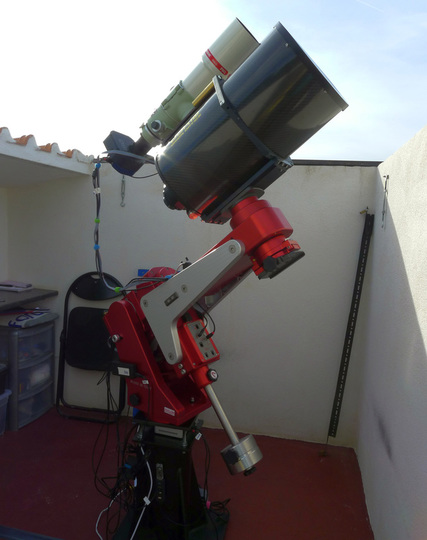
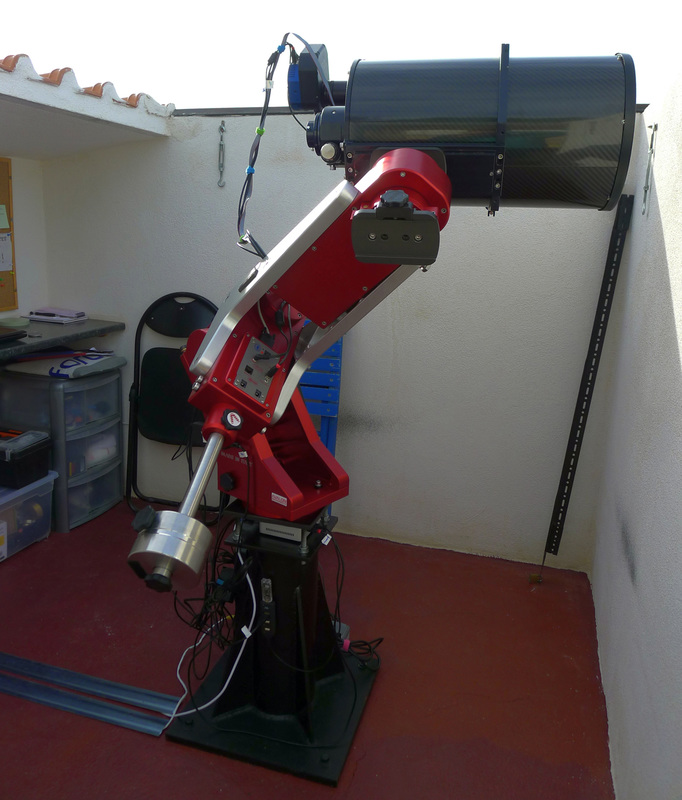
The final mounting configuration on the M-Tre
|
This is the Home position (weights down) - You can see that the Takahashi FSQ85 is piggybacked on the ODK10 and is currently ready for imaging. In this configuration it will be easy to swap the camera's over and will only involve a small tweak in the RA counterweight. This suits me. Weight wise, the ODK10 is about 16kgs, the FSQ85 almost 4kgs and say 1.5kgs for the camera (21.5kgs). So I am still under the 35kg suggested capacity by Avalon.
|
I have set a custom home position so that the roof can close and also I can continue to use the white wall of the observatory to take my flats on both scopes.
The park position was easy to set as per my guide here. |
Software
The M-Tre uses the StarGo software by Avalon. I have covered some of that in my previous guides. When connecting to the PC, the StarGO fired up and just needed a firmware update that was available on the Avalon website. The StarGo is fully ASCOM compliant and so it will work with the other software I use (PHD2, SGP and Cartes Du Ciel)
Polar alignment with the M-Tre
|
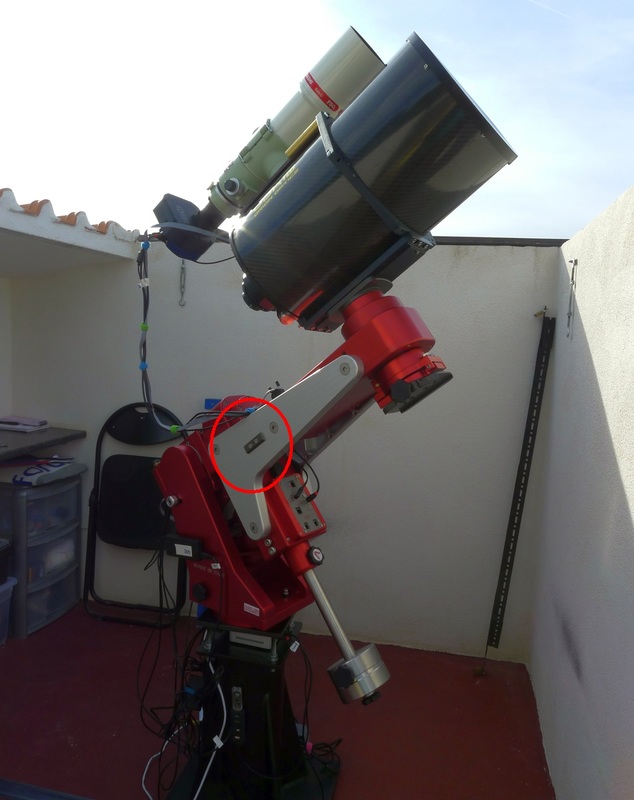
The M-Tre comes with a detachable Losmandy Polar scope - It gets fitted on the side of the scope as circled in the photo below.
I was unable to use the supplied polar scope as I couldn't see over the wall of my observatory with it!! So there had to be another way! Great care was taken when fitting the mount adapter plate on the pier that the adjustment for the azimuth polar alignment was in the correct place. As I already had a 'peg' in place from the previous mount, I was able to take that as a starting point. There was a difference from the previous mount that the adjustment peg needs to be on South edge of the pier and not the north. This is not difficult to achieve as once you have the north set, the bolt holes are such that you just use ones that have already been machined 180 degrees from north. |
PHD2 and drift alignment
I have been using PHD2 to drift align (if that is accurate then the Polar alignment will be accurate too). I use the guide that is downloadable below. As long as you follow the instructions then you will end up with a mount that is accurately aligned. Once this is done you can be sure of being able to capture long exposures without any frame rotation and star elongation.
PHD2 drift alignment guide
| phd2_drift_alignment.pdf |
A drift alignment trick
Starting off with a mount that needs to be set up for your location can be difficult. I set my latitude on the mount using the altitude adjustment but when it came to drift alignment the altitude seemed so far out that I couldn't even begin. I needed a way to bet able to get an altitude reading that would allow me to make an adjustment to get in the right area at least.
Using my Smart Phone I downloaded an application called Clinometer. This allowed me to check the degrees that my altitude was set at.
Using my Smart Phone I downloaded an application called Clinometer. This allowed me to check the degrees that my altitude was set at.
|
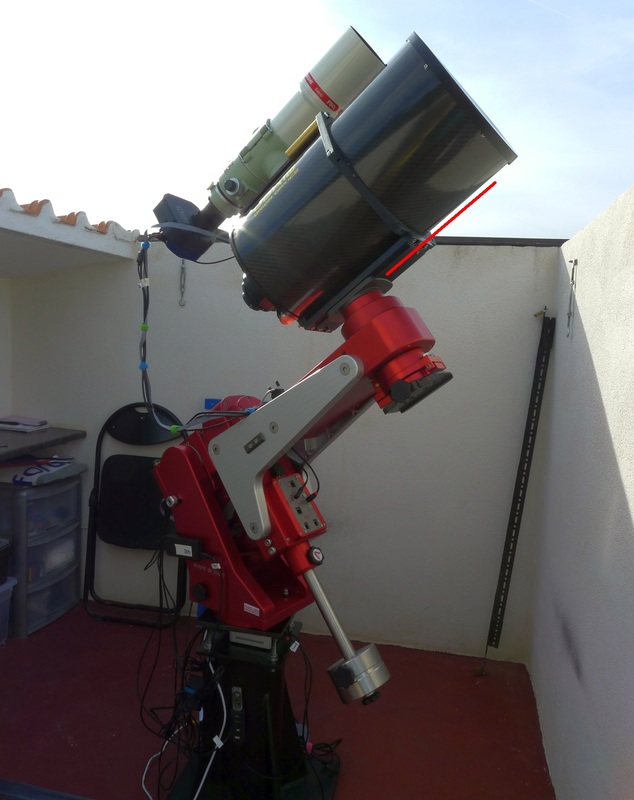
Here I have marked the line that I needed to measure with the Clinometer app. I put my smart phone along the underside of the dovetail and it gave me a reading of 37 degrees. My latitude is 39 degrees, so it was no surprise that the drift alignment tool struggled..... 2 degrees is a significant error in this case.
I was able to do this during the day and adjusted the altitude bolts on the mount until it read 39 degrees. That night when I started the drift alignment procedure again, I was able to follow the process in the guide properly as the error was small enough to make an accurate assessment of where to even start. Following the downloadable guide, my drift alignment is completed and my Polar alignment is now accurate. |
Polar alignment - The results
|
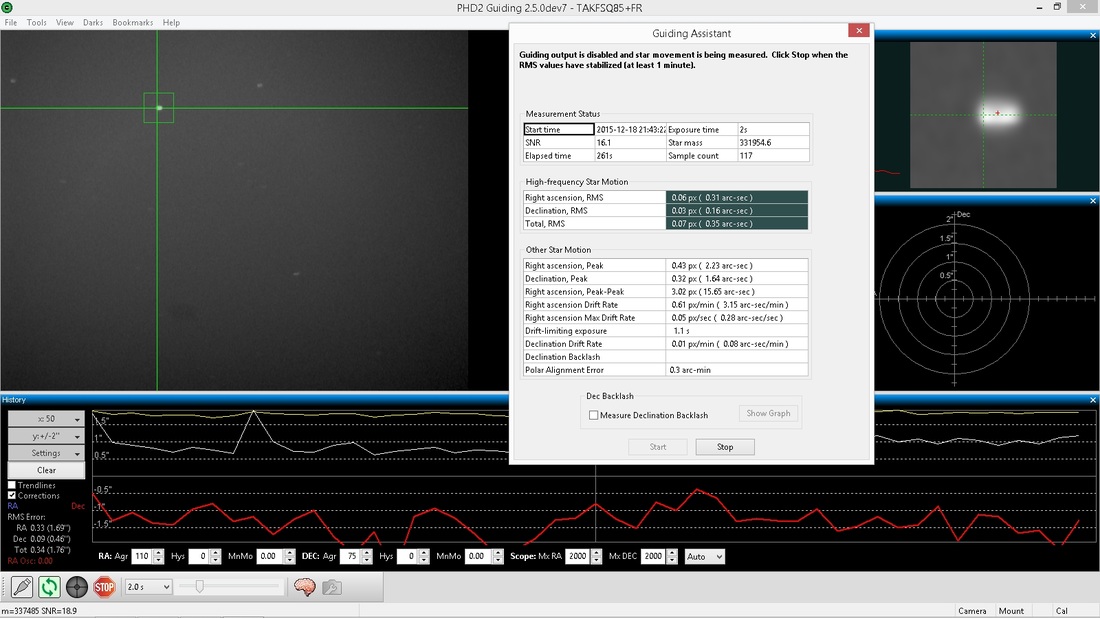
Taken from the PHD2 Guiding assistant this shows the success of the drift alignment. A polar alignment of 0.5 arc minutes is more than acceptable.
The azimuth adjustment on the mount was easy enough to do. The altitude was tricky, involving a couple of spanner and opposing turning nuts. I understand that this is only part of this mount and the retail ones will have an easier adjustment mechanism. The drift alignment method in PHD2 clearly works well and negates the need for a polar scope, which is handy. There are people who struggle to see Polaris, so this will work for them as long as they can get to the coordinates needed in PHD2 for both adjustments. |
Guiding - The important stuff
Firstly, I really do need to thank my friends Trevor Nicholls and Julian Raymond for their help in this. They spent a lot of time with me looking at the guiding and making adjustments. I do appreciate their time and effort helping me with this.
For me, this is THE most important part of everything. How exactly is this mount going to guide? What kind of figures am I going to get with it? I have been using the Linear now for over 2 years, so have the guide settings sorted out and working well. The M-Tre guiding needs some working straight out of the box. Avalon sent me some settings that they had used in PHD2, so I started there and began tweaking.
Guide settings in PHD2 and StarGO
|
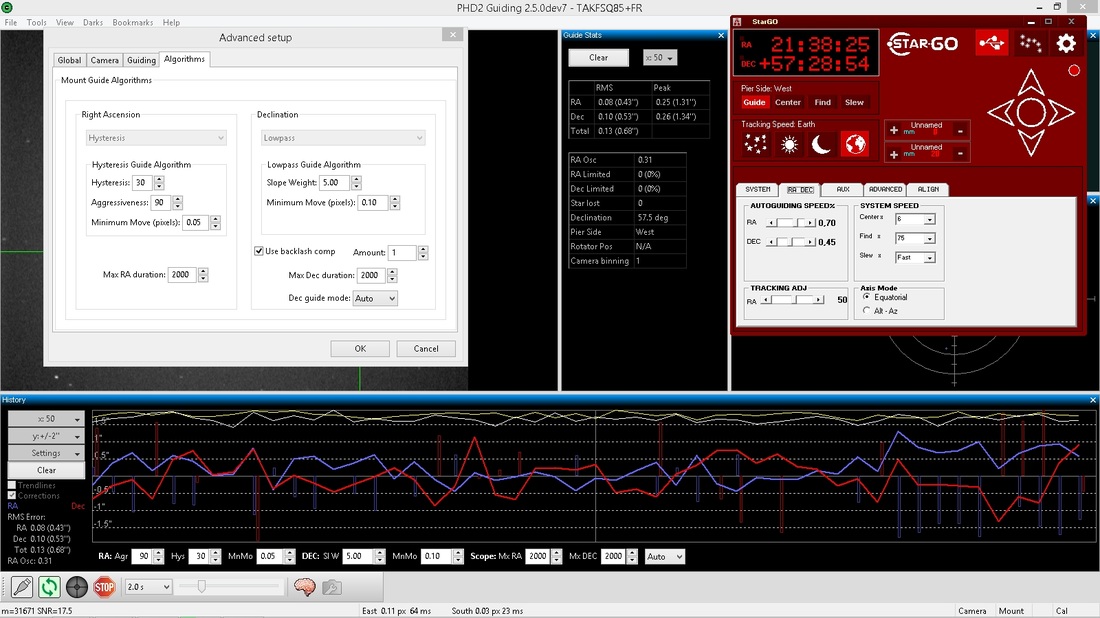
On the left hand side is the PHD2 settings that I used to get this guide graph. I was finding that the RA axis needed some work in particular and so on the right hand side are the settings that I used in the StarGO menu. You can see that the guide rate in RA and DEC ended up different and also that there was some fine adjustment needed in the RA axis as well.
|
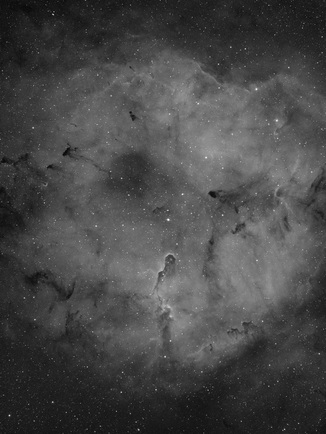
The FIRST published image from the M-Tre
|
This is a full-size jpeg image. It;s had curves and levels applied and nothing more - No sharpening, no contrast boost, no processing trickery to clear any blemishes.
This is 30x600s taken using the M-Tre. Only mono at this stage due to the moon and I've had a limited choice of targets where I could image as far from the moon as possible. |
A guiding snapshot
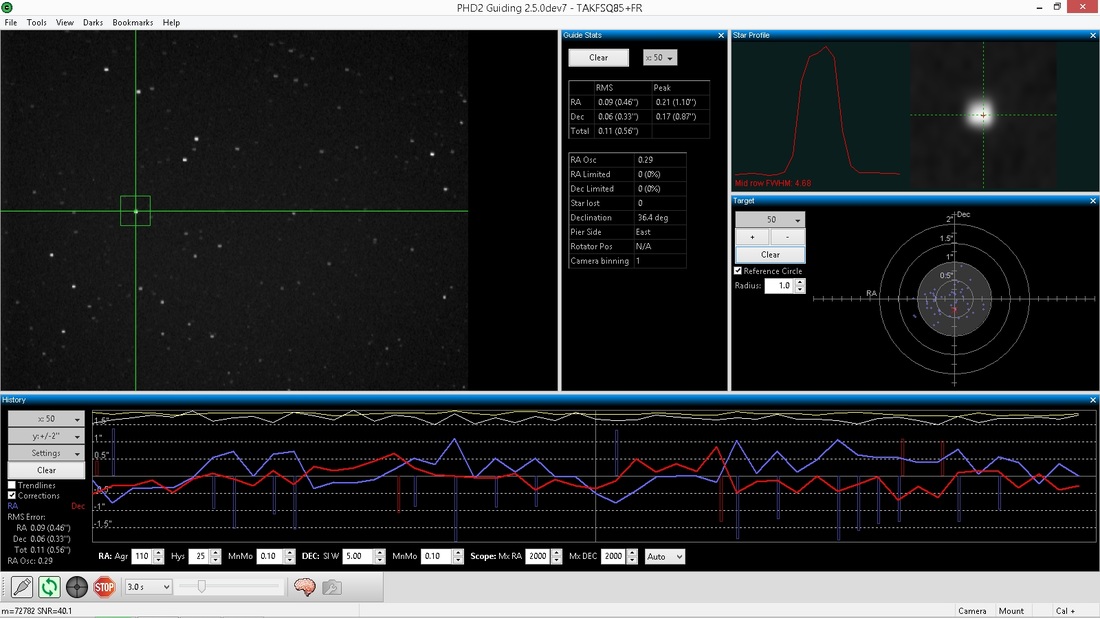
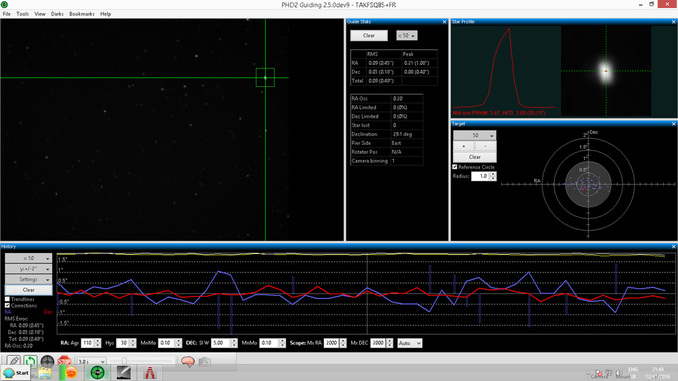
Here are a couple of screengrabs of the M-Tre guiding screen when imaging and at meridian. As you can see, the figures show very good guiding indeed. I am looking specifically at the Total RMS in arc seconds per pixel - These are showing in these examples as 0.56" and 0.49"
I have found that the guiding graph and figures are less favourable at lower altitudes...... yet when actual images are compared at the meridian and lower down the FWHM figure (a good accuracy indication) is similar throughout the imaging run.
I have found that the guiding graph and figures are less favourable at lower altitudes...... yet when actual images are compared at the meridian and lower down the FWHM figure (a good accuracy indication) is similar throughout the imaging run.
Guiding and imaging resolution
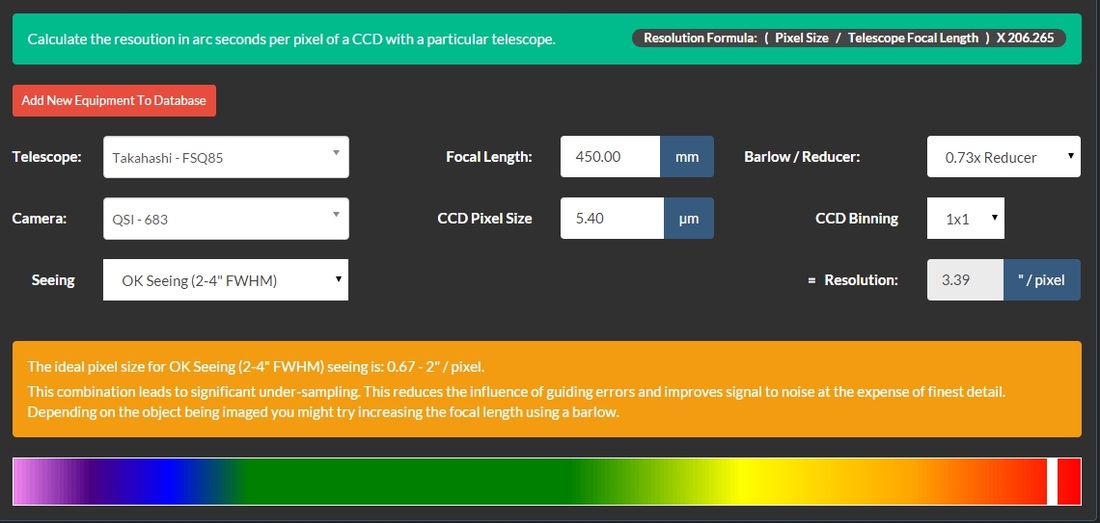
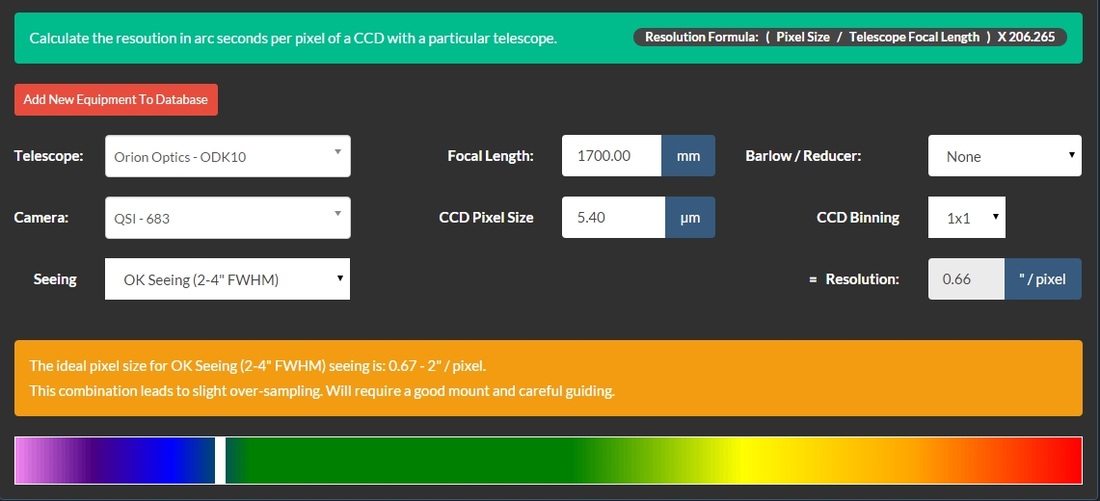
When guiding it is good practice in my opinion to initially know the image resolution of the imaging rig that you are using. Armed with this information you then have a level that you want to achieve in your guiding.
For example - With my Takahashi my resolution is 3.39" per pixel. As long as my overall guiding figure is below this figure that means that my guiding will be good. An easy task for the Takahashi........ the ODK10 has a resolution of 0.66" per pixel. This means that to get maximum resolution and sharpness in my images, I need to be under that figure for the guiding.
Something that I have learnt with my LInear mount is that the guide graph and figures, while a guide, are not the only indication of good guiding. The actual images themselves show good resolution and detail.
Thoughts about the M-Tre at this stage
This mount is large and heavy and in my opinion, is not portable. But I know that Avalon have tested it in the field. For me 35kgs is too heavy to lug about.
1) Think about whether you are going to use this in the field or an observatory
The mount, because of it's design hangs out a considerable distance on the front. Add a scope to that and as my images have show, there's a considerable overhang on this set-up that I haven't come across on a normal GEM mount.
2) Is your space big enough? I am in the position where my observatory is not ideal and is too small for this mount. I've lost a few chunks out of my scope as it's hit my front wall. Also my walls are too high to allow me to use the Polarscope. These are of course my issues, but in documenting them I hope that it will ensure that you don't have similar issues.
The single arm mount has some adjustments of the actual arm itself to ensure that you can get idea balance. This is utilised in all of the Avalon mounts and those who use the M-Uno and M-Zero will be familiar with this. As a GEM user, this is something that I have find peculiar.
3) I have found this weight balancing system to be cumbersome, so much so that I haven't done it. The sheer weight of the arms have stopped me from trying it. To that end I have mounted my scopes in a way to offset this.
Dual mounting is a great feature that this mount has. If you want to use the feature then I'm sure that it will work well.
4) In my position again, my observatory build has prevented me using this. The under mounting saddle was just too low. If you were out in the field this wouldn't be an issue at all.
Lack of meridian flip is undoubtedly THE most advantageous feature of this mount and if you like this system from Avalons other mounts, then you'll love this, I do question whether if you are going to use this in an observatory this feature will be of use as I would expect that there is a degree or automation in peoples observatories. This is something that buyers need to think about, whether they want this feature and the higher weight capacity that the M-Tree delivers.
This is not the end..... I will soon be putting the larger ODK10 to use and see how that guides and I'll be comparing it to the Avalon Linear Fast reverse mount that I have been using now for a few years.
A guiding nuance
I have found a massive difference in the guiding figures between the meridian and lower in the sky. The meridian guiding is really good on the guide graph with very good RMS figures of about 0.5"-0.6". When the scope is guiding lower (up to 60 degrees - which is in fact quite high) the guiding graph looks pretty scary and the RMS figures and peak to peak are pretty high..... but here's the rub........ I am finding that the images themselves taken during the worse guiding periods have FWHM's as good as at the meridian and the stars look the same.
To this end, I guess what I am saying is that you can not be a slave to the guide graph, otherwise in my experience you will be chasing your tail.
Of course, I am still using the short focal length scope......... the longer focal length will really give it a work out when that goes on.
To this end, I guess what I am saying is that you can not be a slave to the guide graph, otherwise in my experience you will be chasing your tail.
Of course, I am still using the short focal length scope......... the longer focal length will really give it a work out when that goes on.
Avalon support
I have to say that the support from Luciano at Avalon has been superb. If there is every a company out there that everyone else should aspire to........ It's Avalon. He's spent time this afternoon remotely sorting out my PC as I couldn't update the new firmware. He's friendly and approachable and always willing to help and listen to new ideas.
Thank you Luciano, you are an excellent example of how a company should be run.
Thank you Luciano, you are an excellent example of how a company should be run.
The final outcome
The ODK10 never made it onto the mount as it became apparent that even using the Takahashi at short focal lengths things were not quite right. The mount is being returned to the manufacturer for a mechanical improvement which was creating a performance limit within the guiding.
I wanted the very best out of this mount and I felt, as did Luciano at Avalon, that some mechanical changes were required to make the the best that they could. Its a shame that I didn't end up testing a mount that was working at its expected level at this experimental stage, but I hope that my experience and thoughts have been helpful in developing the mount further and ensuring that those who buy it get the very best mount possible.
I wanted the very best out of this mount and I felt, as did Luciano at Avalon, that some mechanical changes were required to make the the best that they could. Its a shame that I didn't end up testing a mount that was working at its expected level at this experimental stage, but I hope that my experience and thoughts have been helpful in developing the mount further and ensuring that those who buy it get the very best mount possible.

