Thoughts on data
While processing can hide a multitude of sins and a person who is adept at processing can sort out many issues that arise through less than perfect data, there is only so much that can be done.
For example, there are tricks for sorting out stars that are elongated, halos can be dealt with as well in processing. Bad focus can not be sorted at all, so for me this is a make or break part of an image.
Life is very much easier at the processing stage if your data is good and also if you have a lot of it ......... I guess I am saying that there are no corners that can realistically be cut and while processing is in my opinion, a larger percentage of the over all image there's no avoiding that the better the data at the start the easier it will be.
Data - What format?
Always take your images in an unaltered format - For DSLR's this is usually in .raw and for CCD camera's this is in .fits format. If you take images in jpeg then this is a format that suffers from lossy compression, so your stacked data will have lost a degree of it's detail before you even start. I also find that during processing I always use a .tiff format for saving and never do any processing on a .jpeg image.
The importance of processing
Astro imaging is a discipline of photography that is incredibly different to any other area of photography. It involves a lot of equipment, patience and knowledge on image processing that many photographers probably think that they already have. Here I just want to demonstrate the importance of processing in the creation of the astro images that you see in the media, on the TV etc.
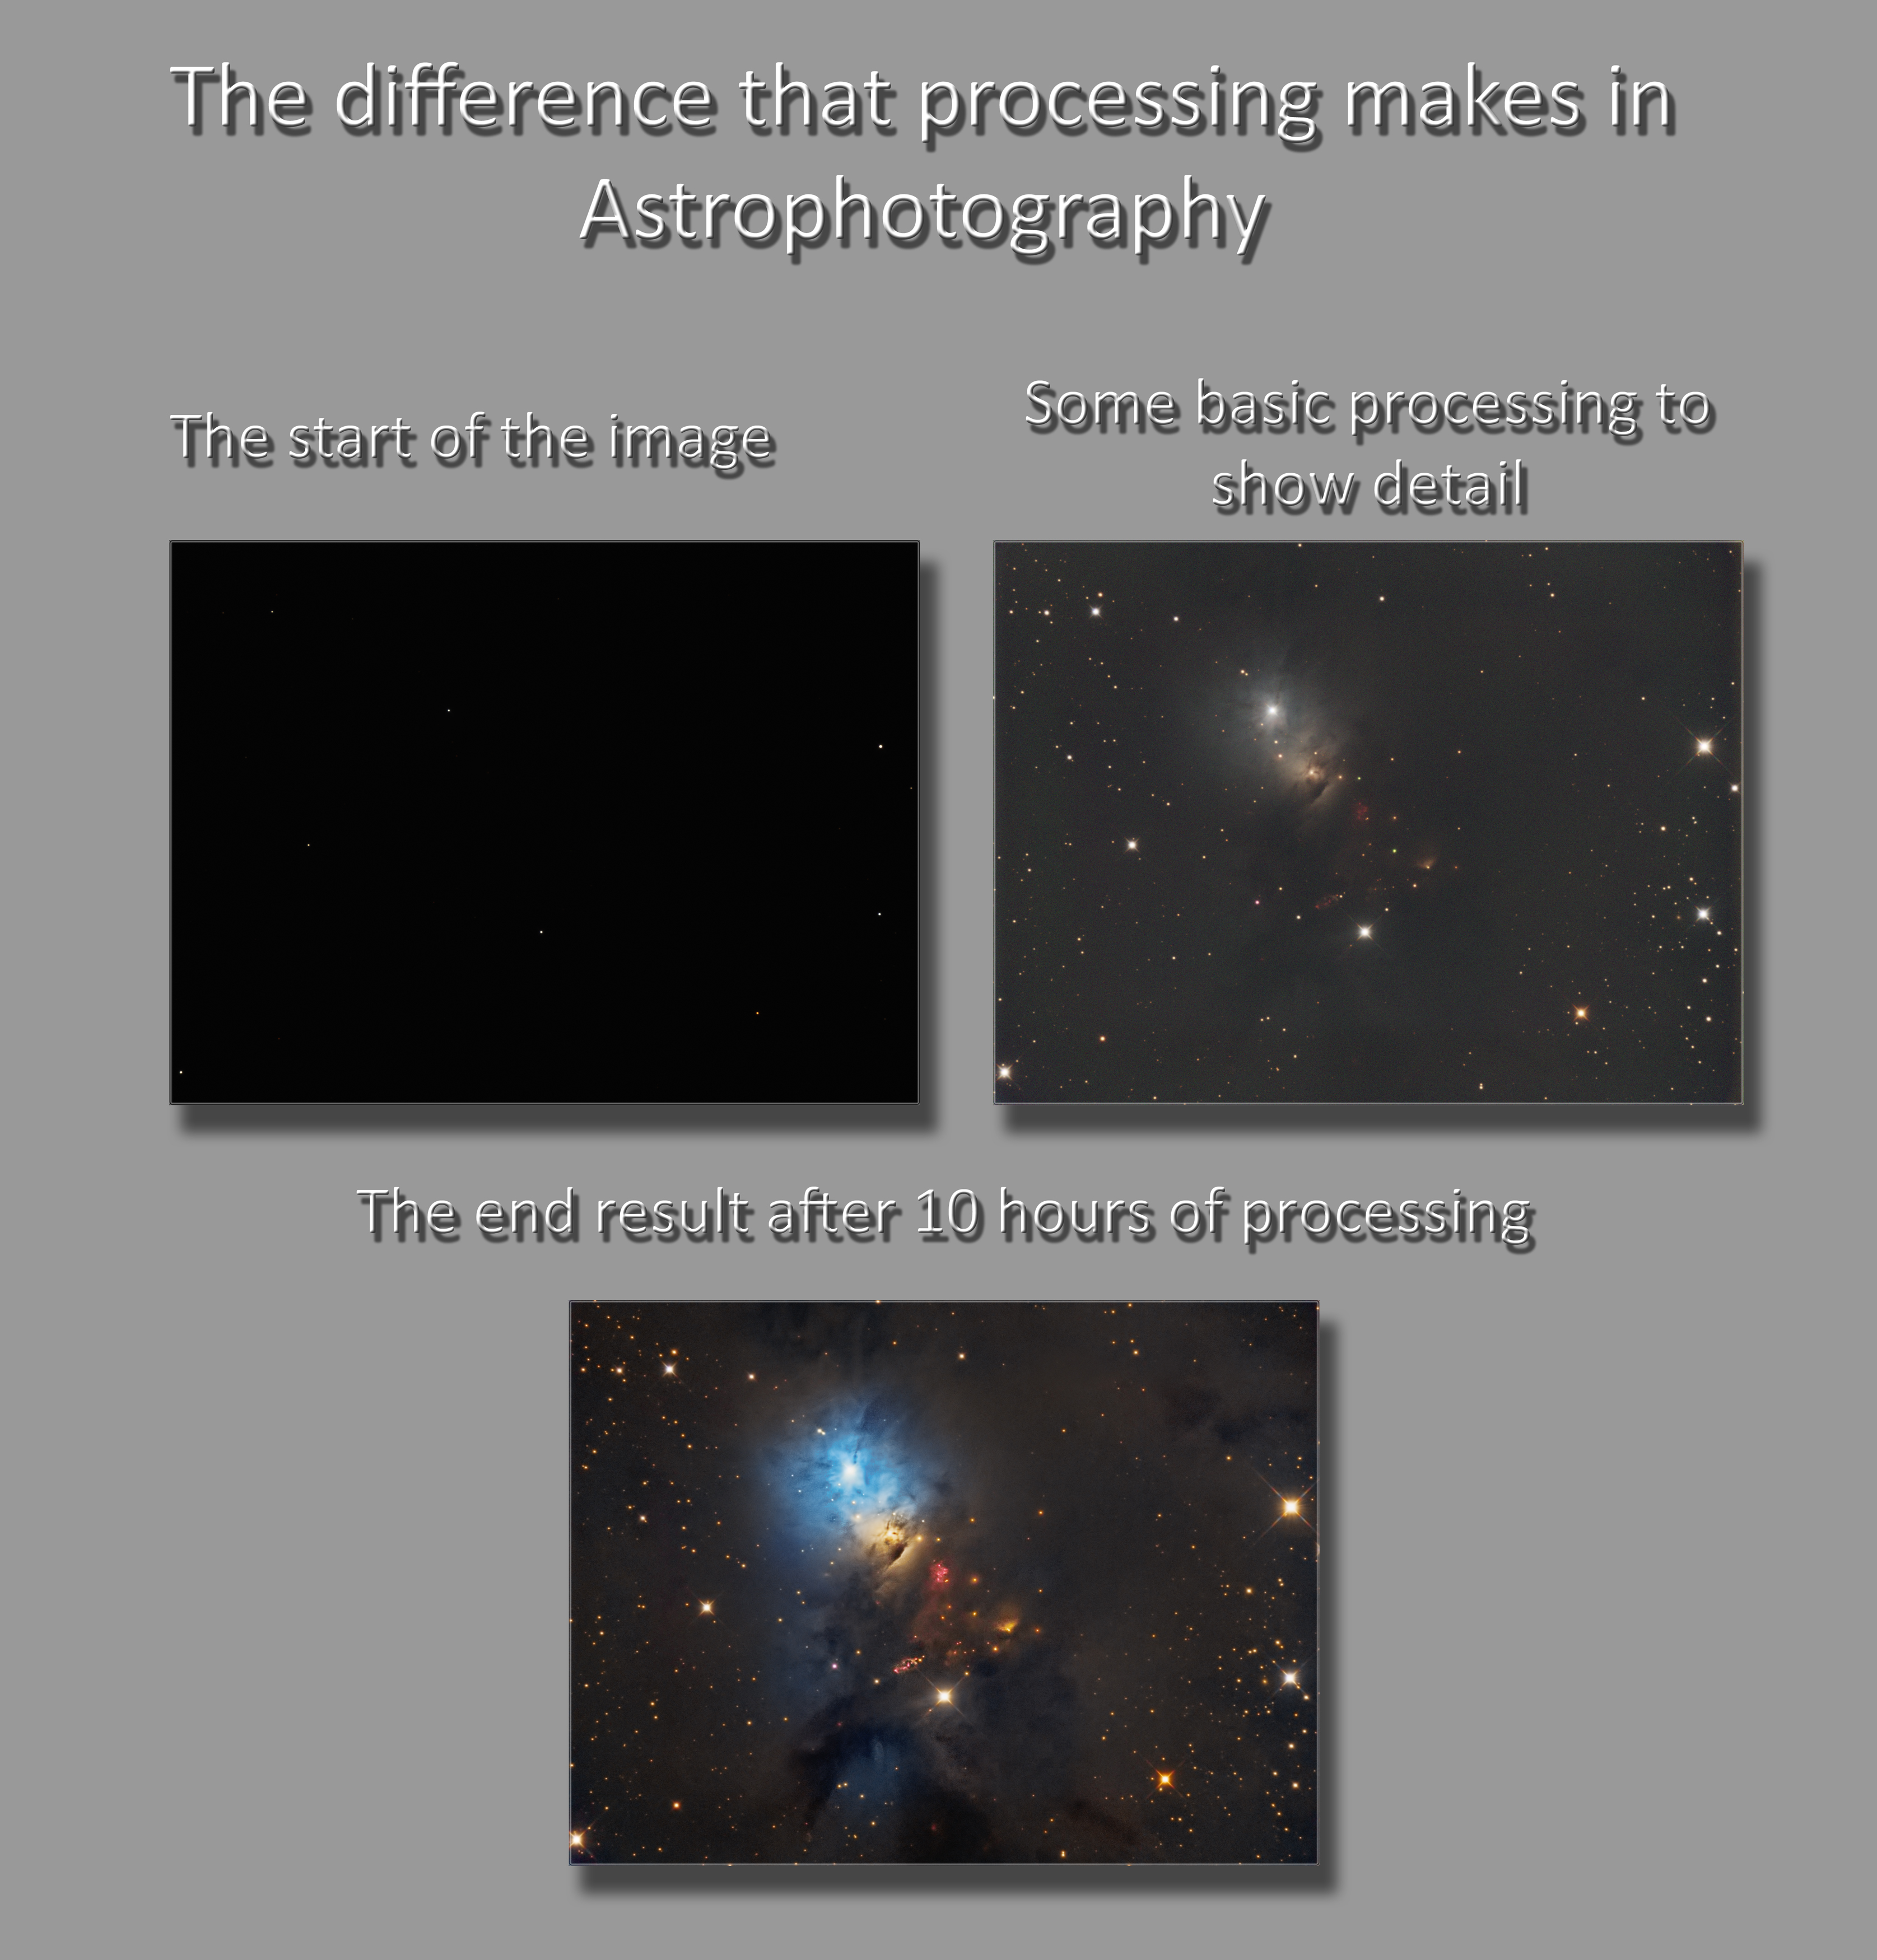
Start to finish in 3 steps! 'The start of the image'
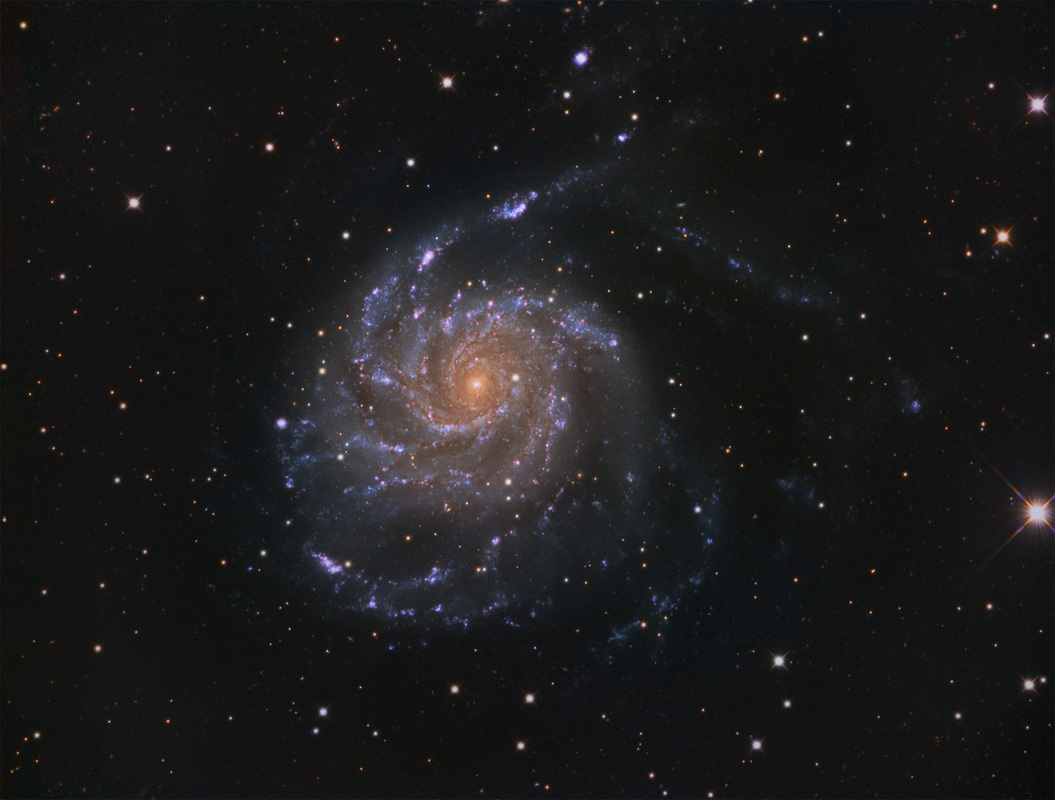
M101 in 'normal' (LRGB) colour
Here is an example of where we start with when the data has been stacked..... On the left is the luminance channel of M101 and on the right is the RGB of M101. As you can see, there is almost nothing to see at this stage except a couple of the brighter stars. With processing, it's possible to go from this ..........

|
|
.... to this .......
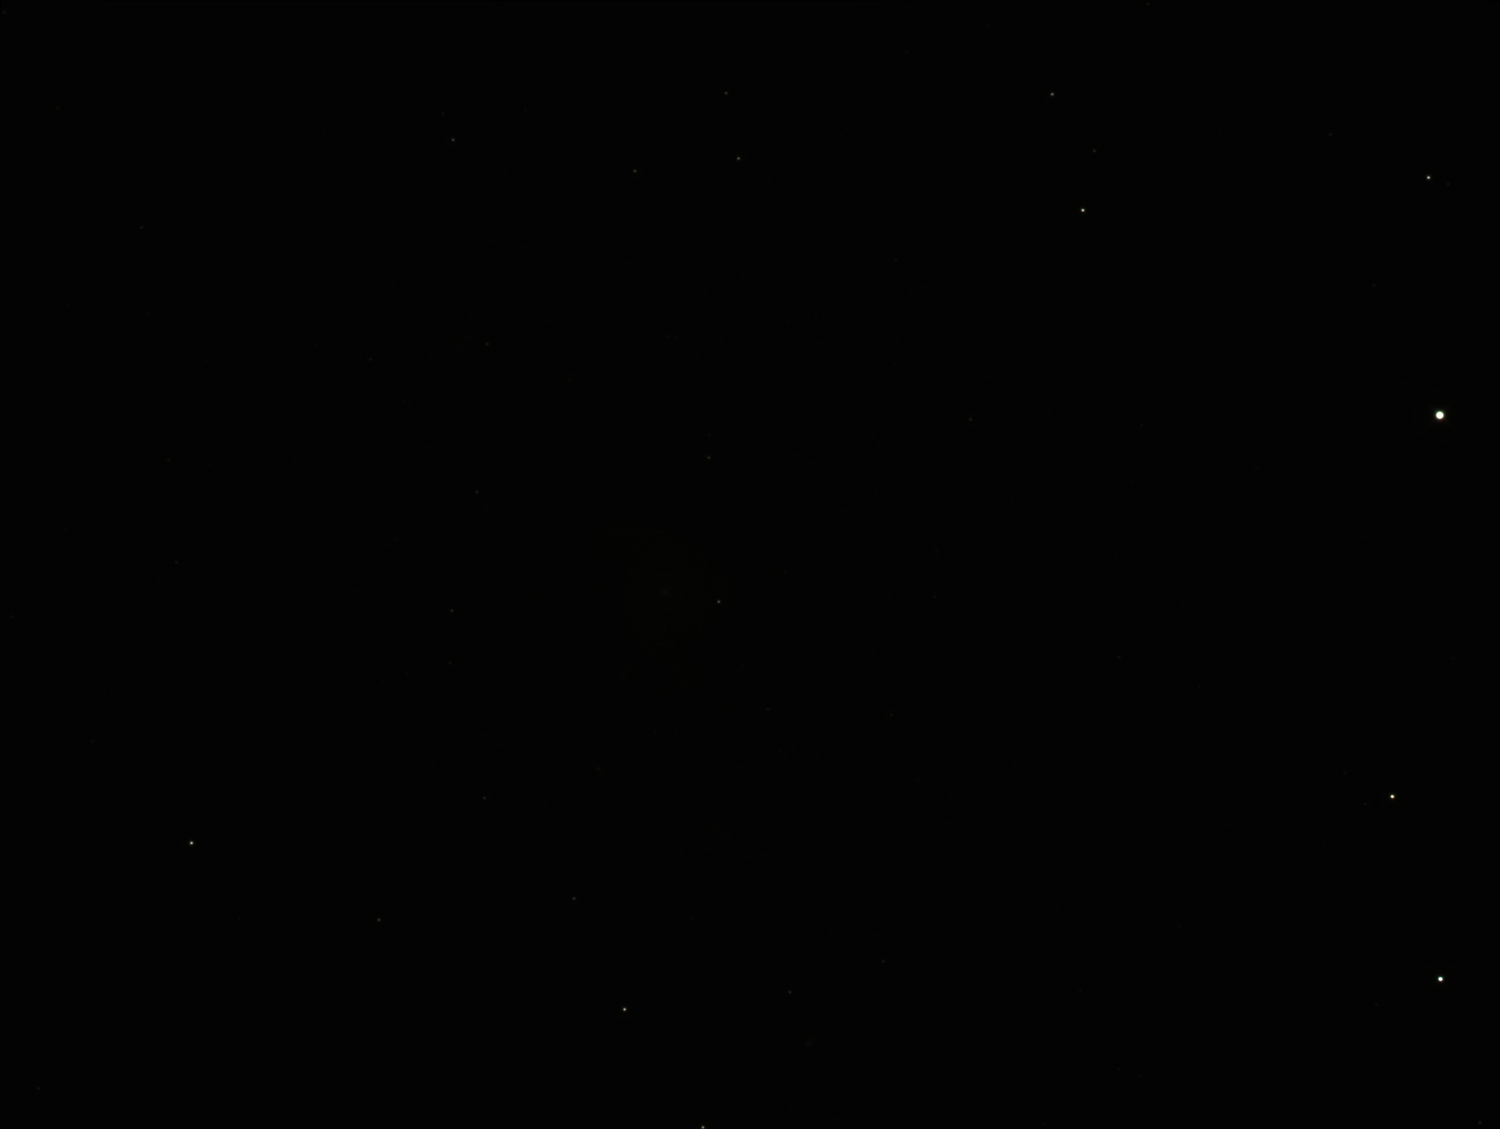
A processing map of a Narrowband image
Here you can see the start off point of the image. This is a combination of data from each filter put into the Red, Green Blue channels in the following order
Red --> SII
Green --> Ha
Blue --> OIII
At this point there is nothing to see!! There's a couple of stars that are bright enough to show, but that's it.
Red --> SII
Green --> Ha
Blue --> OIII
At this point there is nothing to see!! There's a couple of stars that are bright enough to show, but that's it.

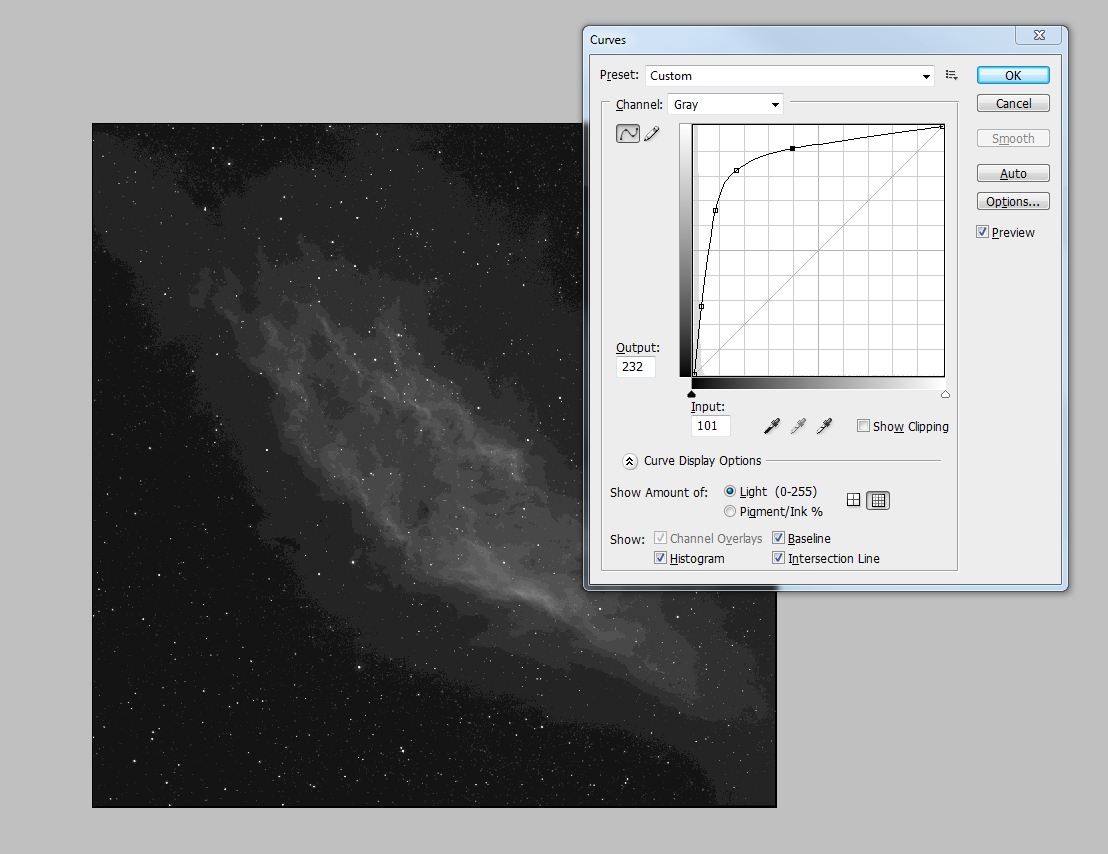
Image 2 'Some basic processing to show detail'
The second image shows what you see after a couple of basic curve stretches in Photoshop. Here's an example of the basic curves that I used in the first image to get to the point of the second. These are called standard curves - Always the same shape, just with different variations of strength and curve! From here you are left with a very green image.
This may seem odd, but in reality makes perfect sense. The Ha detail was put into the green channel as above and the Ha detail is almost always the strongest data of all of the narrowband filters. So to this end, it will start off looking very green.
This may seem odd, but in reality makes perfect sense. The Ha detail was put into the green channel as above and the Ha detail is almost always the strongest data of all of the narrowband filters. So to this end, it will start off looking very green.
|

|
|
Image 3 'The end result after 10 hours processing'
This is the final presented image. This has been obtained in photoshop from image 2 - There's no trickery involved as it looks so different. The first place to start is in the 'Colour Select' adjustment. Here you adjust the colours of the nebula to get them to something that you like. There is a well documented method for this which is on the Bob Franke website. As it's so well documented I won't repeat it, but this is the basis of the method I use to change the colours.
It's worth noting here that each image is different and what will work for one, won't always work for another. So for me the colour select tool settings are more of a guide than a religion!
There's also a stage that I do that is definitely worth mentioning. I always use the Ha data (or a blend of all the data - depends on the target) as a luminance layer. This is a layer that is in mono (So I will process a mono image of the Ha data for example as well) and then add it over the colour layer. Think of it as the bottom layer being a colour layer, holding the detail purely of the colour distribution of the image. This can be blurred to get rid of noise and really can look a mess when compared to the final image - When the luminance layer is added over the top (Photoshop - Blend mode Luminosity) then it puts the detail into the colour.
Adding luminance to the colour
These two images show what I mean - We have the first image that is purely an RGB image - It has been blurred to take out any colour noise and looks soft. The second image is after the luminance layer has been added - You can see how that all of the fine detail has come to the top and the colours are showing against the background of the luminance layer. I do this process a little way into my processing and then tweak the image from there.
Basic RGB image
|
Luminance layer added
|
The sharper details are noticeable on the second image with the luminance added and the stars are slightly smaller as well. A good situation to be in.
What next?
From this point I continue to make small tweaks until I am happy with the image. I will use the 'Colour Select' tool to get the colours how I want them, ensure that the colour balance is pleasing and that there is no strong colour casts. I may use some more contrast boosting and a little sharpening - It all depends on the image.
Does it really take 10 hours to get to this stage? Certainly for me it tends to as well as a couple of days. I like to do my processing, stop and go back to it with a new refreshed outlook, then sometimes go back a stage and sometimes move forwards. When I think it's finished, I leave it on my desktop for a couple of days and generally continue to tweak it from there. So I think 10 hours is probably quite a conservative estimation ........all for ONE image!
This is the same processing map idea but using LRGB data instead of my more usual narrowband data