
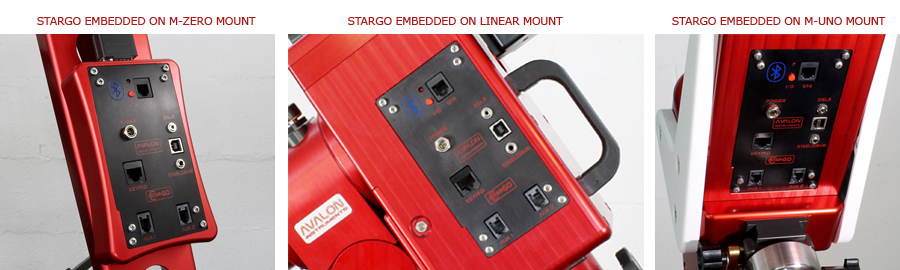
My Avalon Linear Fast reverse mount shipped with the standard mother board that is the same as the EQ6. I have had the opportunity to retrofit the StarGO upgrade.
How to get the StarGo
The StarGo can be purchased directly from Avalon Instruments in Italy. It can be bought as a retro fit for the LInear Fast reverse mount, or it can be purchased to work as a stand alone unit for other mounts - I won't be mentioning this as I have no experience of how this works or what mounts it covers.
Once ordered, the StarGO was sent via a courier from Italy to Spain and arrived in a very timely manner in a smallish box.
Once ordered, the StarGO was sent via a courier from Italy to Spain and arrived in a very timely manner in a smallish box.
Box contents
- StarGO motherboard
- StarGO handset
- USB stick containing relevant drivers and software
- Power supply for mount (mains and cigarette lighter ends)
- Mount - USB cable
- Handset - mount connector cable
Compatibility
StarGO has fully working ASCOM drivers. I have used the mount in conjunction with SGP Pro, PHD2 and Cartes du Ciel. There is no reason why it wouldn't work with all other software that has ASCOM compatibility.
On the USB stick Avalon provide the latest firmware and drivers for the StarGO. This includes the latest ASCOM drivers as well. I uploaded the files to my computer and these automatically downloaded and updated all relevant drivers.
On the USB stick Avalon provide the latest firmware and drivers for the StarGO. This includes the latest ASCOM drivers as well. I uploaded the files to my computer and these automatically downloaded and updated all relevant drivers.
How to retro fit the StarGO motherboard to the Linear Fast reverse
This is a video provided by Avalon showing how to fit the StarGO to the Linear. I have fitted it myself. It was almost this easy - We had to loosen off a bolt that holds the casing together in order to get the board into place, but once in this tightened back up with no problems.
Download the StarGO manual |
| ||
Connecting the StarGO
Connect the mount in the following way.
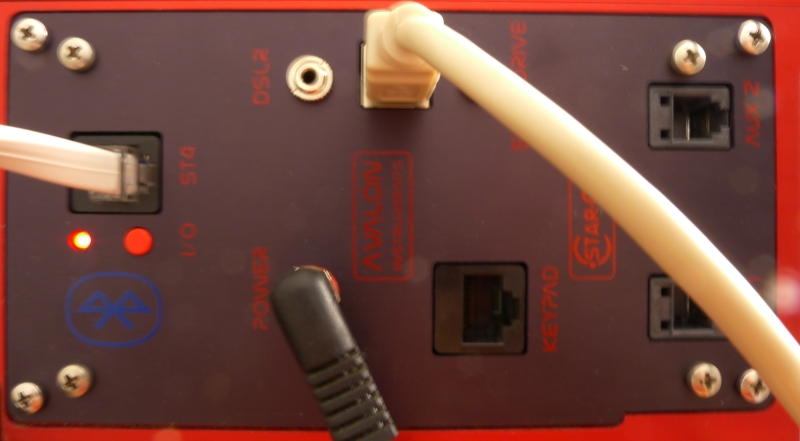
ST4 - This is your guding connection and connects to your guide camera. This cable will have come with your guide camera, not with the StarGO as each camera may have different connectors. Each ST4 cable will have the correct connector to fit the mount.
Power - Use the power cable supplied with the StarGO (black cable in the picture)
Data cable (white cable) - As supplied with the StarGO, this needs to connect to the PC - Either directly into the PC USB port or a USB hub (as I use)
Power - Use the power cable supplied with the StarGO (black cable in the picture)
Data cable (white cable) - As supplied with the StarGO, this needs to connect to the PC - Either directly into the PC USB port or a USB hub (as I use)
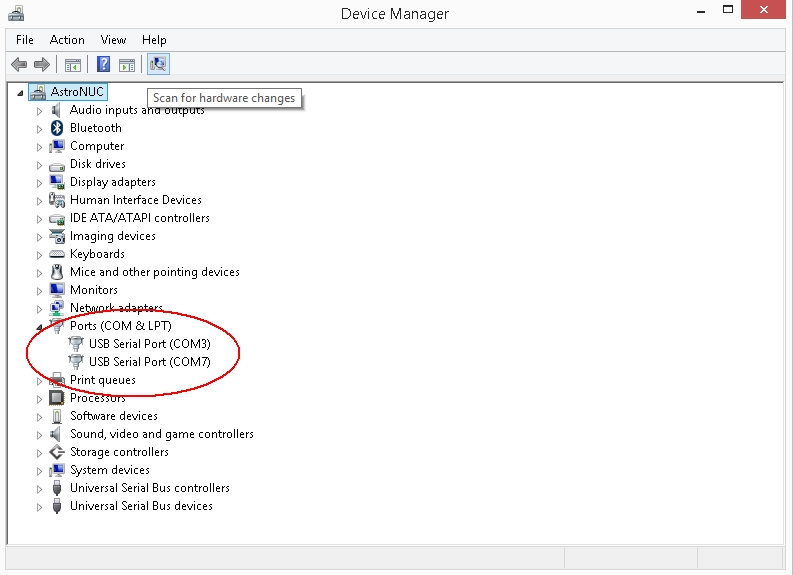
Switch on the mount and the PC - ASCOM drivers will automatically load.
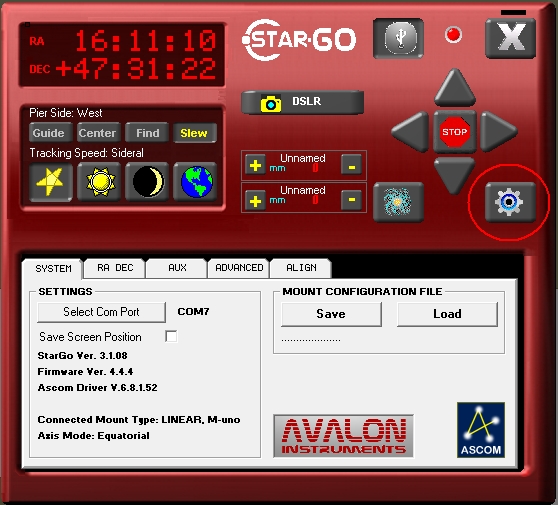
1) Check the COM port that has been assigned to the mount in Device manager - Here you can see that I have COM3 and COM7 assigned. COM3 is used for the Lakeside focuser, and COM7 is the one that is assigned to the mount.
1) Check the COM port that has been assigned to the mount in Device manager - Here you can see that I have COM3 and COM7 assigned. COM3 is used for the Lakeside focuser, and COM7 is the one that is assigned to the mount.
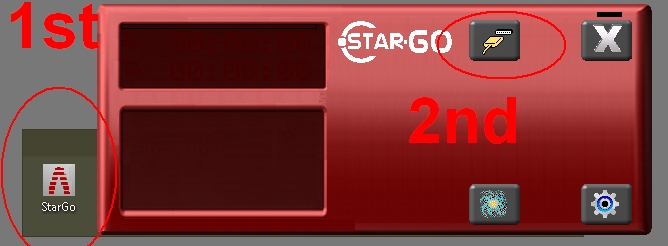
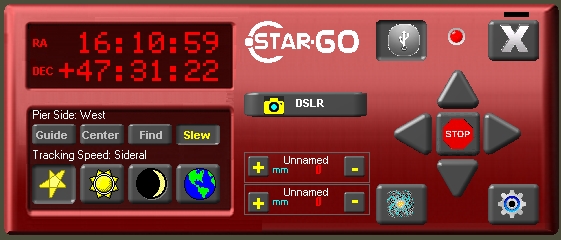
2) Click firstly on the StarGO icon that is on either your desktop or in 'My Programs' - Then secondly, click on the Connect icon as shown below
3) This will now connect and bring up the following - From here you can start configuring your home position and aligning your mount.
4) Click on the 'setup icon' as circled in red, and you will see the following - From here 5 tabs are opened up. You can see in the first tab 'System' the Com Port is showing.
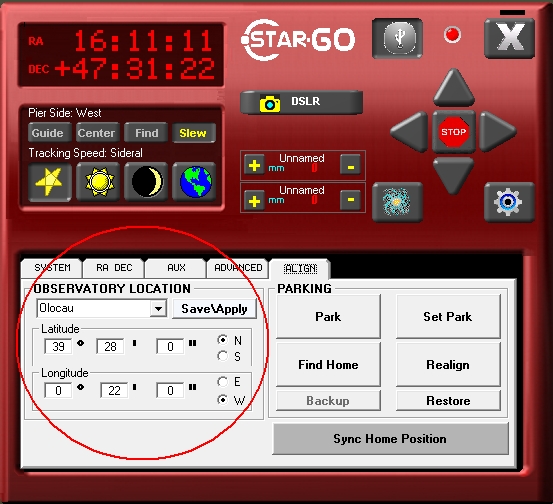
5) From here, to get the system up and running I then clicked on the 'Align' tab - The first thing that I set was my location. The default was showing as Rome! Type in your place and the Latitude and Longitude and then press 'save/apply' - This is then set to your configuration.
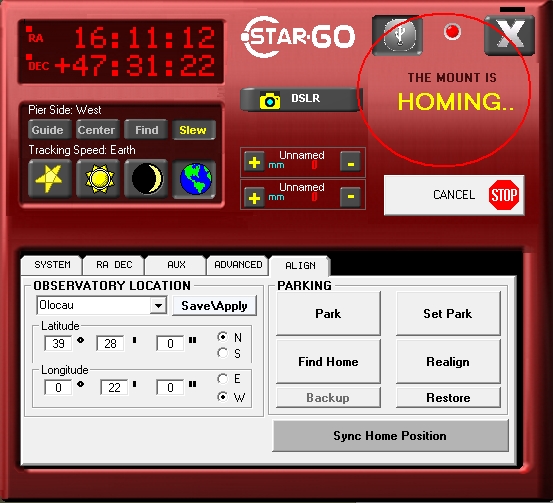
6) Next I wanted to align the scope and so pressed 'Find Home' while watching the mount very closely to ensure it did not hit against the pier. It could go in all directions at this stage and if it's getting close to the pier or tripod, just press the 'stop' button. Then manually move your mount to a more favourable position and press 'home' again. When the mount stops slewing, it is in a position that it thinks is 'home'
Homing screen
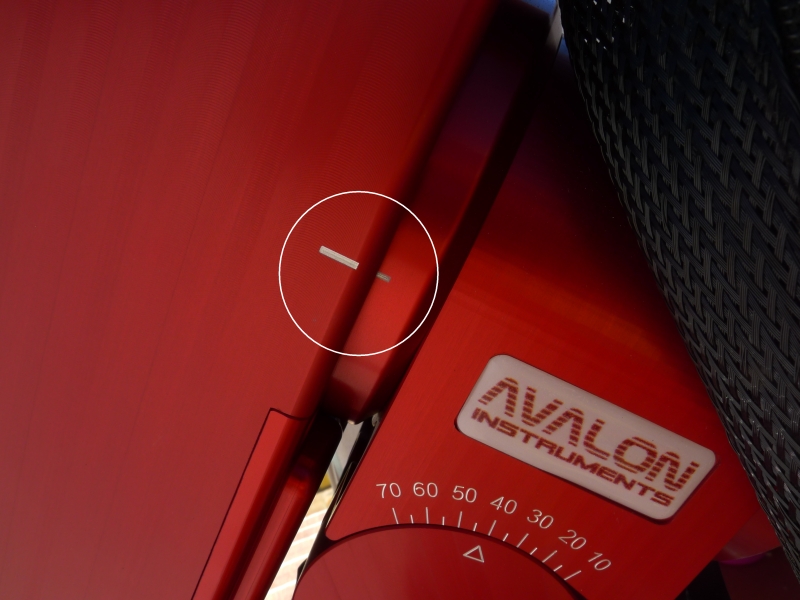
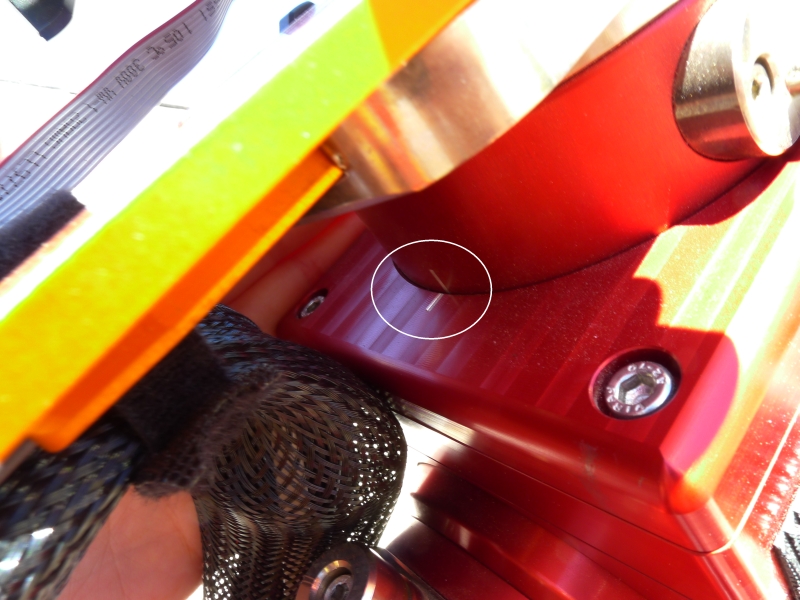
7) You now need to manually undo the clutches and move the mount to the 'home' position. This is the position with the weights pointing to the floor. There are 2 markers on the Avalon that can easily help with ensuring you have it in the correct home position - You can see the first marker on the RA axis (align them) and the DEC axis (they need to be aligned as well) . From here, the mount think's it's in the home position...... and you have put it in the exact right place.
|
|
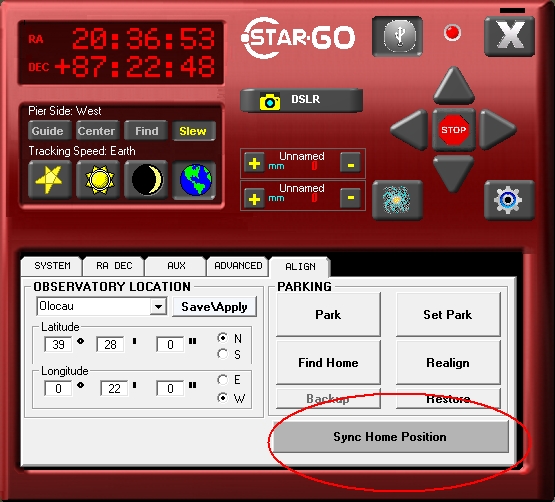
8) Once you have put the mount into the 'Home' position using the above markers, then you are in a position where the mount 'thinks' it is in the home position and indeed it is. There are no encoders on the Avalon, so you have not confused the mount or done anything untoward by manually moving it.
Now you need to sync it.
Now you need to sync it.
|
Once 'homed' then click on 'sync home position'
|
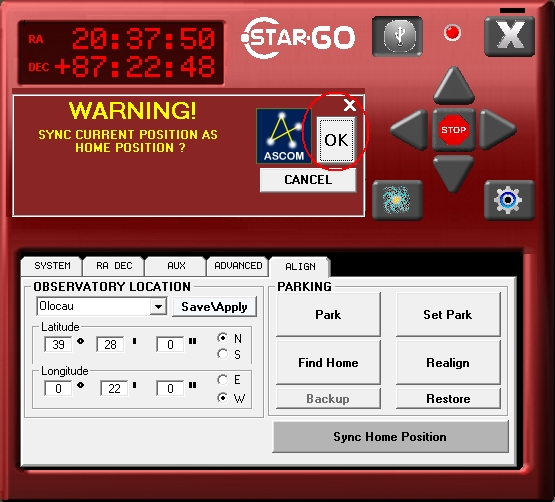
Click 'OK' when asked to sync position
|
