On a number of occasions I have been asked how I capture the data for my images. This page will help to understand a little of the process I go through to get the photo's I produce.
It's difficult to know at what level to pitch this, I will go for the lay person with little or no knowledge of such things. If you feel it's too basic or there's stuff missing then just use the 'contact me' button at the top right of this page. I will be interested to hear your thoughts.
It's difficult to know at what level to pitch this, I will go for the lay person with little or no knowledge of such things. If you feel it's too basic or there's stuff missing then just use the 'contact me' button at the top right of this page. I will be interested to hear your thoughts.
What my pictures are showing
My main interest lies in capturing images of the nebula's that are out there that are almost exclusively invisible to the naked eye (With the exception of a couple of galaxies in very dark sites, such as M31 and M33). Some of the nebulas I image can be seen with binoculars as a minimum.
The distances are considerable, most nebulas being thousands of light years away (I do put this information in my pictures for interest). Imagine then, photographing a nebula that is 5000 light years away - It will have taken 5000 years for that light to reach my camera - It left that nebula on Egyptian times!
As these targets are so faint, as a photographer I need to take long exposures, perhaps 30 minutes, in order to get data to register on my camera. As an aside, if you take a picture under general conditions with a camera, the shutter is open for perhaps 1/100th of a second. In my images it is open for 30 minutes, that is 1800 seconds.
I need to take multiple images to then stack on top of each other to increase the amount of detail in the image, which can be done on different nights and using different filters.
Below is an idea of how I go about capturing this data.
Stage 1
Here's the kit that I currently use to capture my images. I have another scope, an AstroTech 8" Ritchey-Chretein that will be arriving in Spain in November. There are currently no images of this upgrade.
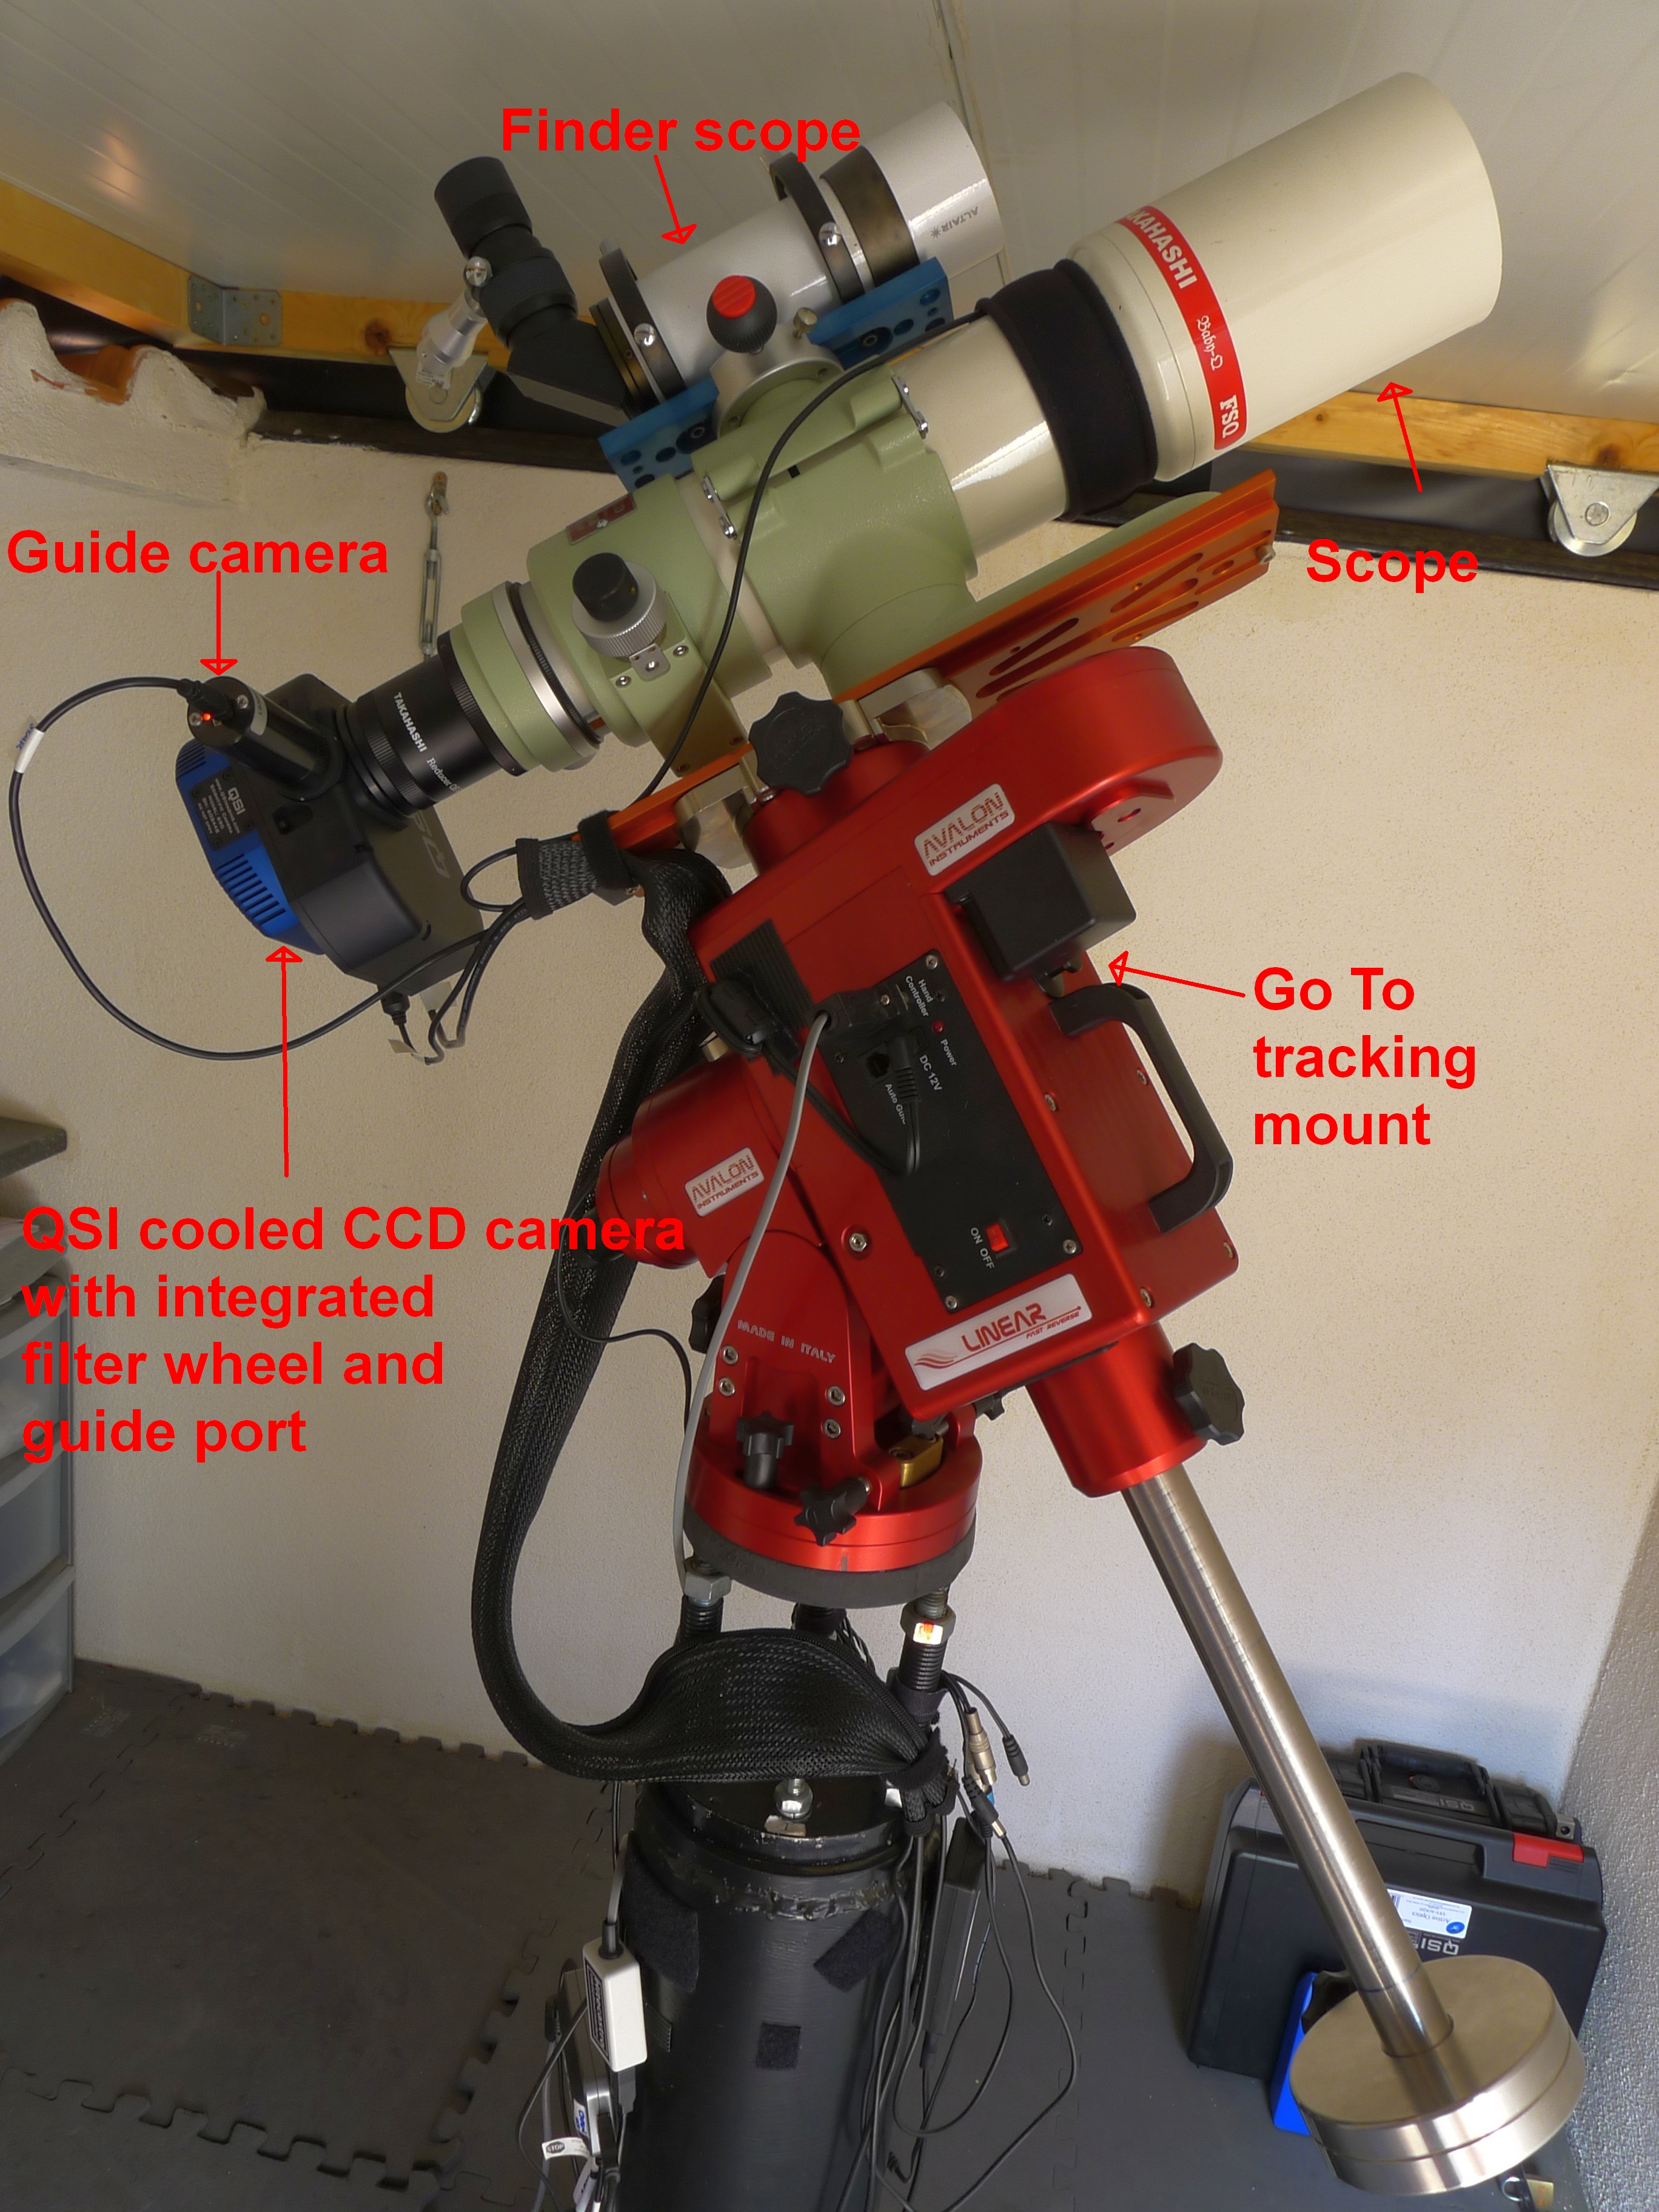
This picture shows my current rig with labels on the relevant parts. Sounds odd I know, but the capture camera ( QSI cooled CCD ) doesn't look anything like a camera!!!
In order to get the different colours of an image I need to use filters as the camera is a mono one. Filters work by only allowing certain wavelengths of light through them. I use a number of filters predominantly in two groups.
- LRGB - These 4 filters are Luminance, Red, Green and Blue. These are used in collecting data for galaxies for example as when blended they will create a 'normal colour' image.
- Ha, OIII and SII - These three filters are called narrowband, Hydrogen Alpha, Oxygen and Sulphur. These filters allow a very narrow range of wavelengths through them. These can be used in situations where the normal filters are not effective, such as in Light Polluted areas and during times when there is moonlight.
Stage 2
Perhaps the most silly thing to start with, but deciding on a target. I use the 12DString website, a brilliant field of view calculator. Here I can put in my scope and camera combination and see the size of targets I am thinking of imaging.
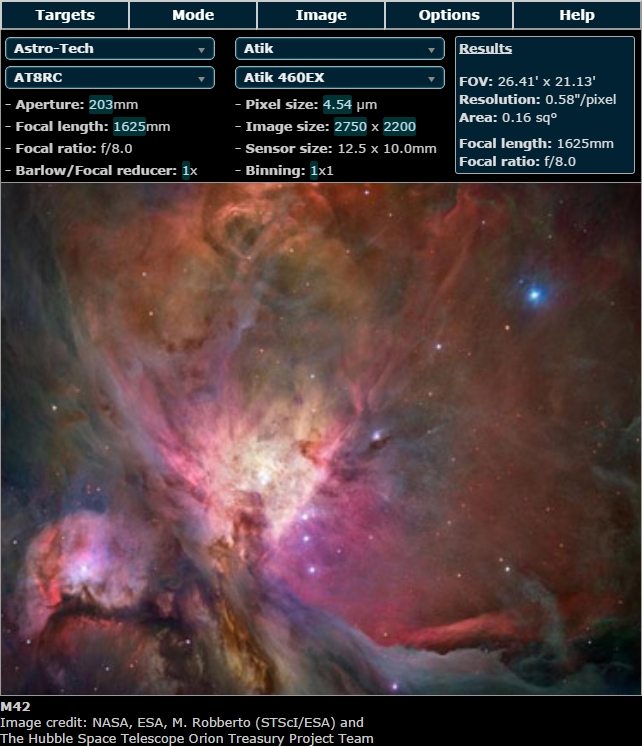
M42 (The Orion nebula) field of view with my 8" RC scope
|
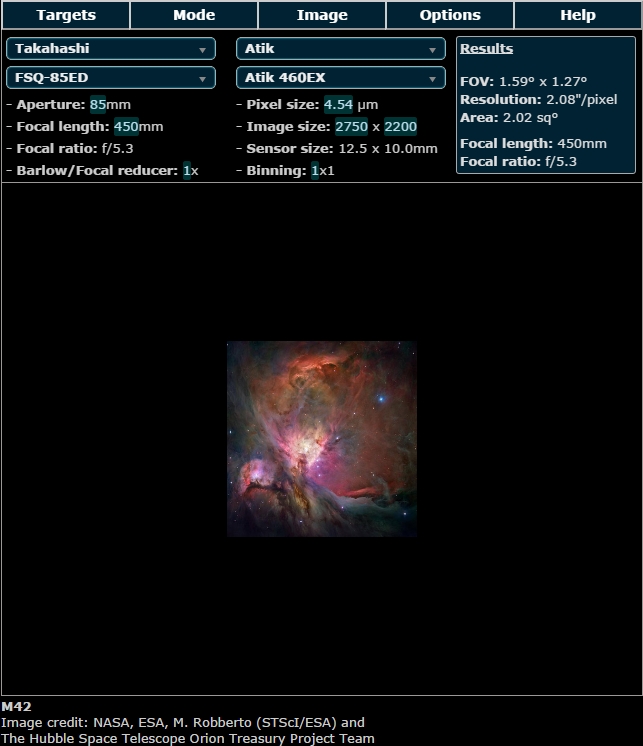
M42 (The Orion nebula) field of view with my Takahashi FSQ85 scope.
|
As you can see from above there's a massive difference in target size on your camera chip depending on what scope you use. By using the field of view calculator in this way I can get an idea of whether the target will fit on the entire camera chip or not.
If the target is too large for my scope and camera combination (such as above) then I will need to decide on how to make a mosaic to fit it all in (Building a mosaic)
If the target is too large for my scope and camera combination (such as above) then I will need to decide on how to make a mosaic to fit it all in (Building a mosaic)
Stage 3
The next part is getting all the equipment working at the start of a night.
Decisions to take
- Switch on the mount
- Switch on the camera
- Connect to the computer
- Connect to the capture software and the Planetarium software. This enables me to guide the camera all night, set the exposure details and point the scope at the desired target.
Decisions to take
- What sort of target I am imaging will depend on the filters I use. Nebula's generally respond well to narrow band filters (Ha, OIII and SII) while galaxies will be better with the normal Luminance, Red, Green and Blue filters to produce natural colours.
- Depending on the target and filter determines how long I will expose each image for. Narrow band images are always 30 minute exposures by default and LRGB much shorter, often at 5 minutes per exposure.
Stage 4
I select the filter that I want to use initially. This is done via the capture programme as the filter wheel is electronic. I will then pick a fairly bright star close to the target for focusing purposes. Focus is critical in imaging and if that's not good then the image is useless. Often I will spend 10 minutes ensuring that I have the focus as good as I can get.
I select the target in the planetarium software and the mount will slew to this. I check the framing of the image on the screen before I move onto setting the data capture
The camera is set to cool to -10 degrees throughout the year. This ensures that noise is kept to a minimum.
I select the target in the planetarium software and the mount will slew to this. I check the framing of the image on the screen before I move onto setting the data capture
The camera is set to cool to -10 degrees throughout the year. This ensures that noise is kept to a minimum.
Stage 5
Firstly I get the guiding working. This will ensure that my target stays in the same place all night, this is essential for imaging. Without this you will not get round stars and the detail in the target will be blurred.
I set my capture software to take a run of images - Depending on the time of darkness, the exposure length and position in the sky of the target this can vary wildly.
Lets assume that I have a 6 hour window of imaging time and I am able to image one target for that time. I will set my capture software to take 12 x 30 minute images for example. It will take 6 hours of data and the guide camera will keep the target in the same place all night.
Stage 6
Sleep!!! I have a rain sensor that will wake me up should there be any rain. I can then run out to the observatory and shut the roof. I don't have it automated and to be honest the weather here is such that I rarely get caught out...... thank goodness!!
Adding to the data on subsequent nights
Rarely is one image finished in one session. I will generally want to go back to it on different nights using different filters. Ideally I will want a number of exposures for each filter as well.
Stage 1
Knowing that I want to add more data to the first night I will go through the same process in Stage 3 above to get everything connected, select the filter that I want to use and focus.
I open one of the exposures from the night before and using the capture software I can plate solve. This involves the software running through the image and detecting star patterns to decide on the coordinates of that target. Once it has done this I can slew to the same place in the sky - Even if this is months, days or hours later.
From there I just set the capture programme and guiding and off I go for another night and some more data!
Once the data has been collected - What next....
Stage 1
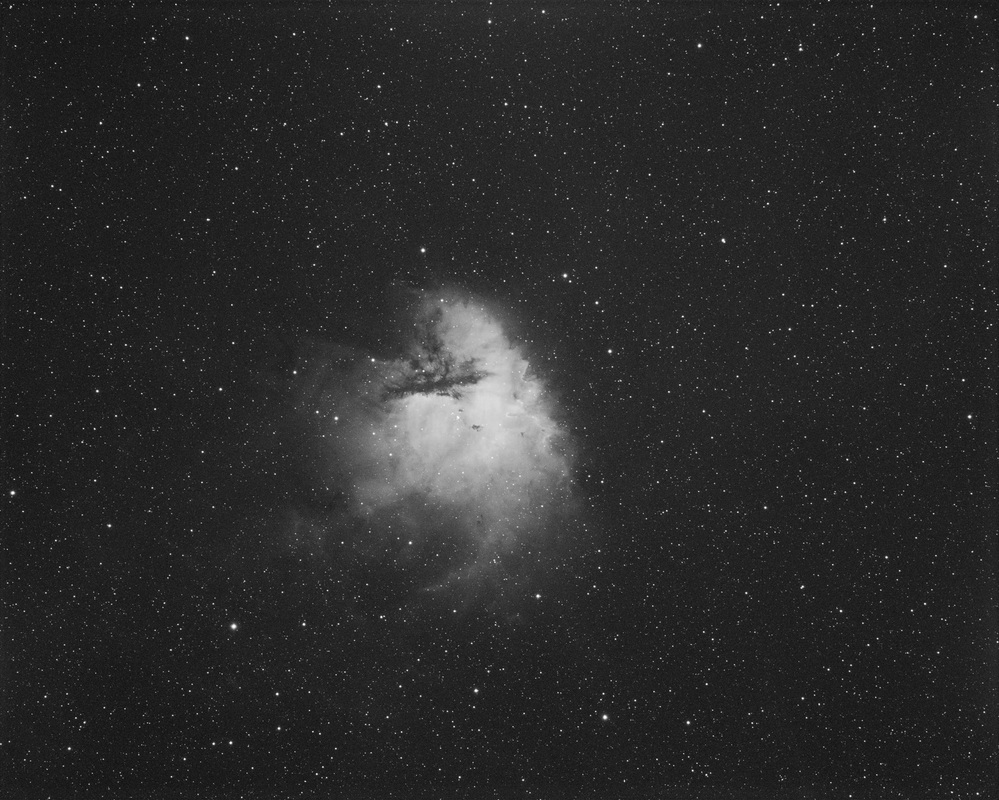
Once I have a number of images of the same target, using the same filter and exposure temperature, I use software to stack these into a single master frame. This increases the detail captured as it is effectively stacked on top of each other and also deals with reducing the amount of natural noise that exists in the darker background areas.
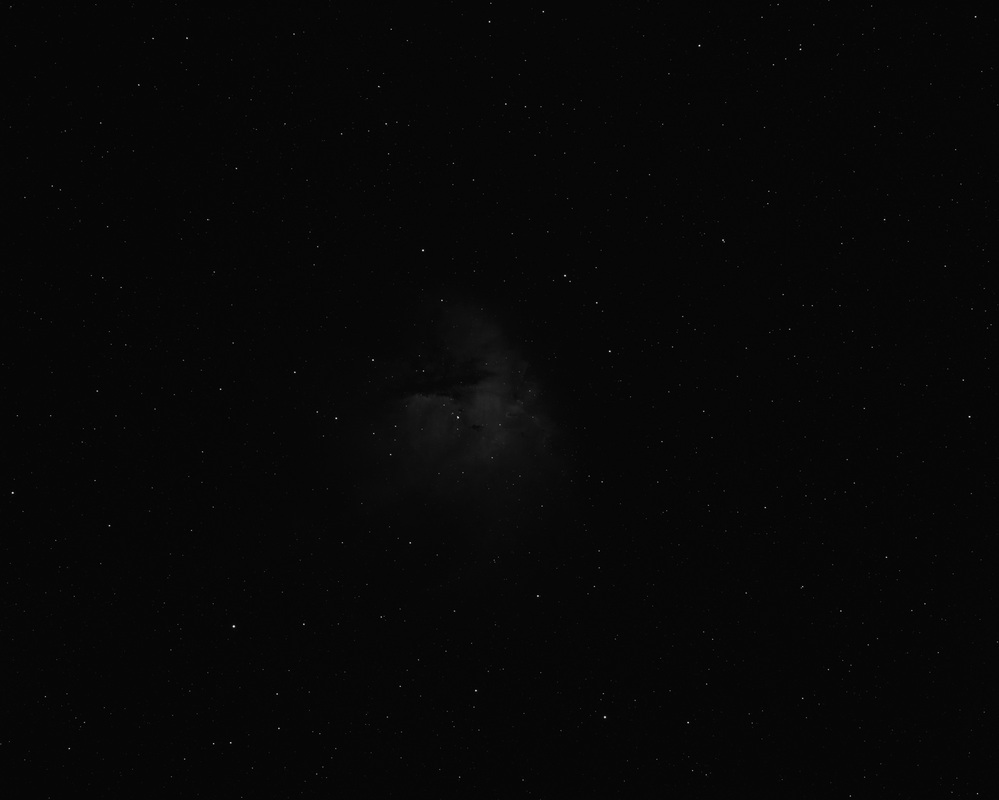
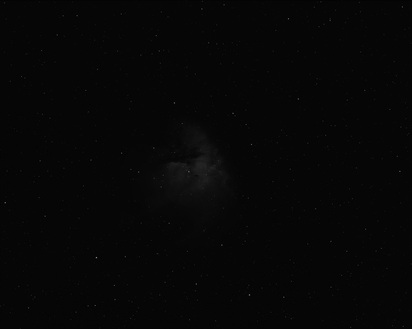
This is a single 30 minute exposure as it comes out of the camera
|

This is a stacked image of 8x 30 minute exposures
|
As you can see, prior to any processing at all, there is little apparent difference between the two images.... at this stage. I will show the difference later in the first processing stage.
Stage 2
Once I have the stacked image above there's a couple of things that need to be done with regards to addressing issues within the imaging train and camera sensor.
- Bias frames - These are taken at the fastest shutter speed possible. The idea is that by adding these frames into the calibration process, they deal with the difference in zero values of each pixel and cancel out this bias. I take these at the same -10 degree temperature that I use for all of my exposures.
- Flat frames - Within the imaging train there is often inherent vignetting and perhaps dust bunnies. These are taken at -10 degrees again and according to my camera manufacturer should be at or below 20k ADU average across the whole image.
|
This is an example of my flats - As you can see there's darker corners which will be evident in the image when the processing starts. When you take a number of these and stack them together using a median algorithm the resulting master image is used to make a correction to the main image so that the vignette is no longer evident.
|
The importance of multiple exposures
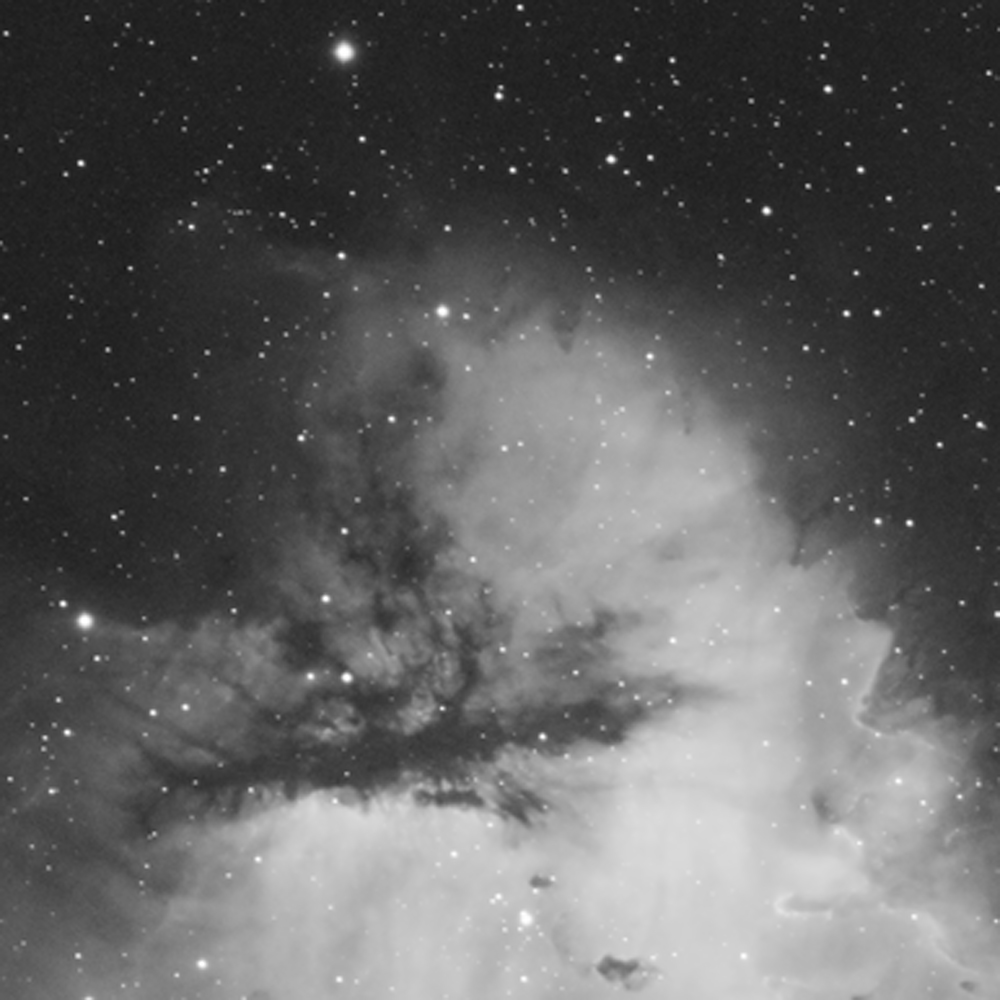
Below are two images that are strecthed to show the detail that I work with on the processing side. All stretching means is processing the data in order to bring out the detail using curves and levels in Photoshop.
Single 30 minute exposure
|
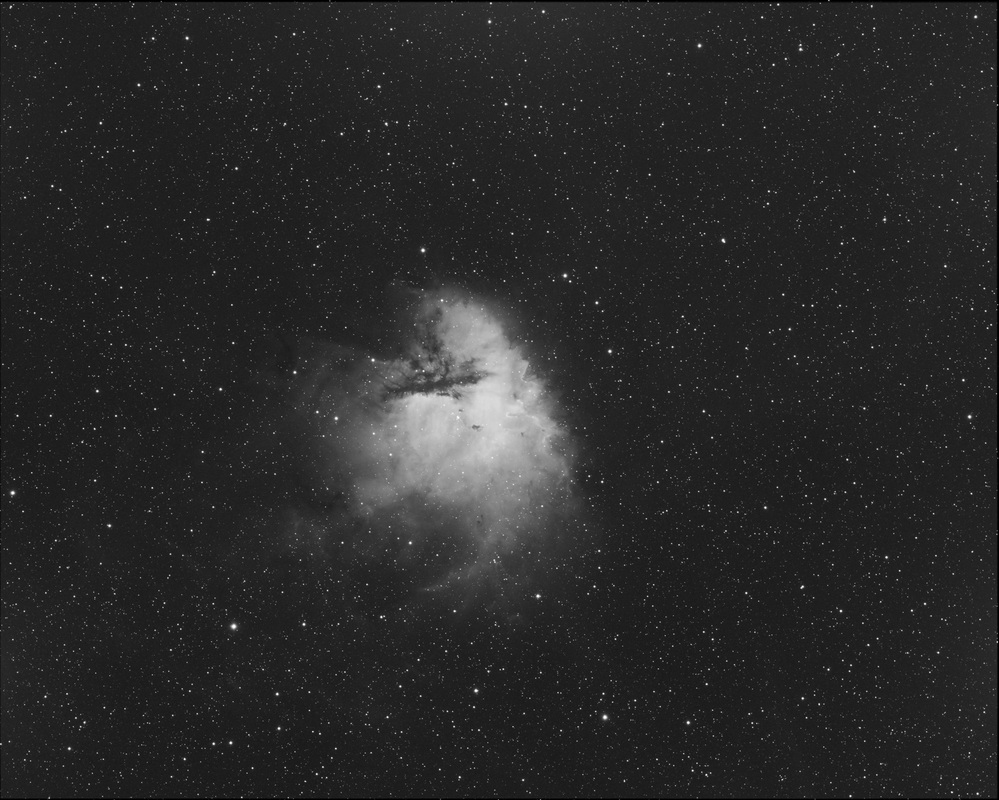
Stacked 8x30 minute exposures
|
When cropped in significantly so that you can see what is going on you can really see why multiple exposures are so crucial to the astro photographer.
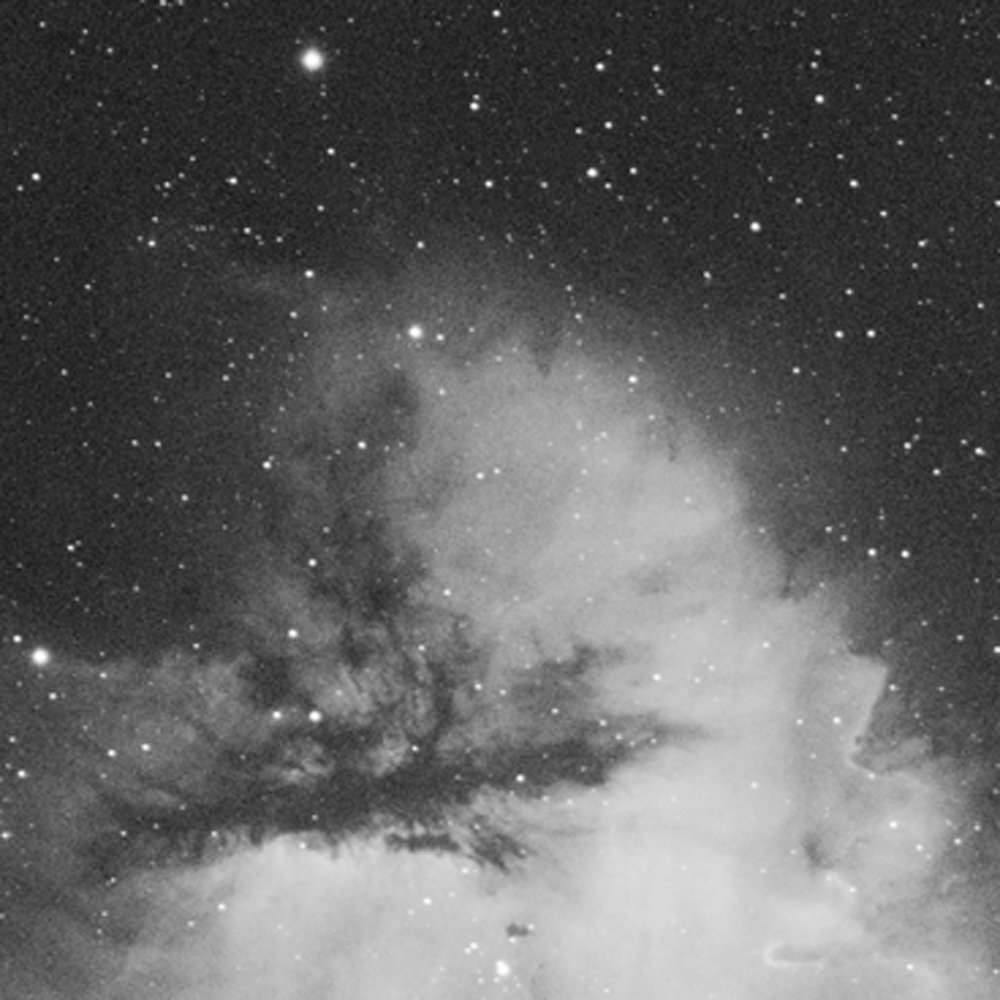
Crop of a single 30 minute exposure
|
Crop of a stacked 8x30 minute exposure
|
Now you can see the difference. The single exposure has much more noise in the darker areas. The stacked version is much smoother - This will pay huge dividends in the processing stage.
The beginning of the processing
This is a little difficult to document as each image requires different processing at different stages in my experience. I find it very 'touchy feely'!
There's always the same start off point........................
........................... I start off with the basic stacked data below. This is a stack of 8x30 minute exposures, calibrated with flats and bias, but totally unstretched at this time. No processing has been carried out on this at all. While you can see the nebula showing through, I need to make it lighter.
I use what imagers call 'standard curves' to start lightening the image and showing the data to its potential. This is a curve that is essentially the same shape, but at different levels of aggression. You can pause the slide show at any point.
You can see the image as it goes through the processing stage as well as the curves and levels window used on that image to achieve the results on screen.
You can see the image as it goes through the processing stage as well as the curves and levels window used on that image to achieve the results on screen.
LInk to Noel Carboni's Astronomy tools - A comprehensive set of Photoshop actions that can be used for a whole number of processes. These tools are good value for money if you are already using Photoshop.
The slideshow demonstrate the initial processing that I undertake on all of my images. From there things will be done based on what I think needs doing. this could include
That is generally my process for data capture and image processing. To process an image can take many hours, it is not uncommon for me to spend 8-10 hours in Photoshop on one image.
I hope this has been useful and if anyone has any other points, then do contact me.
The slideshow demonstrate the initial processing that I undertake on all of my images. From there things will be done based on what I think needs doing. this could include
- Overall sharpening to the areas of detail
- Noise reduction in the background and fainter areas
- Star reduction
- More curves and levels concentrating on specific parts of the image - These curves are different from the standard curves used previously, very dependant on what I think needs to be improved.
That is generally my process for data capture and image processing. To process an image can take many hours, it is not uncommon for me to spend 8-10 hours in Photoshop on one image.
I hope this has been useful and if anyone has any other points, then do contact me.
Links to the kit that I use
Mount - Avalon Linear Fast Reverse
Telescope - Takahashi FSQ85
Camera - QSI683-wsg with an 8 position filter carousel
Filters - Astrodon and Baader
Telescope - Takahashi FSQ85
Camera - QSI683-wsg with an 8 position filter carousel
Filters - Astrodon and Baader
