Sara Wager Astrophotography
  • Recent images
  • Images Gallery
    • Interesting images
  • About me
    • Star People article
  • My Blog
  • Latest Dual rig adventure
  • Astro Pixel Processor tutorials
  • Asteroids and me.....
    • How to find asteroids
    • How to create an asteroid time lapse
  • My observatory
    • The observatory rebuild
    • Equipment
    • Light pollution and astro darkness
  • My guide to image capture
    • Real world comparison - Kodak / Sony chip
    • Dual imaging set up
    • Creating an inset in Photoshop
    • Artistic one channel processing
    • Rubbish in, Rubbish out - you decide
    • Image process tutorials
    • Start / finish - Processing is THE key
    • Building a mosaic >
      • SGPro - Creating a mosaic in software
    • The difference in RGB and Ha light
    • The benefits of extra subs in graphics
    • Narrowband information
    • To bin or not to bin...
  • Equipment reviews
    • PrimaLuceLab Eagle S
    • All things ODK 10
    • PrimaLuceLab PLUS mounting system
    • Avalon linear guide settings
    • Starting out with the Avalon StarGO - Fitting and connecting to a PC
    • Avalon StarGO - Setting a custom park
    • Mallincam All Sky
    • Aviosys IP Power 9258 4 port
    • Avalon M-Tre mount
  • My published images
  • Links
  • Other Astrophotographers
  • Useful books
  • Write in my Guestbook
    • Contact me
Picture

Why would you want a custom park position?

For me this is very important. In order for my roof to close I need the telescope to be in a horizontal position, so taking up minimal height. If I could only use the usual home position then my roof would not shut....... It's as simple as that! It can also be used for flats - Say for example you have your flats panels on your observatory wall, you can set the park position so that you will be able to do flats easily and without fuss.

How to set a custom park position

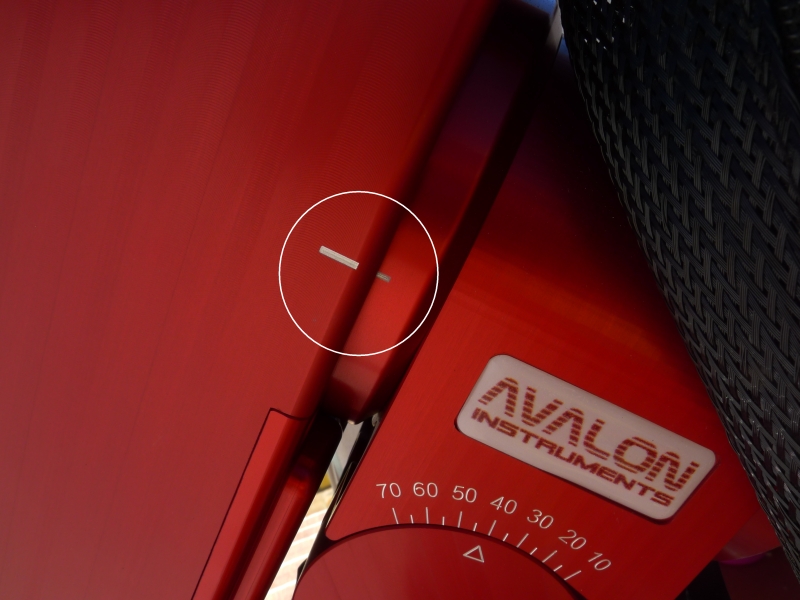
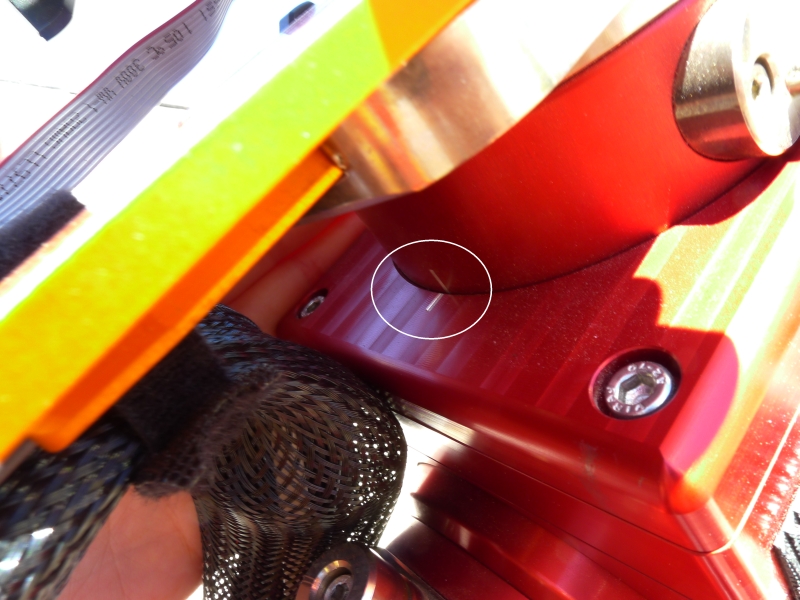
The generic home position of the mount is weights pointing towards the floor and the scope pointing north. There are marks on the Linear Fast reverse to ensure that you can put the mount to an accurate home position should you want.
Picture
Picture
I am going to show you how to set a park position that is different to the home position so that you can have your equipment positioned how you need it. It is worth mentioning at this stage that the mount will always park to this position as well at the end of an imaging sequence, whereas other software I have used this has not been possible. For me this is a BIG advantage.

Connect the mount

In order to do anything, you need to firstly connect the mount. Firstly access the StarGO icon on the desktop and secondly press the connect button.
Picture

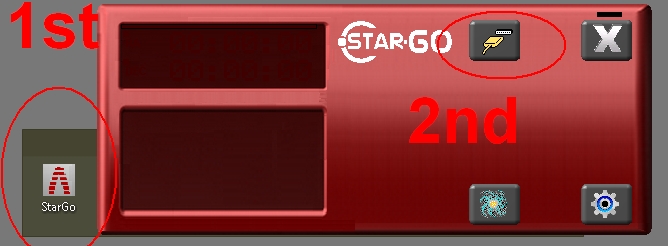
Enable slew and access the settings menu's

From the next StarGO screen you need to ensure that the 'slew' button is highlighted as this enables you to slew the mount freely.
Picture
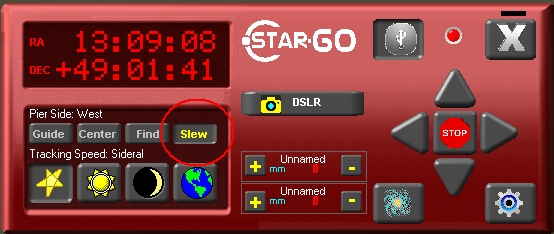
From this point you need to access the settings menu, which is done by pressing the 'cog' in the bottom right of the screen. This then opens the different menus and for this exercise we need to select 'align' - Here you can see the relevant 'set park' button.
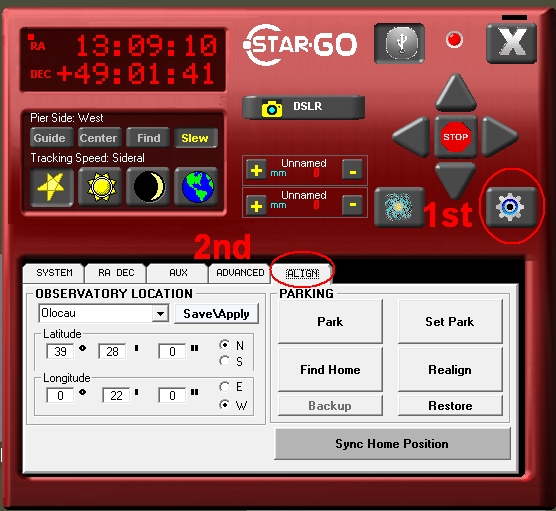
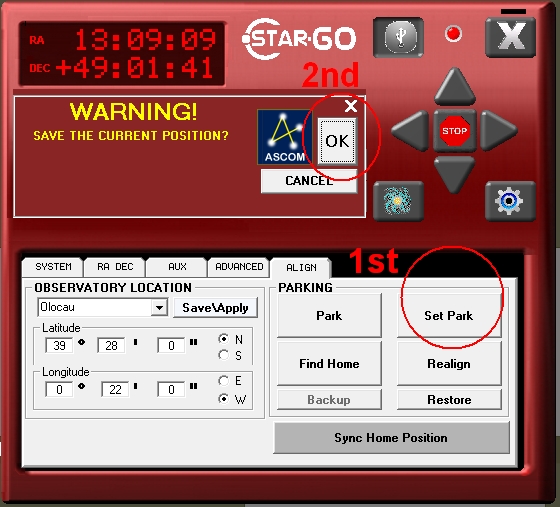
Picture

Set park

You slew your mount using the arrow keys to a position that you want to set as your own custom park. It is likely to be wherever you need the telescope to be positioned so that you can close the roof or gain access to an area. It may be that if you have a couple of different scopes you need a different custom park for each. While you can not create a number of different custom parks, they are easy to set as required.
Picture
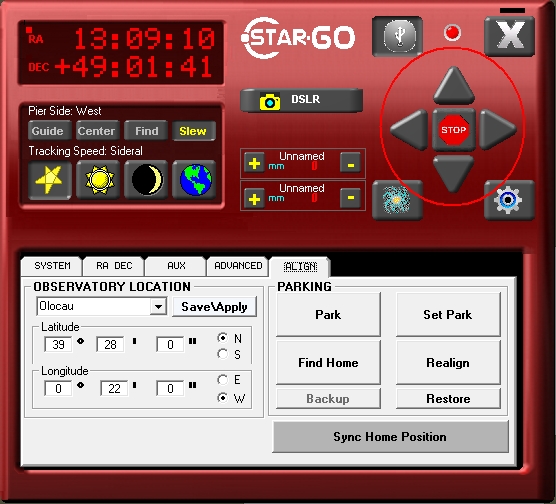
Now that you have your scope in the position that you want as your custom park, you press 'Set Park' and click OK when the ASCOM WARNING box is displayed. Now your mount is set to park in this position whenever you press the park button, either through StarGO or another capture programme (I use SGP Pro and I can park it to this position from that software)
Picture
Powered by Create your own unique website with customizable templates.
  • Recent images
  • Images Gallery
    • Interesting images
  • About me
    • Star People article
  • My Blog
  • Latest Dual rig adventure
  • Astro Pixel Processor tutorials
  • Asteroids and me.....
    • How to find asteroids
    • How to create an asteroid time lapse
  • My observatory
    • The observatory rebuild
    • Equipment
    • Light pollution and astro darkness
  • My guide to image capture
    • Real world comparison - Kodak / Sony chip
    • Dual imaging set up
    • Creating an inset in Photoshop
    • Artistic one channel processing
    • Rubbish in, Rubbish out - you decide
    • Image process tutorials
    • Start / finish - Processing is THE key
    • Building a mosaic >
      • SGPro - Creating a mosaic in software
    • The difference in RGB and Ha light
    • The benefits of extra subs in graphics
    • Narrowband information
    • To bin or not to bin...
  • Equipment reviews
    • PrimaLuceLab Eagle S
    • All things ODK 10
    • PrimaLuceLab PLUS mounting system
    • Avalon linear guide settings
    • Starting out with the Avalon StarGO - Fitting and connecting to a PC
    • Avalon StarGO - Setting a custom park
    • Mallincam All Sky
    • Aviosys IP Power 9258 4 port
    • Avalon M-Tre mount
  • My published images
  • Links
  • Other Astrophotographers
  • Useful books
  • Write in my Guestbook
    • Contact me