Sara Wager Astrophotography
  • Recent images
  • Images Gallery
    • Interesting images
  • About me
    • Star People article
  • My Blog
  • Latest Dual rig adventure
  • Astro Pixel Processor tutorials
  • Asteroids and me.....
    • How to find asteroids
    • How to create an asteroid time lapse
  • My observatory
    • The observatory rebuild
    • Equipment
    • Light pollution and astro darkness
  • My guide to image capture
    • Real world comparison - Kodak / Sony chip
    • Dual imaging set up
    • Creating an inset in Photoshop
    • Artistic one channel processing
    • Rubbish in, Rubbish out - you decide
    • Image process tutorials
    • Start / finish - Processing is THE key
    • Building a mosaic >
      • SGPro - Creating a mosaic in software
    • The difference in RGB and Ha light
    • The benefits of extra subs in graphics
    • Narrowband information
    • To bin or not to bin...
  • Equipment reviews
    • PrimaLuceLab Eagle S
    • All things ODK 10
    • PrimaLuceLab PLUS mounting system
    • Avalon linear guide settings
    • Starting out with the Avalon StarGO - Fitting and connecting to a PC
    • Avalon StarGO - Setting a custom park
    • Mallincam All Sky
    • Aviosys IP Power 9258 4 port
    • Avalon M-Tre mount
  • My published images
  • Links
  • Other Astrophotographers
  • Useful books
  • Write in my Guestbook
    • Contact me

How to create an asteroid time-lapse using Maxim

Creating calibrated subs 


I use Maxim for this part - Calibrating my exposures, aligning them and creating a time lapse. Then to actually create the presentation that I upload to the website I use the free Windows Live Movie maker.

​My screen grabs will be from Maxim. I have found this very easy to use  to make the initial AVI file.​
  1. Open up Maxim
  2. Click on file and open all the files that you want to use for the time lapse
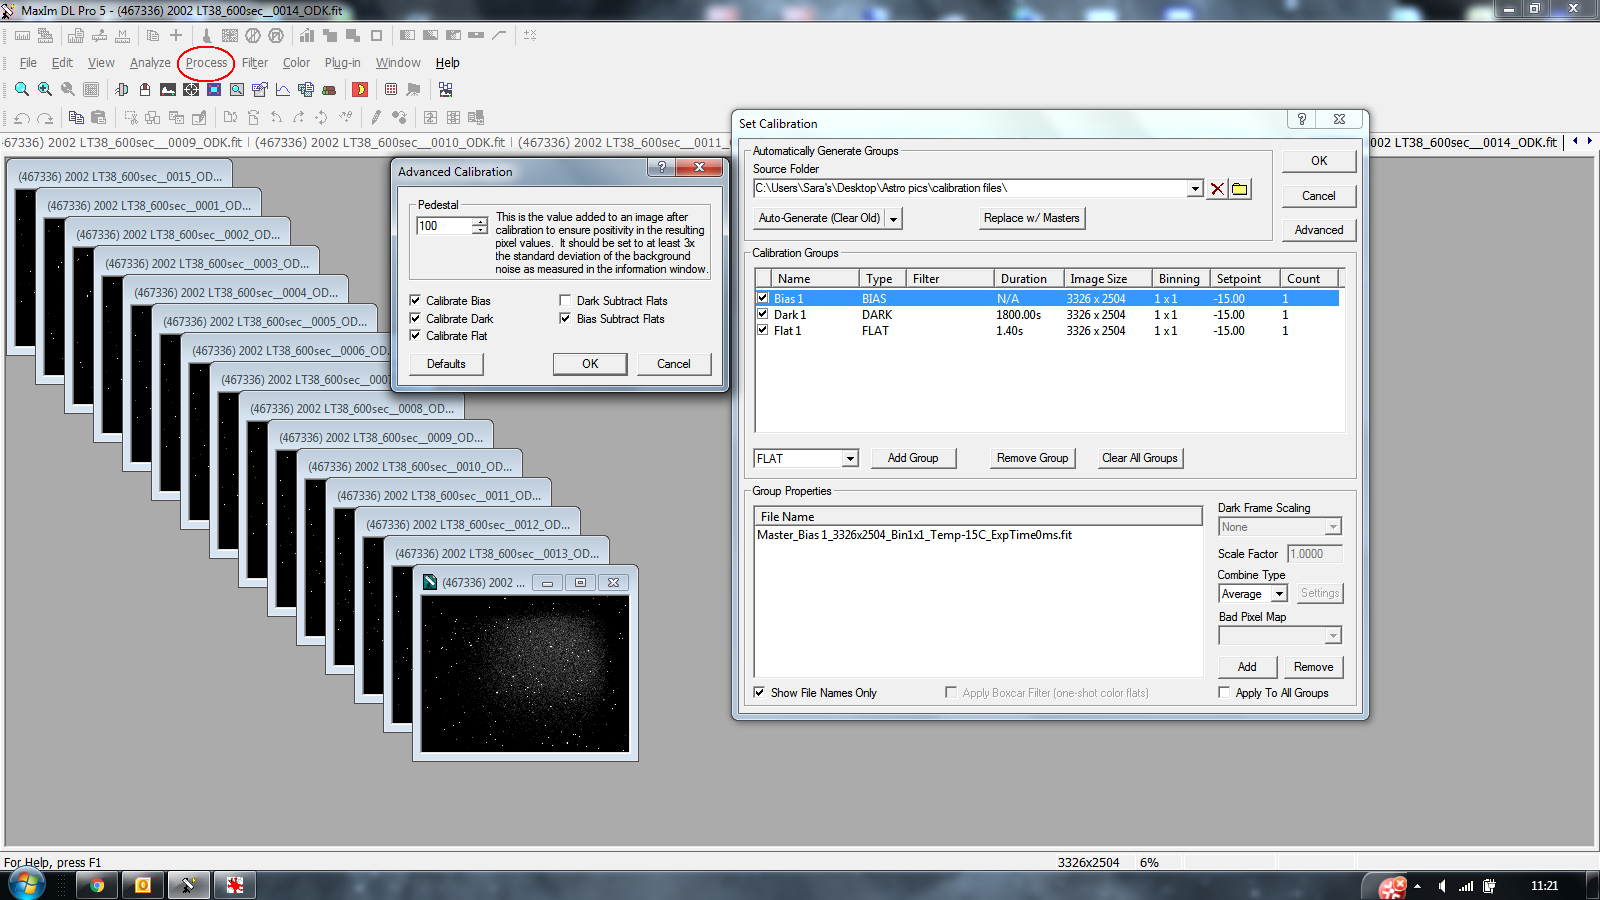
  3. Click on the circled 'process' icon and then 'set calibration'
  4. The calibration window will come up. Here you are adding your bias, flat and dark files to calibrate your individual exposures prior to making the animation. 
  5. Select add group in the top box and ensure that you use the drop down menu on the left if you are using dark, bias or flats.
  6. In the bottom window, using the add button you add the appropriate flat, bias or dark frames. In this instance I have clicked 'replace w/ masters' and so I have the masters of all of my calibration files in the bottom window.
  7. Click on the 'advanced' button and the smaller window to the left opens up. Here you stipulate how you want the calibration to work. I have ticked all relevant methods. If you aren't using darks for example then you won't have the 'dark subtract' ticked
  8. When you have set this, click OK and then click OK in the main calibration box.
Picture


​Creating the animation

  1. Click view ---> animate
Picture
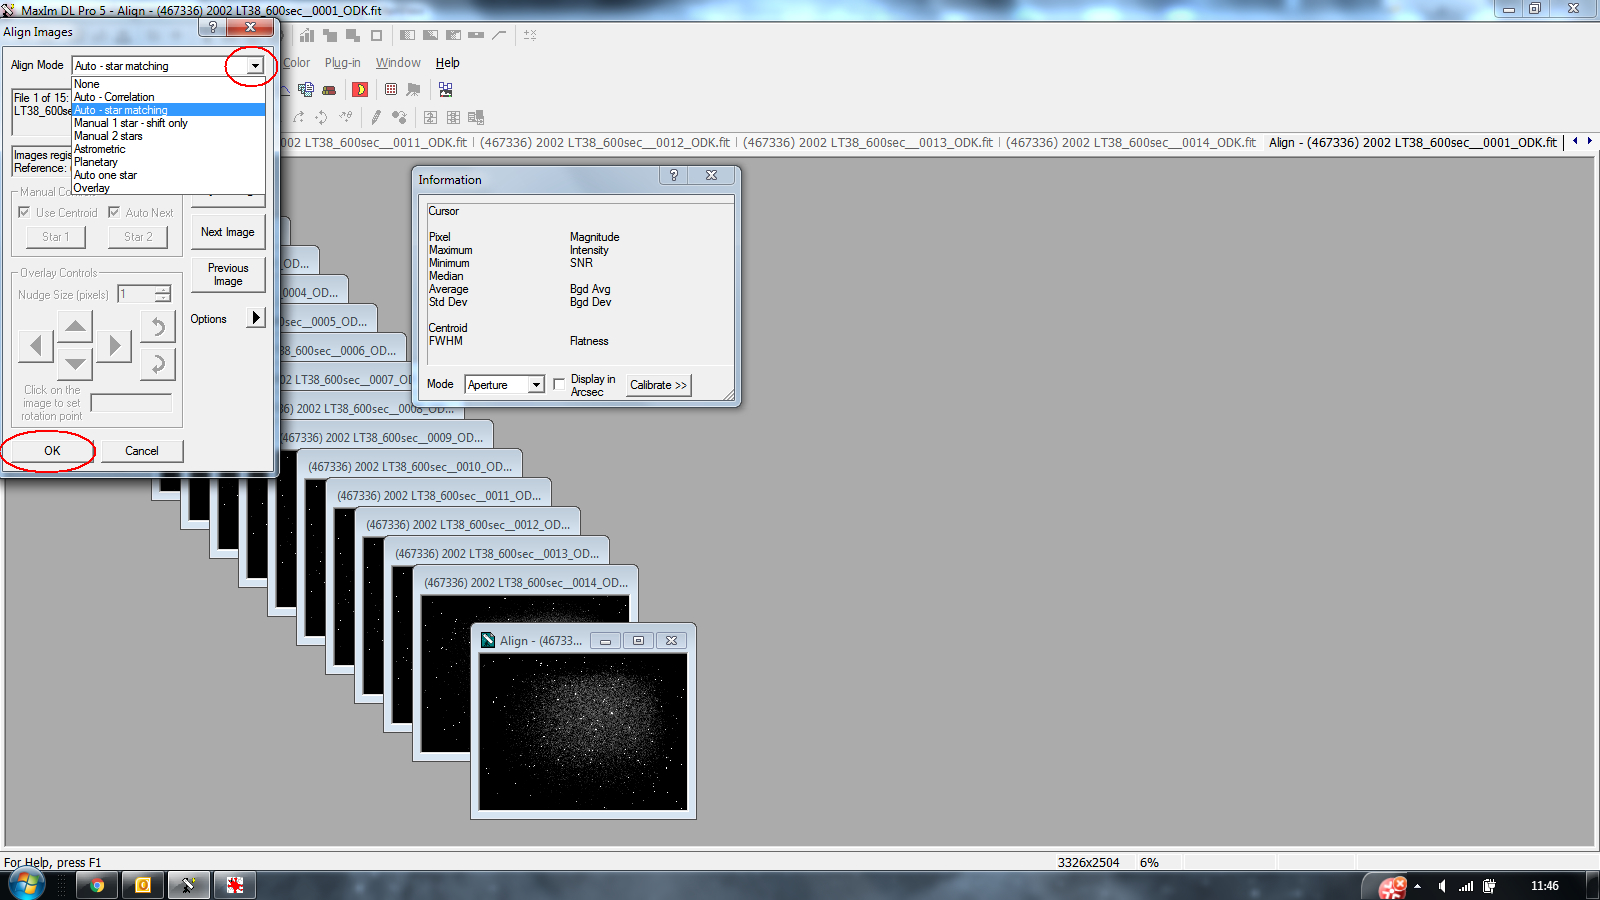
     4.   Click the type of align mode you want - I use                  'Auto star matching' and then press OK
Picture
     7.    Now you can select whether you want an auto               stretch of the subs and also you set the frame               rate that you want in your animation - I use 2                 fps
     8.    Click OK and then you can save your AVI                     animation
Picture
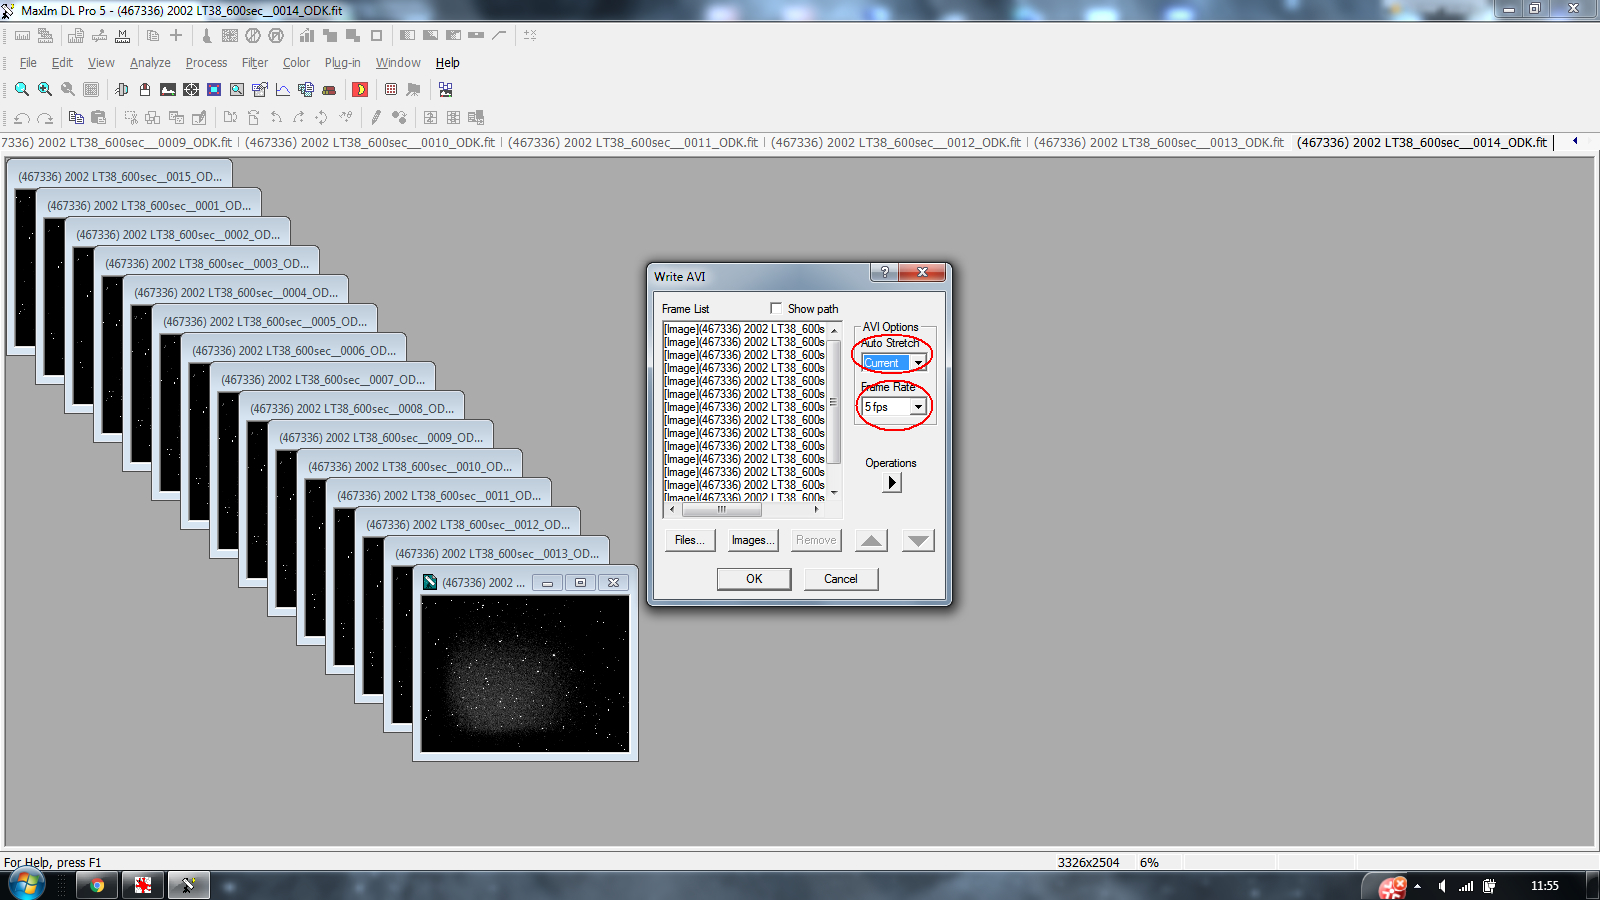
    2.  Click 'add all' and this will put all of your opened            images into the selected images

    3.  Click 'align'   
Picture
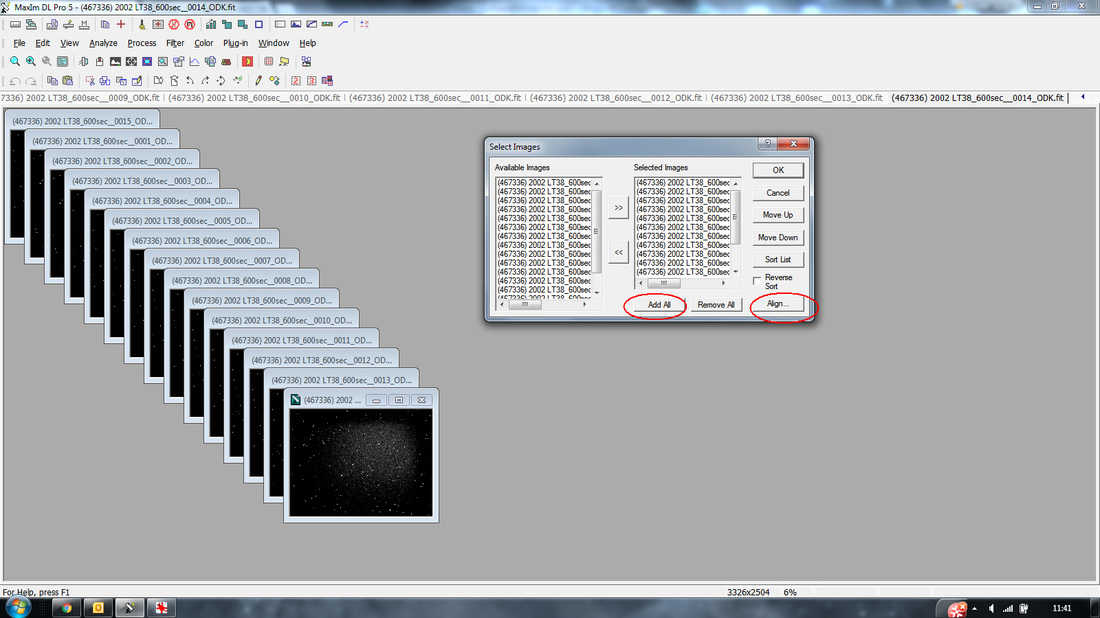
     5.    When the alignment has finished you need to                 tick OK as the images box comes back up and             you will get an animation box in the top left.
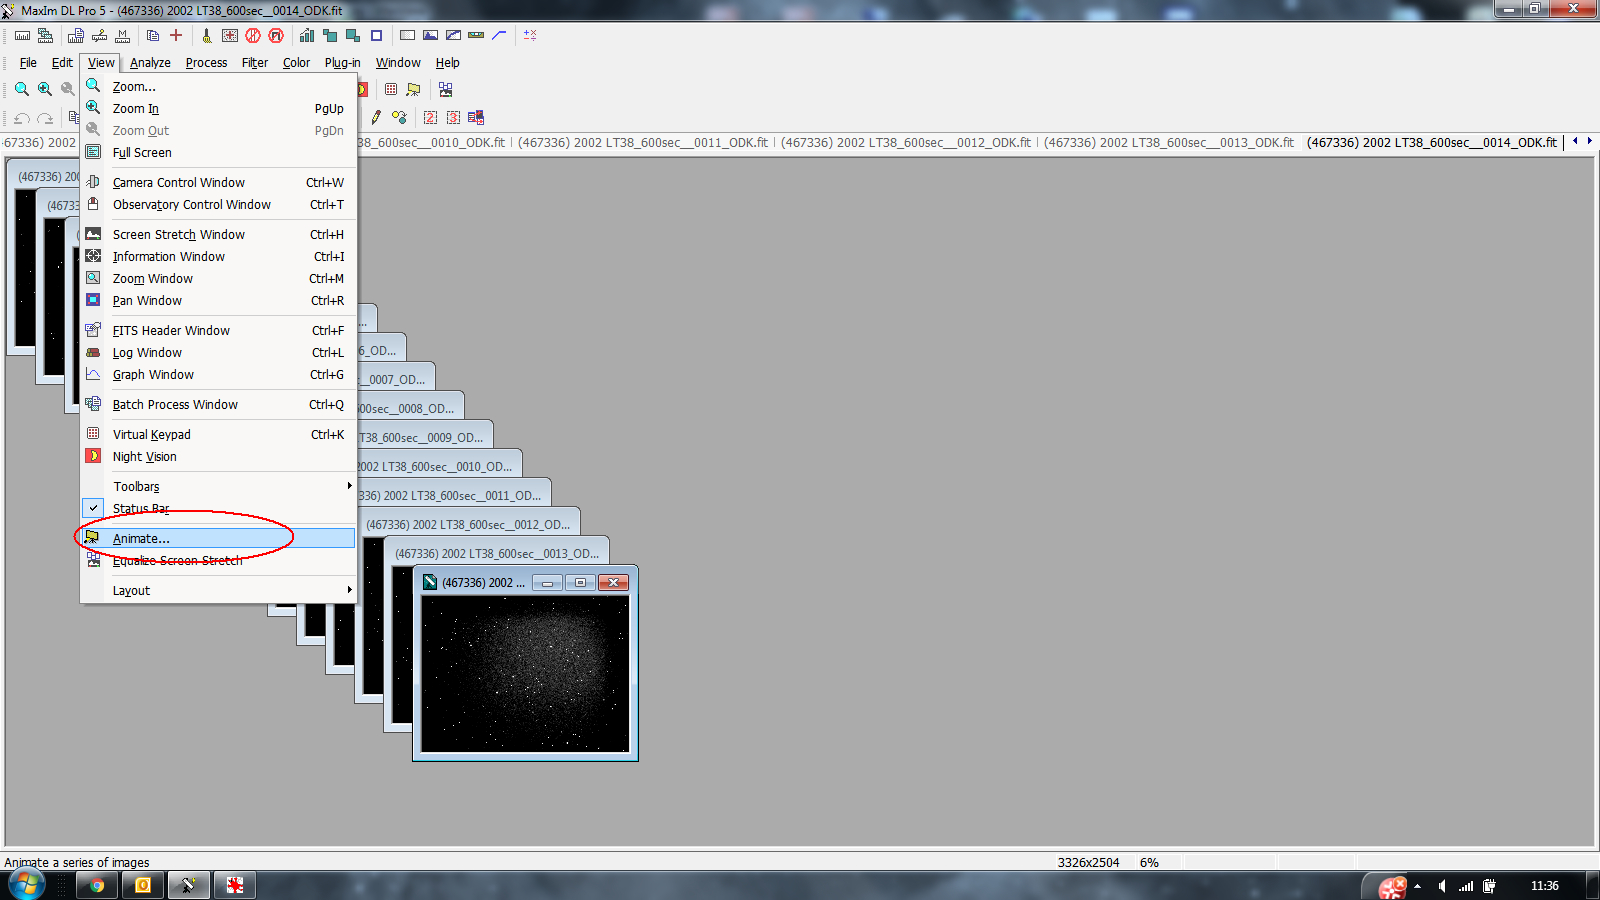
     6.    Click on the circled animation box
Picture
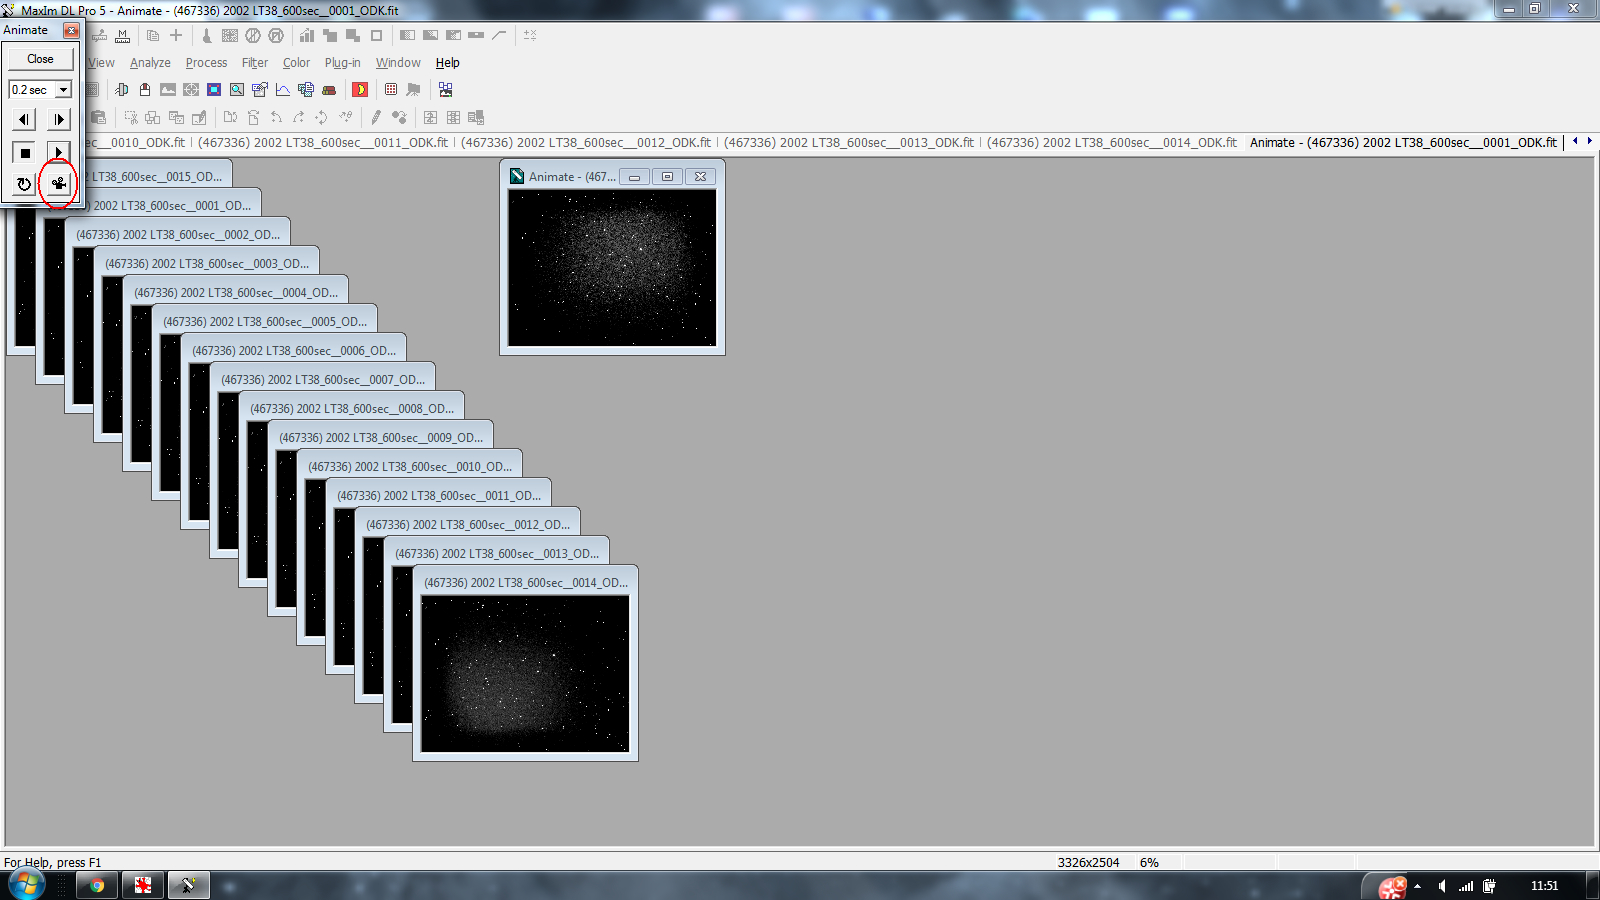
Now you will have a .AVI file with your time-lapse. From there you can convert the file to an MP4 for more regular viewing or use another programme to make a presentation of your time lapse.
Powered by Create your own unique website with customizable templates.
  • Recent images
  • Images Gallery
    • Interesting images
  • About me
    • Star People article
  • My Blog
  • Latest Dual rig adventure
  • Astro Pixel Processor tutorials
  • Asteroids and me.....
    • How to find asteroids
    • How to create an asteroid time lapse
  • My observatory
    • The observatory rebuild
    • Equipment
    • Light pollution and astro darkness
  • My guide to image capture
    • Real world comparison - Kodak / Sony chip
    • Dual imaging set up
    • Creating an inset in Photoshop
    • Artistic one channel processing
    • Rubbish in, Rubbish out - you decide
    • Image process tutorials
    • Start / finish - Processing is THE key
    • Building a mosaic >
      • SGPro - Creating a mosaic in software
    • The difference in RGB and Ha light
    • The benefits of extra subs in graphics
    • Narrowband information
    • To bin or not to bin...
  • Equipment reviews
    • PrimaLuceLab Eagle S
    • All things ODK 10
    • PrimaLuceLab PLUS mounting system
    • Avalon linear guide settings
    • Starting out with the Avalon StarGO - Fitting and connecting to a PC
    • Avalon StarGO - Setting a custom park
    • Mallincam All Sky
    • Aviosys IP Power 9258 4 port
    • Avalon M-Tre mount
  • My published images
  • Links
  • Other Astrophotographers
  • Useful books
  • Write in my Guestbook
    • Contact me