My first setup
My first AP setup was recommended by an astro retailer when I told them that I wanted to get into photography. It consisted of:
I soon realised the need to go for a guided setup and so purchased a second hand modded finder guider and a QHY5. This and modding my 1000D helped to improve my imaging. Along with an Astronomik CLS clip in filter I was able to take exposures of many minutes. I found though that my focuser on the Skywatcher just wasn't holding and so changed it for a Moonlite.
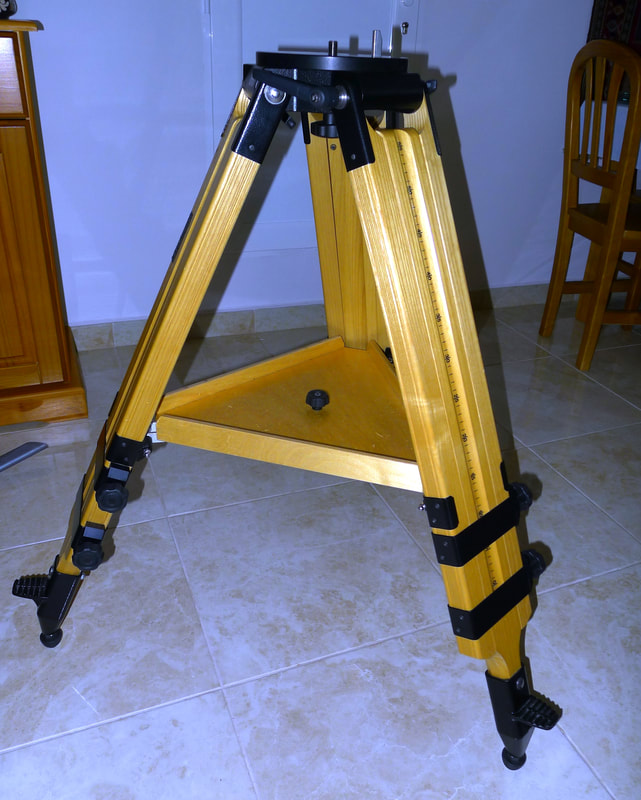
- HEQ5 Pro Synscan
- Skywatcher Black Diamond 120ED refractor
- Skywatcher 0.85x reducer
- Canon 1000D
I soon realised the need to go for a guided setup and so purchased a second hand modded finder guider and a QHY5. This and modding my 1000D helped to improve my imaging. Along with an Astronomik CLS clip in filter I was able to take exposures of many minutes. I found though that my focuser on the Skywatcher just wasn't holding and so changed it for a Moonlite.

Change 1:
I soon realised that the temperatures in Spain made DSLR imaging unfavourable, the chip sensor was running in the 30's all the time and I couldn't combat noise:
It was also around this time that I got the Altair Astro 10x60 finder guider - I found that as I needed a finder for alignment the modded system I'd had before didn't have enough adjustment to adequately align with the scope. I continued to use this with the QHY5.
- Atik 314L+ mono
- Trutek Supaslim filter wheel
- Baader LRGB filters and Narrowband filters
It was also around this time that I got the Altair Astro 10x60 finder guider - I found that as I needed a finder for alignment the modded system I'd had before didn't have enough adjustment to adequately align with the scope. I continued to use this with the QHY5.
Change 1.5:
I moved to using the brilliant EQMOD software combined with Cartes du Ciel - Both free software. As I was using a laptop to run the CCD by this stage, it made sense to move to astronomical software that I felt enhanced my imaging

Change 2:
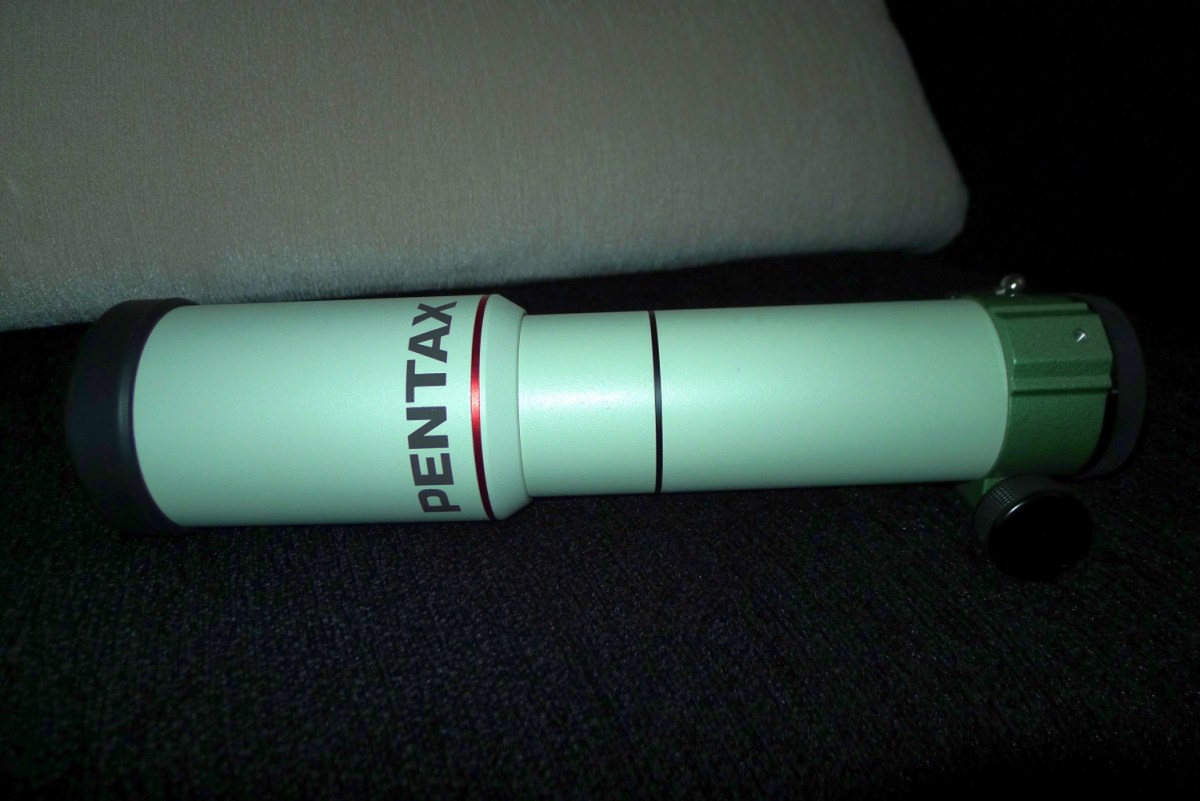
I found a second hand Pentax 75SDHF and purchased it. This was a dream. It has a built in flattener and so there was no fiddling with spacing. The standard rack and pinion focuser was a joy to use and held my imaging kit easily.
I searched for a reducer for the Pentax and settled on an Optec NexGen 0.7x. This was specifically designed for scopes with an already flat field.
I searched for a reducer for the Pentax and settled on an Optec NexGen 0.7x. This was specifically designed for scopes with an already flat field.

Change 3:
I was feeling the limitations of the small Sony 285 chip in the 314L+ as I had discovered by this time that my real interest lay in photographing nebula's. Tending to be rather on the large size, I needed a larger chip camera. I had been impressed with the Atik 314L+, especially it's cooling in the warm Spanish climate, so I stuck with Atik and got a 460EXM

Change 4:
I had the opportunity to purchase a second hand Takahashi FSQ85 with the 0.73x reducer. This was a dream scope and so I changed my scope again. I remained using the HEQ5 and the finder guider in order to keep the weight low. The 460EXM continued to be my camera of choice

Change 4.5:
The Baader filters were performing well, but by this time I was regularly using 30 minute exposures on my narrow band imaging. I decided to get a set of 3nm Astrodon Ha, OIII and SII filters. The diffence has been marked in overall contrast and smoothness of the data. They are far easier to work with than the Baaders. By far the best narrowband filters on the market.

Change 5:
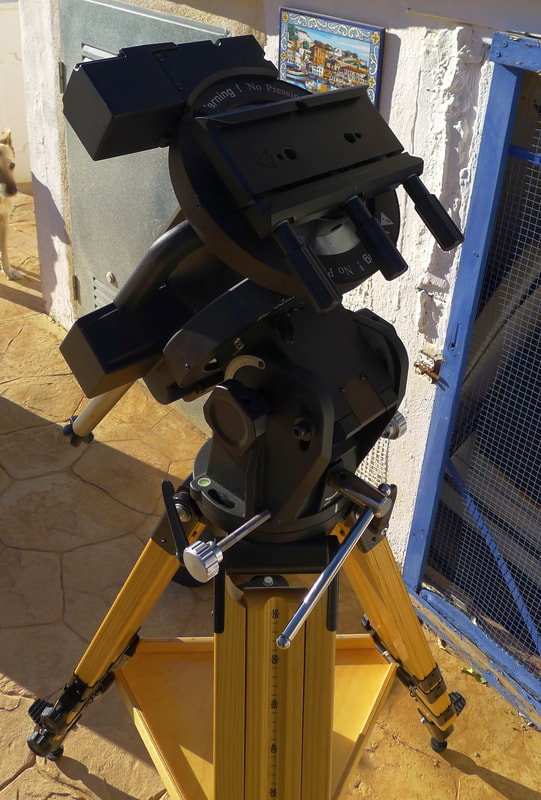
This has been the latest change - The Avalon Linear Fast reverse mount. I decided on this as it was minimum fuss to move from my HEQ5. The drivers were the same and I was still able to use EQMOD, a system that I am now comfortable with.
I did look long and hard at mounts such as the 10Micron and AP, but ease of changeover won the day.
I did look long and hard at mounts such as the 10Micron and AP, but ease of changeover won the day.
Change 5.5:
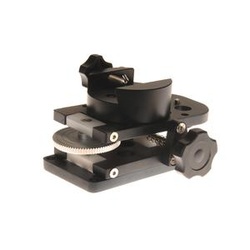
This is a catalogue picture of the latest Christmas change to my setup. This is a guider mount and is used to get accurate alignment between the telescope and the finder scope or guider scope.
This is the mount on the telescope. I have had a few too many power cuts this year and the scope has lost it's alignment. This system, using the finder scope means I can pinpoint an alignment star accurately in the finder as it has a shorter focal length than my main scope, when it's centred in the finder I know that it's now centred on my main scope.

Change 6:
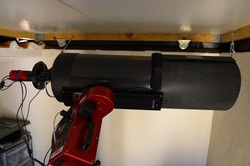
I have decided that I wanted a scope that would give me a longer focal length and would allow me to photograph the smaller galaxies. This is a Celestron C9.25 SCT scope - a radically different design to my other scope, which is a refractor.
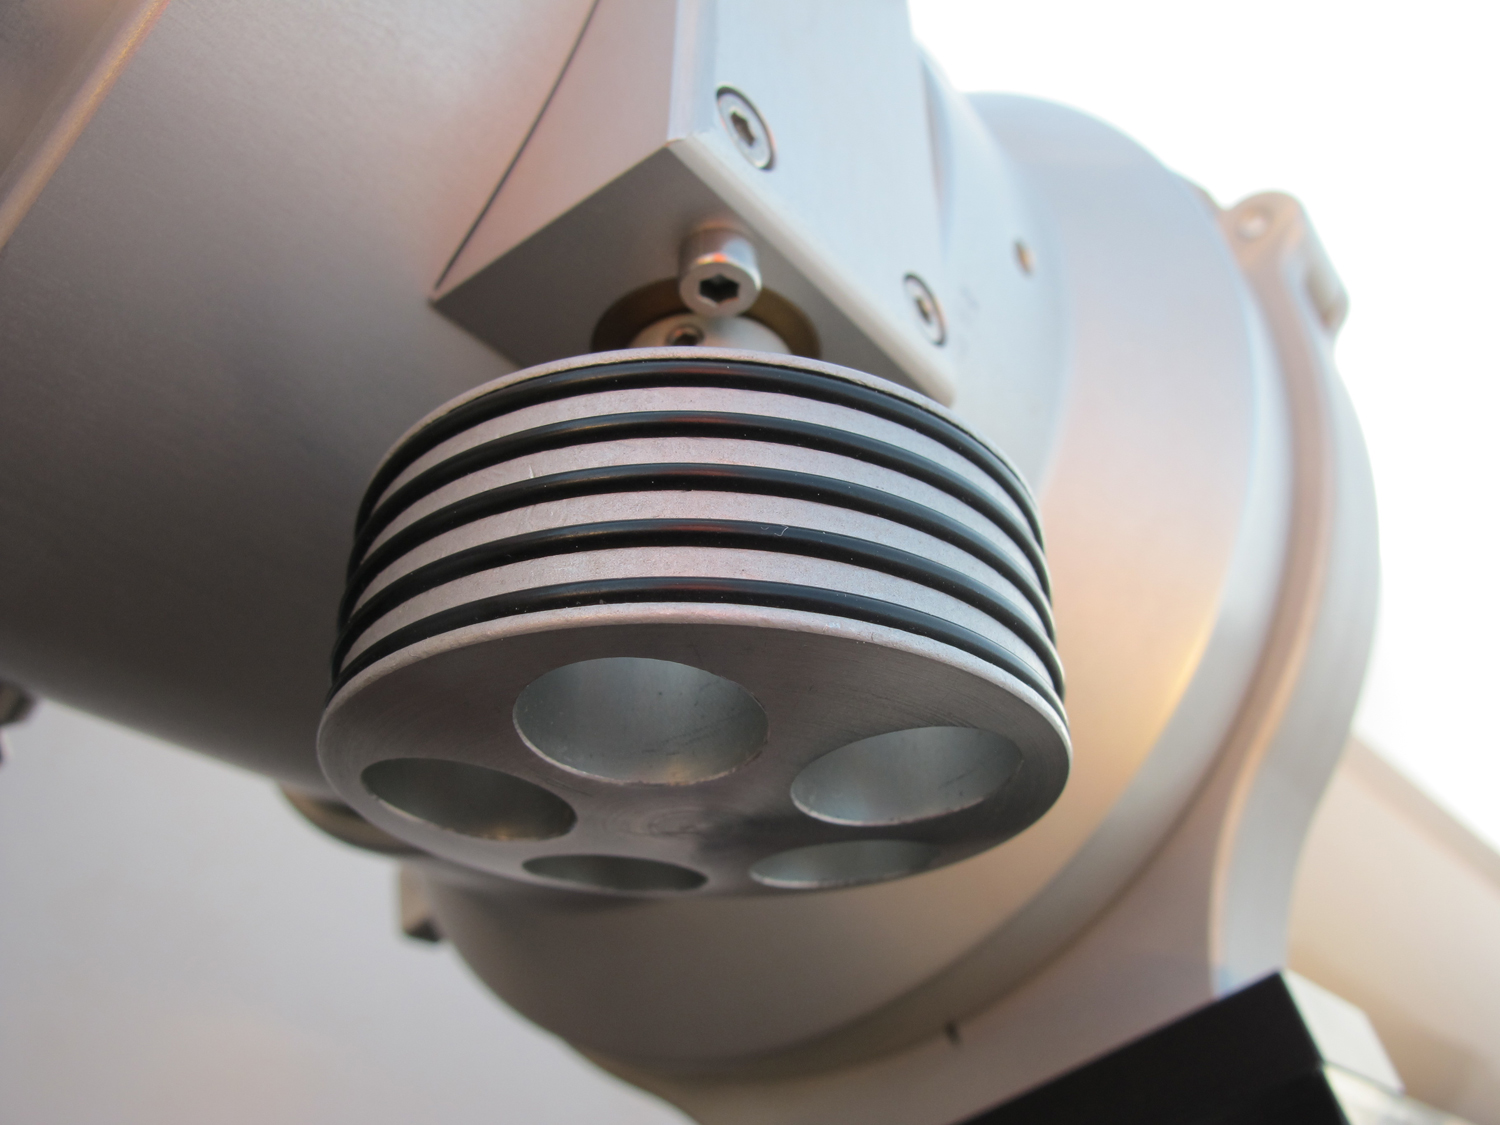
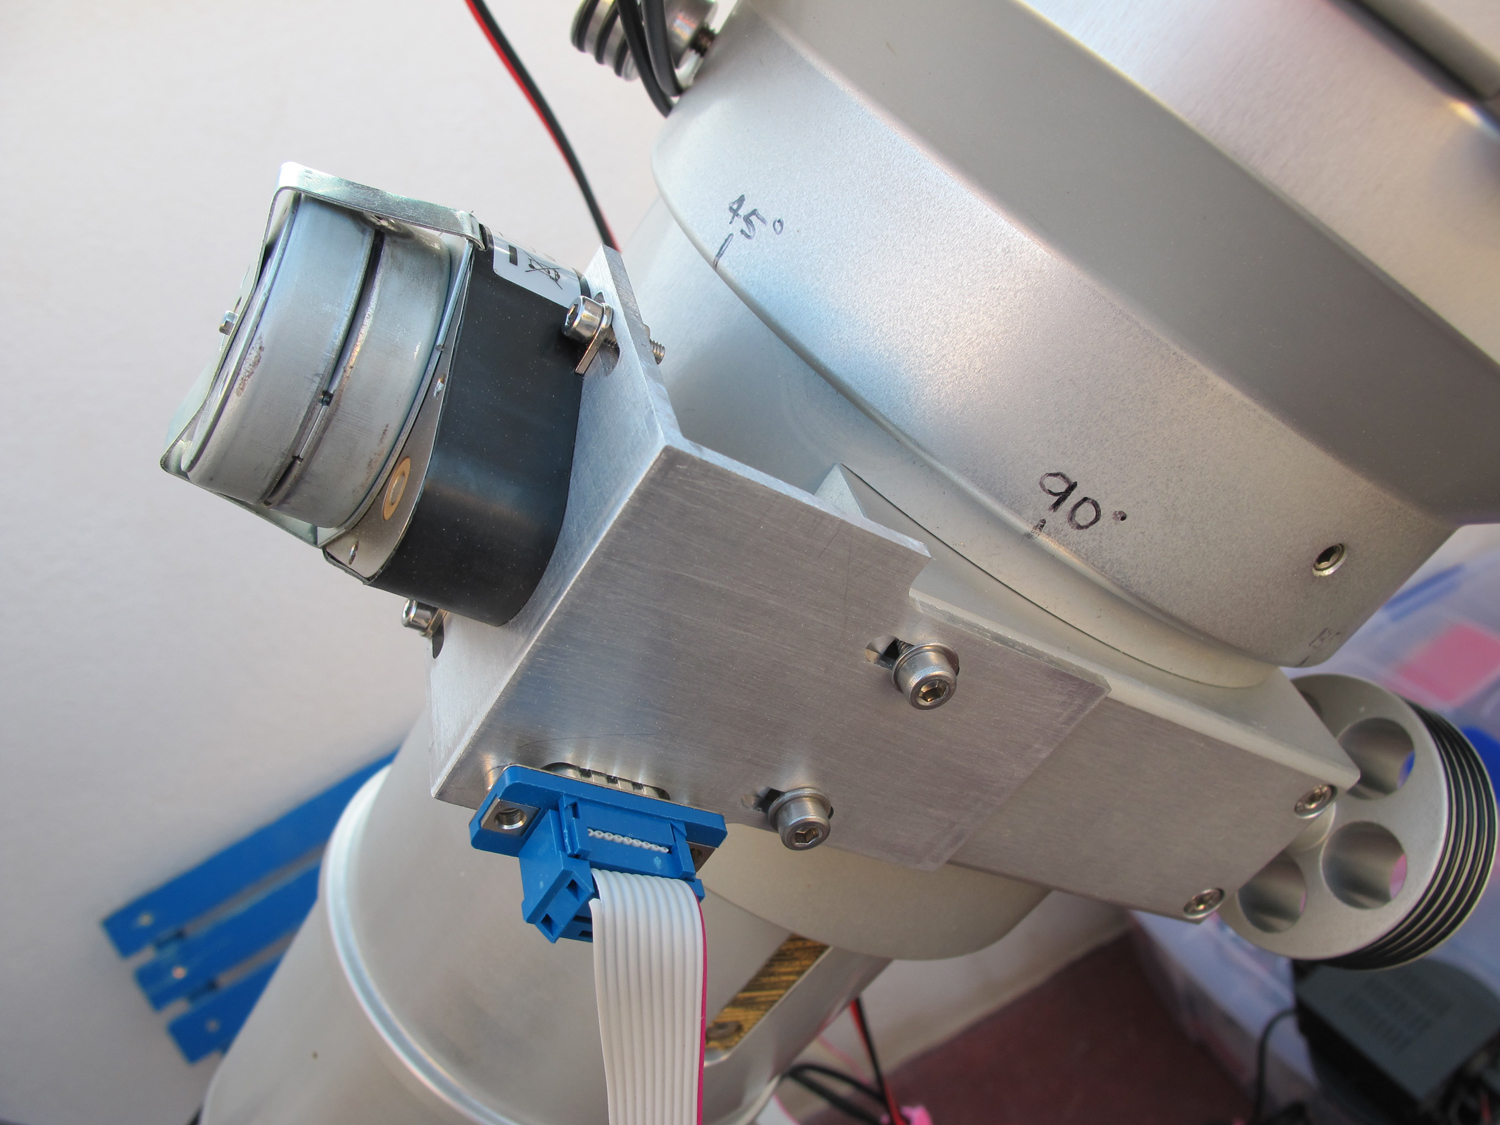
I had to upgrade the dovetail to a Losmandy otherwise it wouldn't have fitted on my mount with the existing Vixen dovetail.
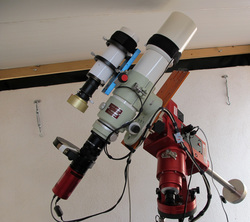
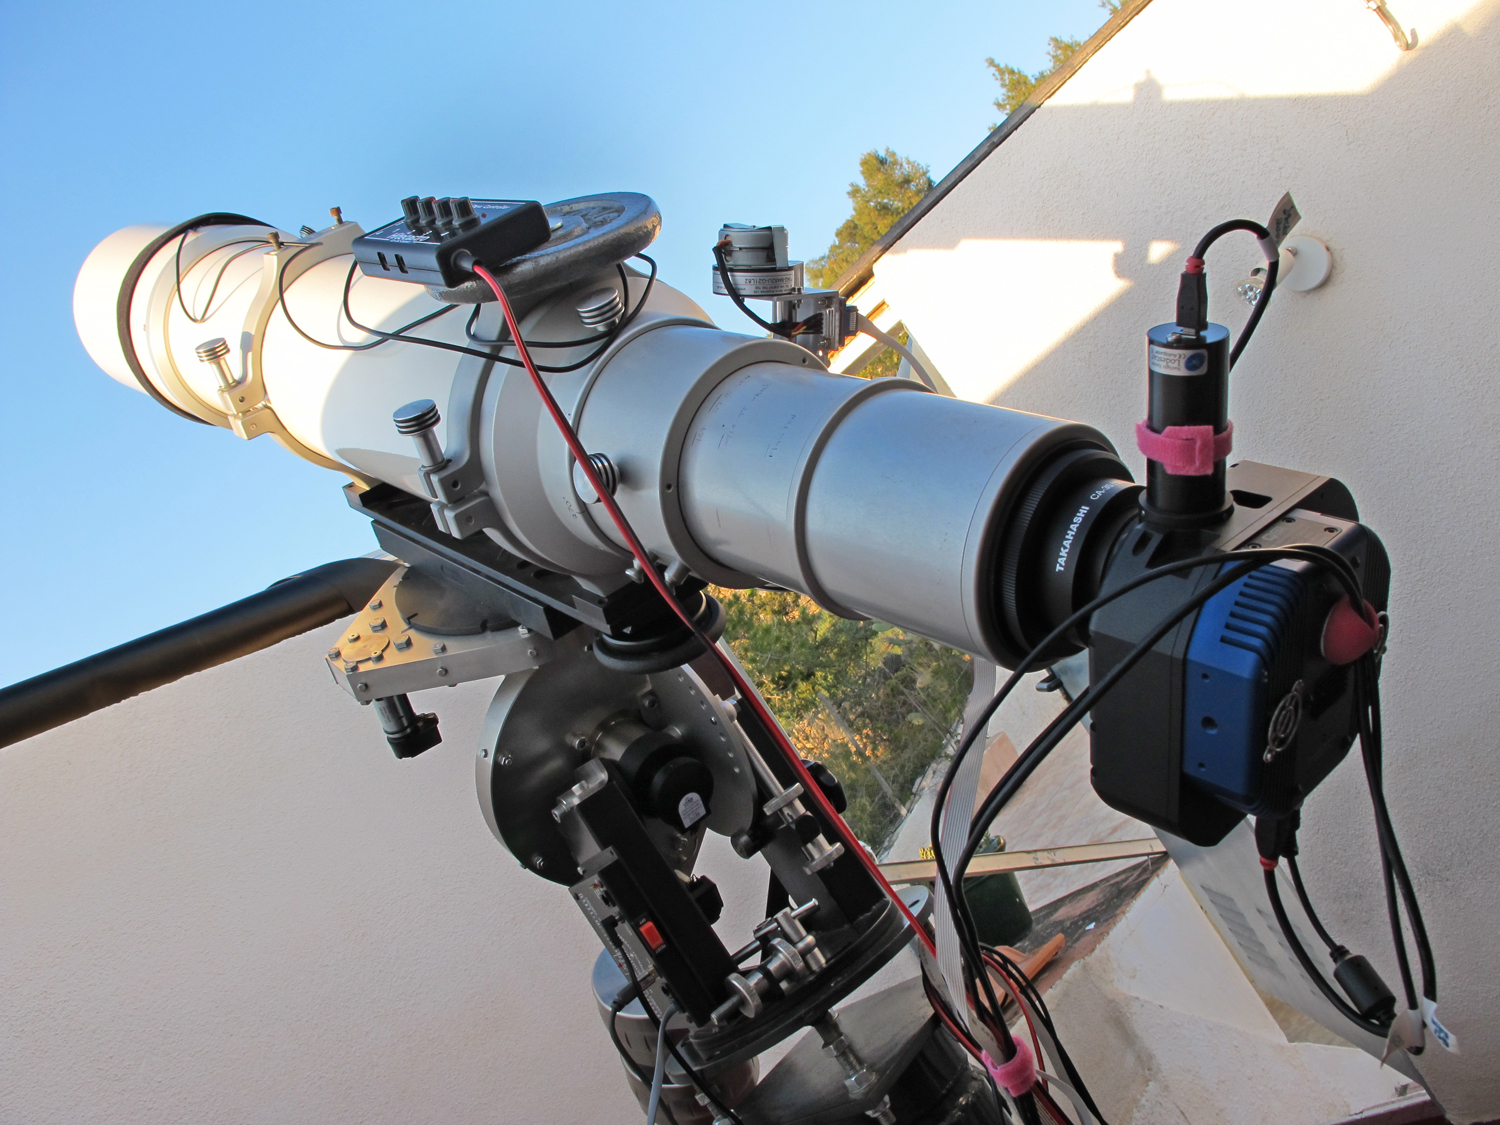
Here you can see it with a dew shield on, dew band and all connected to the imaging train. There have been a few changes here too.
I had to upgrade the dovetail to a Losmandy otherwise it wouldn't have fitted on my mount with the existing Vixen dovetail.
Here you can see it with a dew shield on, dew band and all connected to the imaging train. There have been a few changes here too.
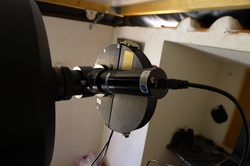
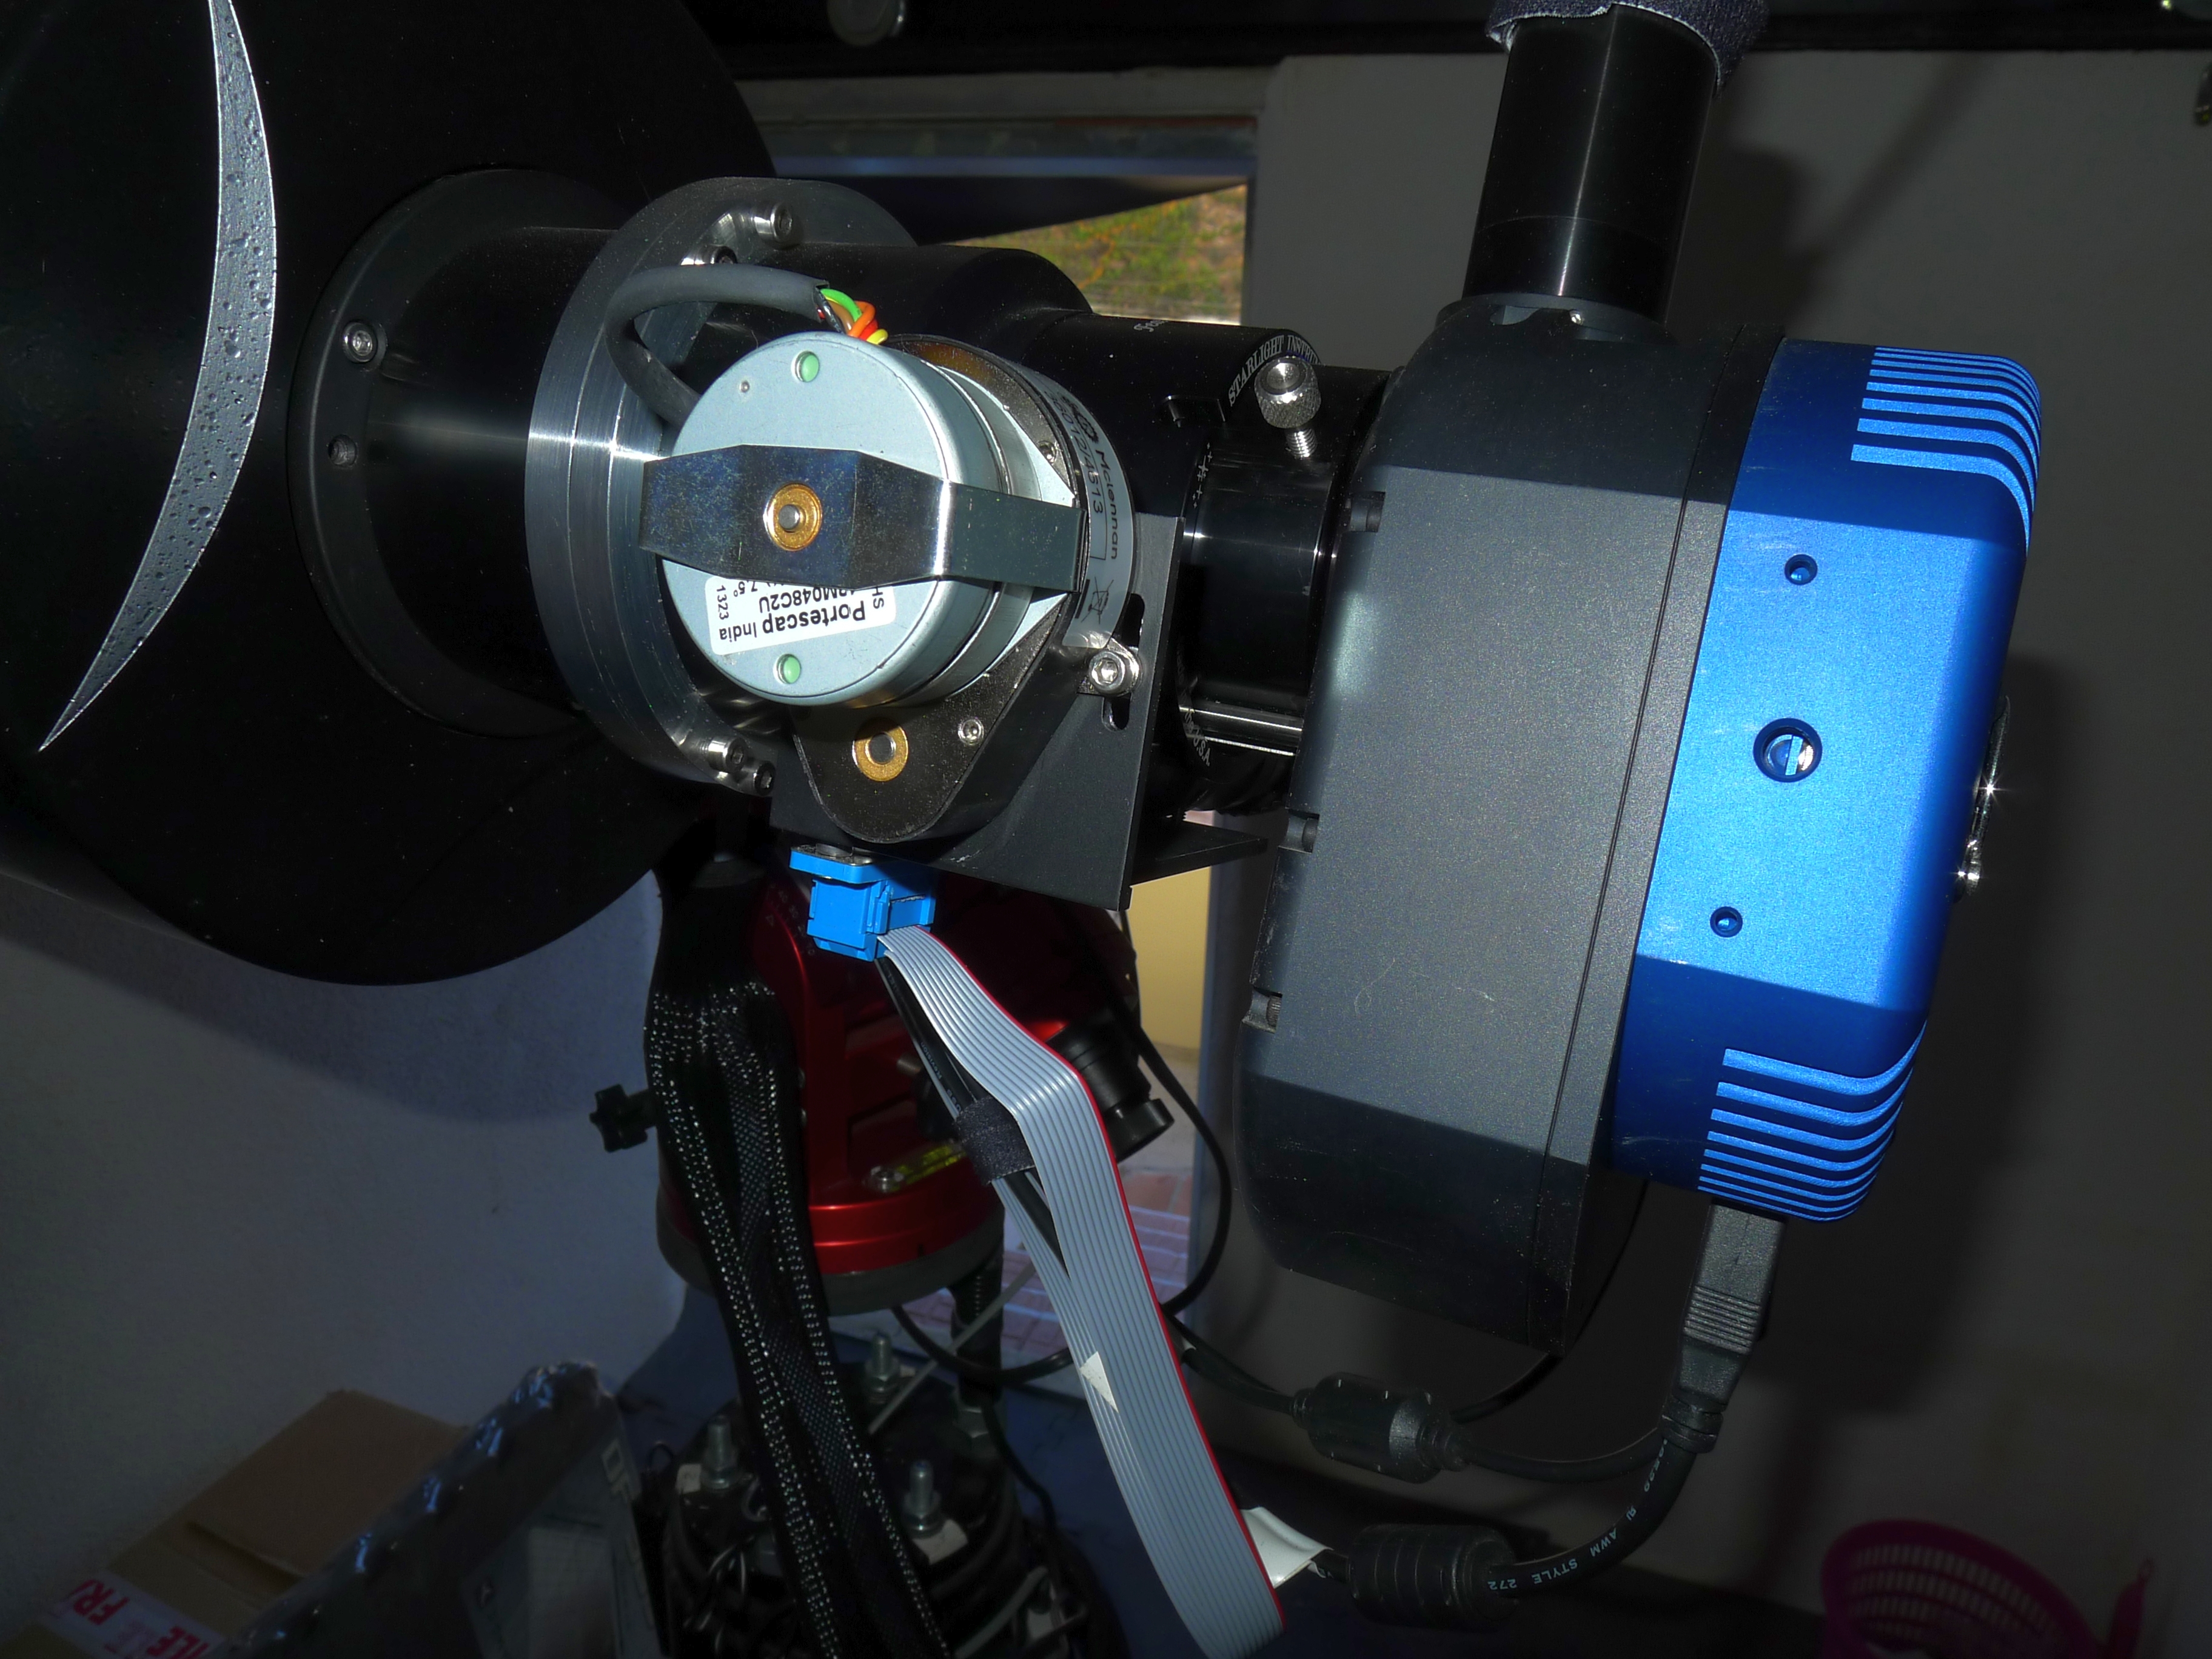
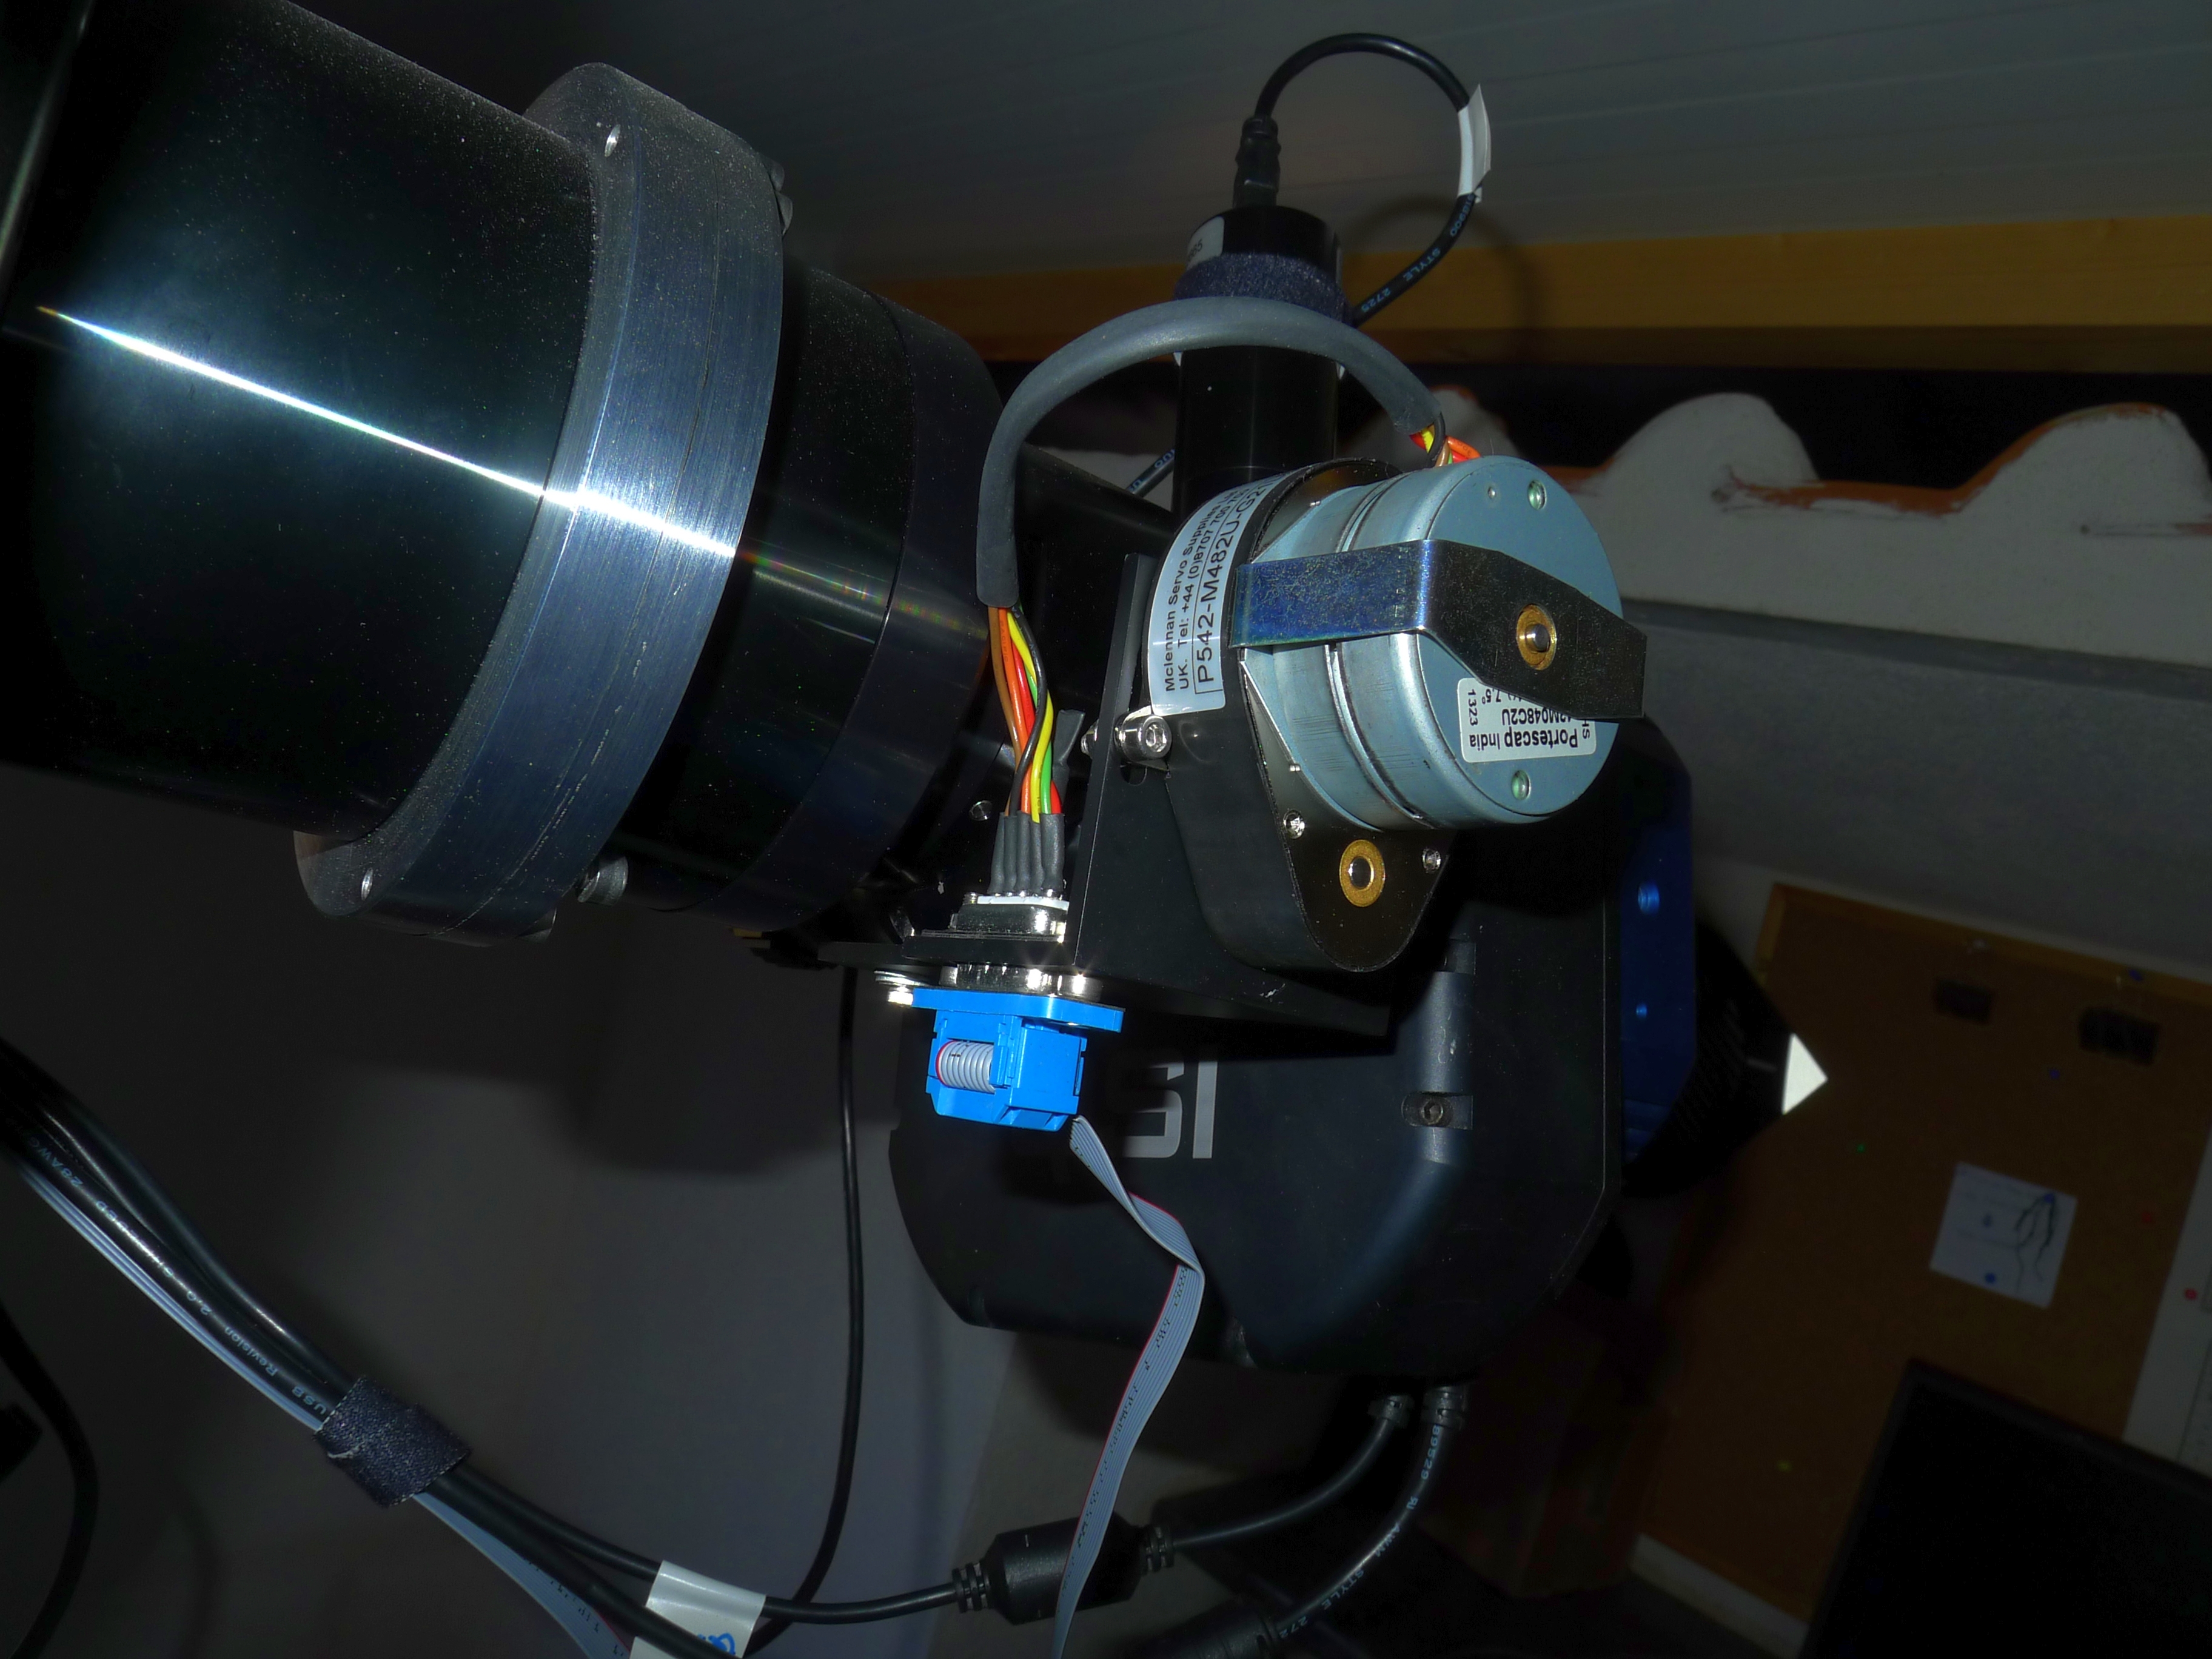
A new guide camera - A Lodestar - was an addition at Christmas. This is a far more sensitive camera than my previous guide camera. This degree of sensitivity is essential with the next addition ......... which you can see here - An Off Axis Guider (OAG)
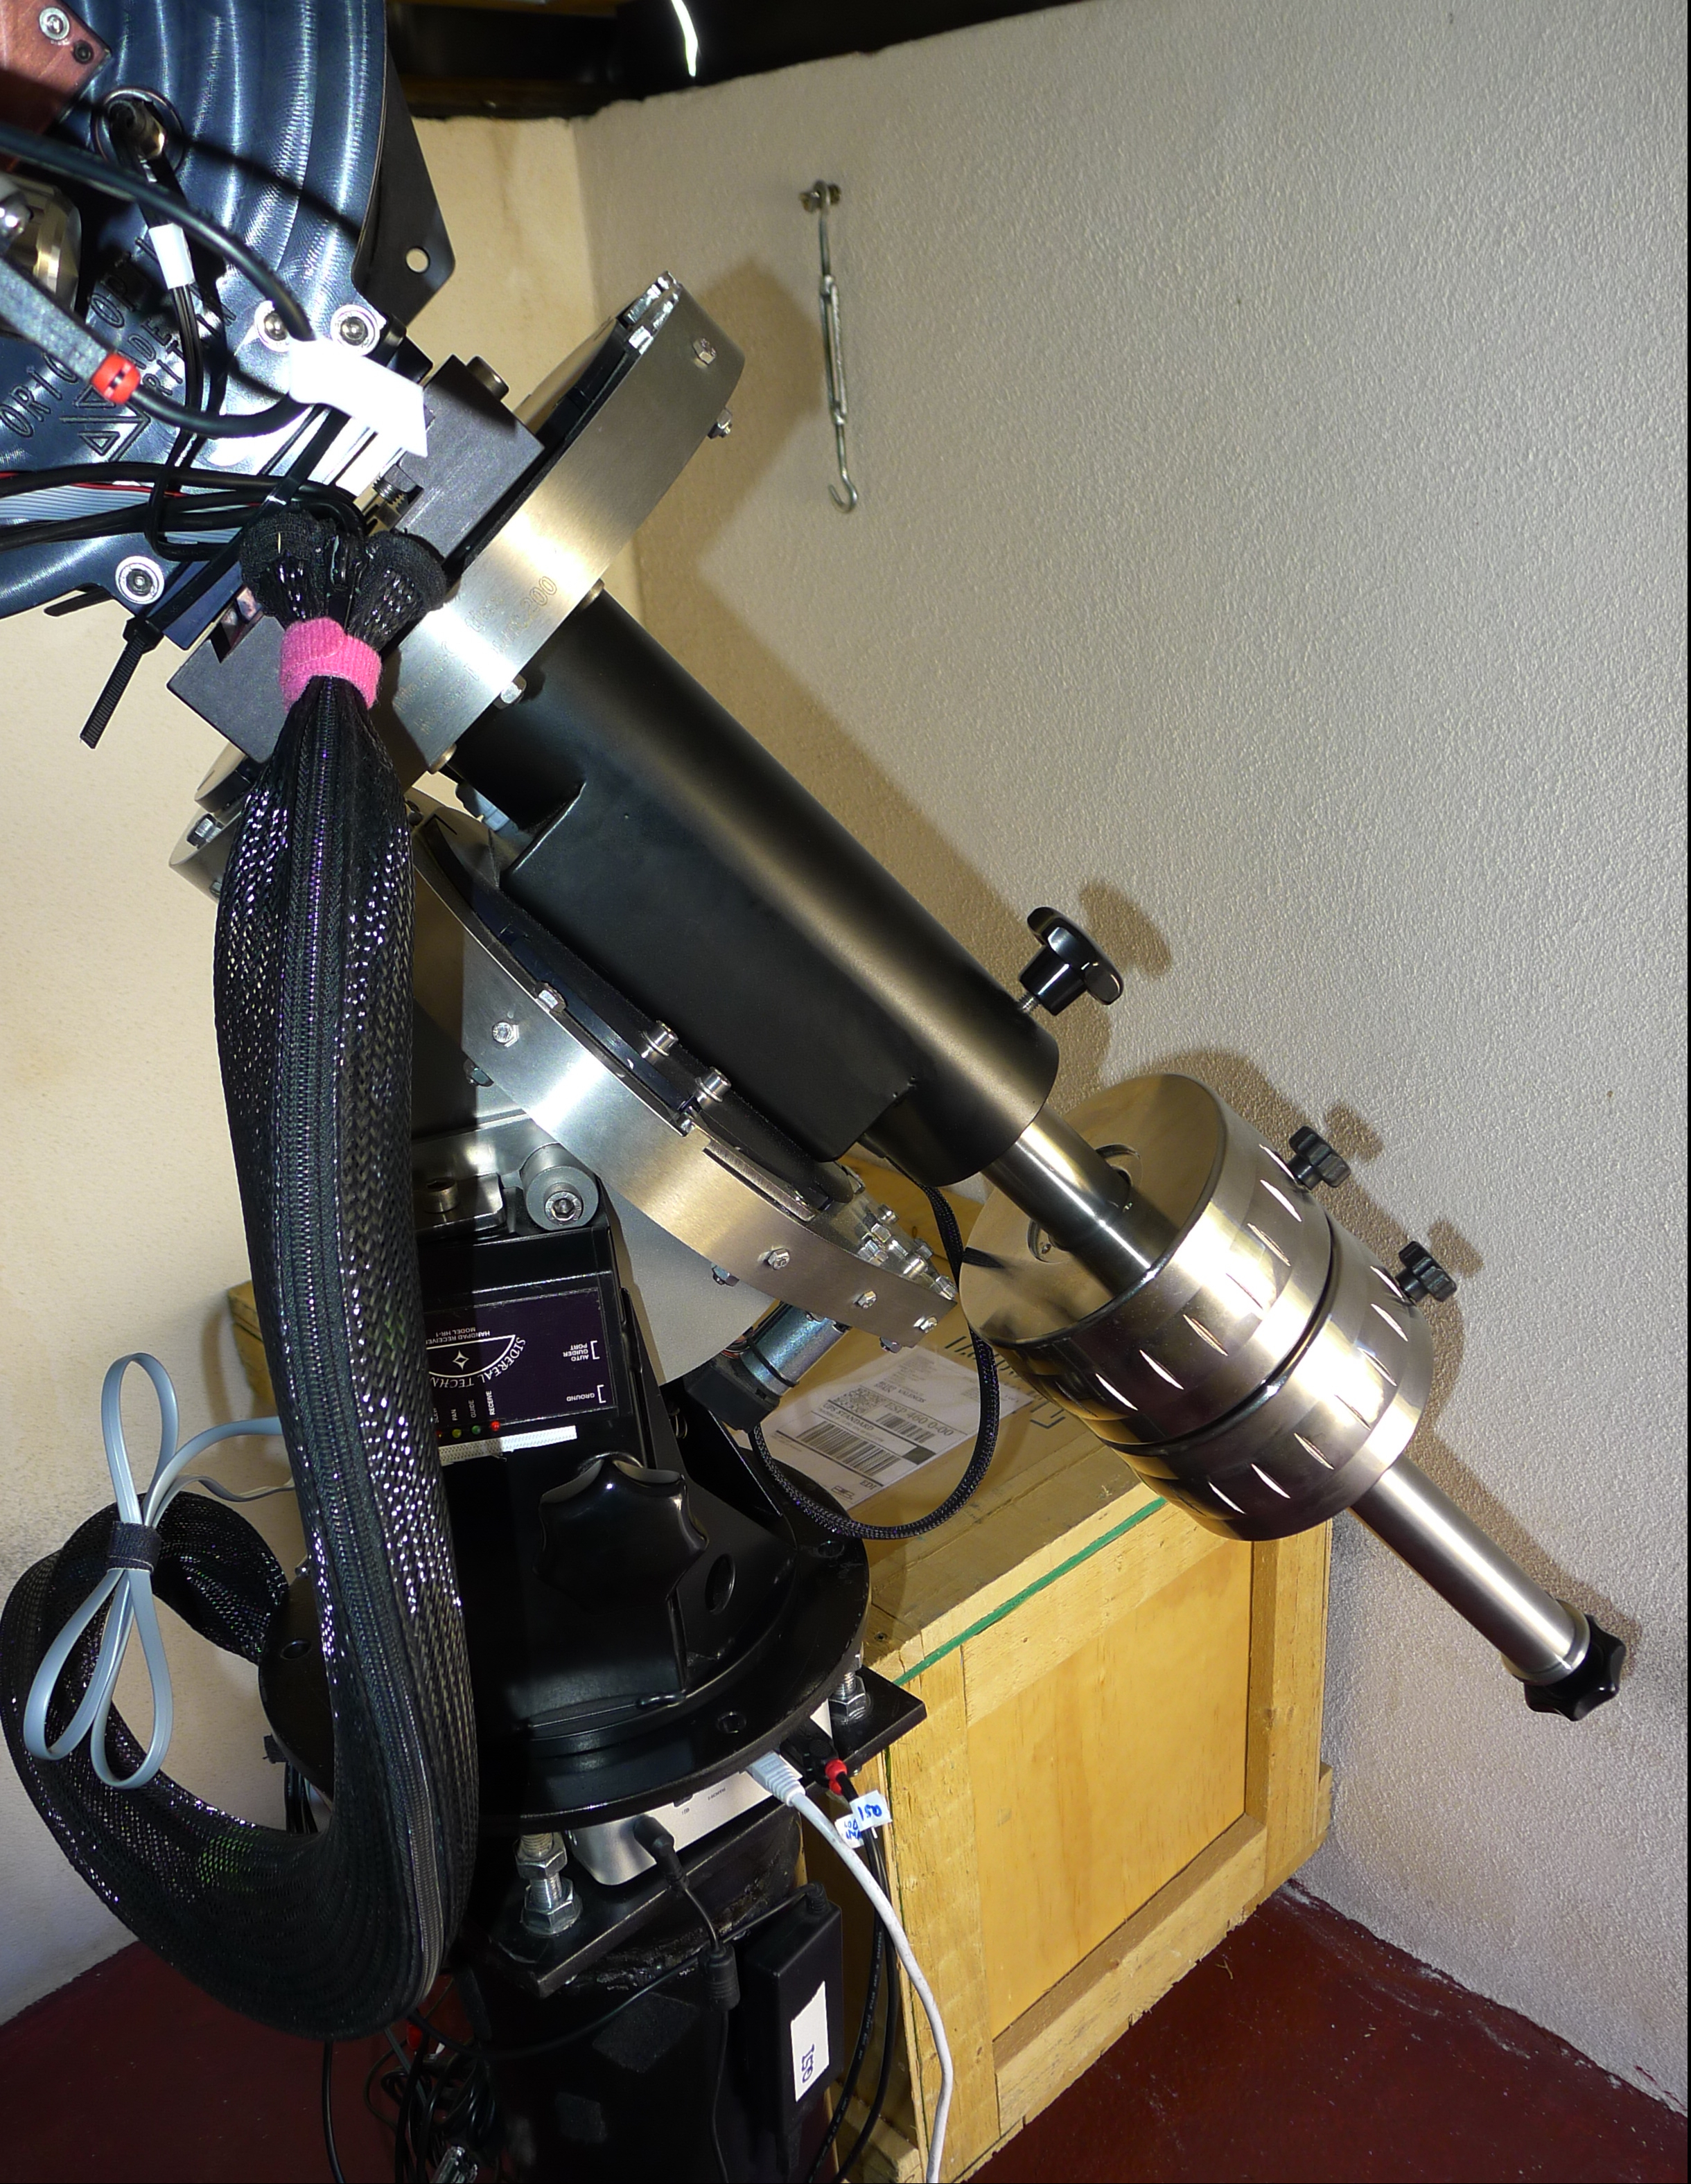
You can see from the right end of the picture attached to the rear end of the telescope the following
1) 0.63x Celestron reducer - This makes the telescope faster and also gives it a shorter focal length.
2) Celestron Radial Guider (Off Axis Guider) - These are used in longer focal length imaging. Inside the OAG is a prism that picks off some of the light coming through the scope and hopefully it will contain a star or two. The guide camera will pick up the stars (hence why such a sensitive camera is needed) and guide the scope.
3) Filter wheel
4) Atik 460EXM
Change 6.5:
I have recently removed the focal reducer from the imaging train - This means that my focal length has now increased to 2350mm. This gives me many opportunities to image small targets, which is the main reason for purchasing this scope. I was concerned how the mount would cope with guiding at this focal length, but it has been solid so far and I have been very impressed.

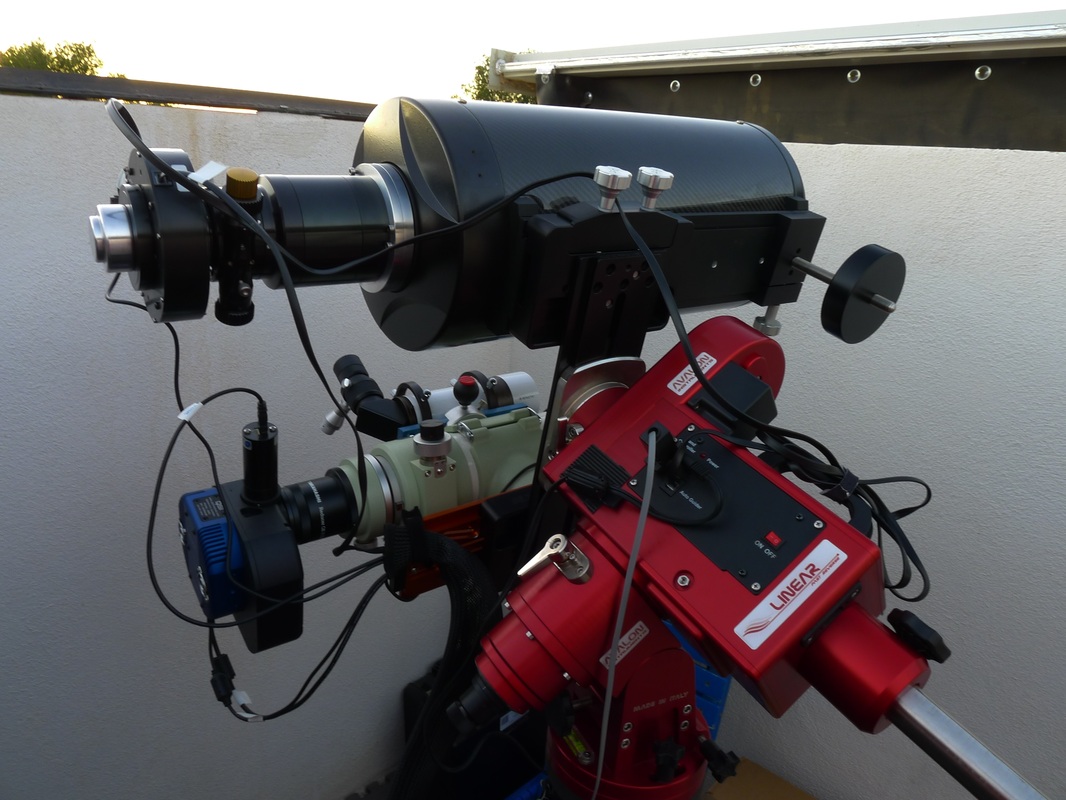
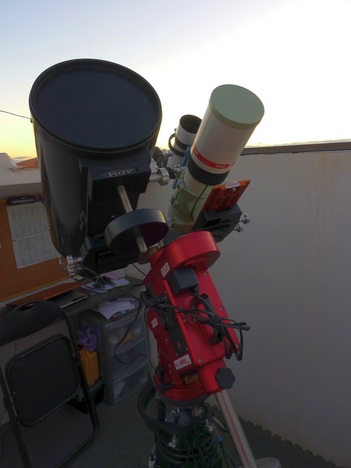
Change 7:


The big changes recently have been as follows:
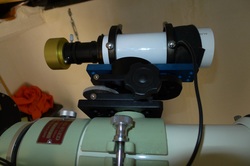
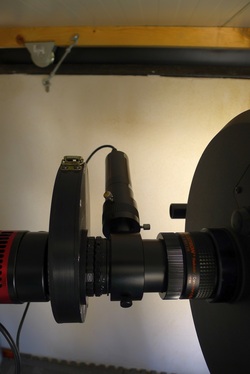
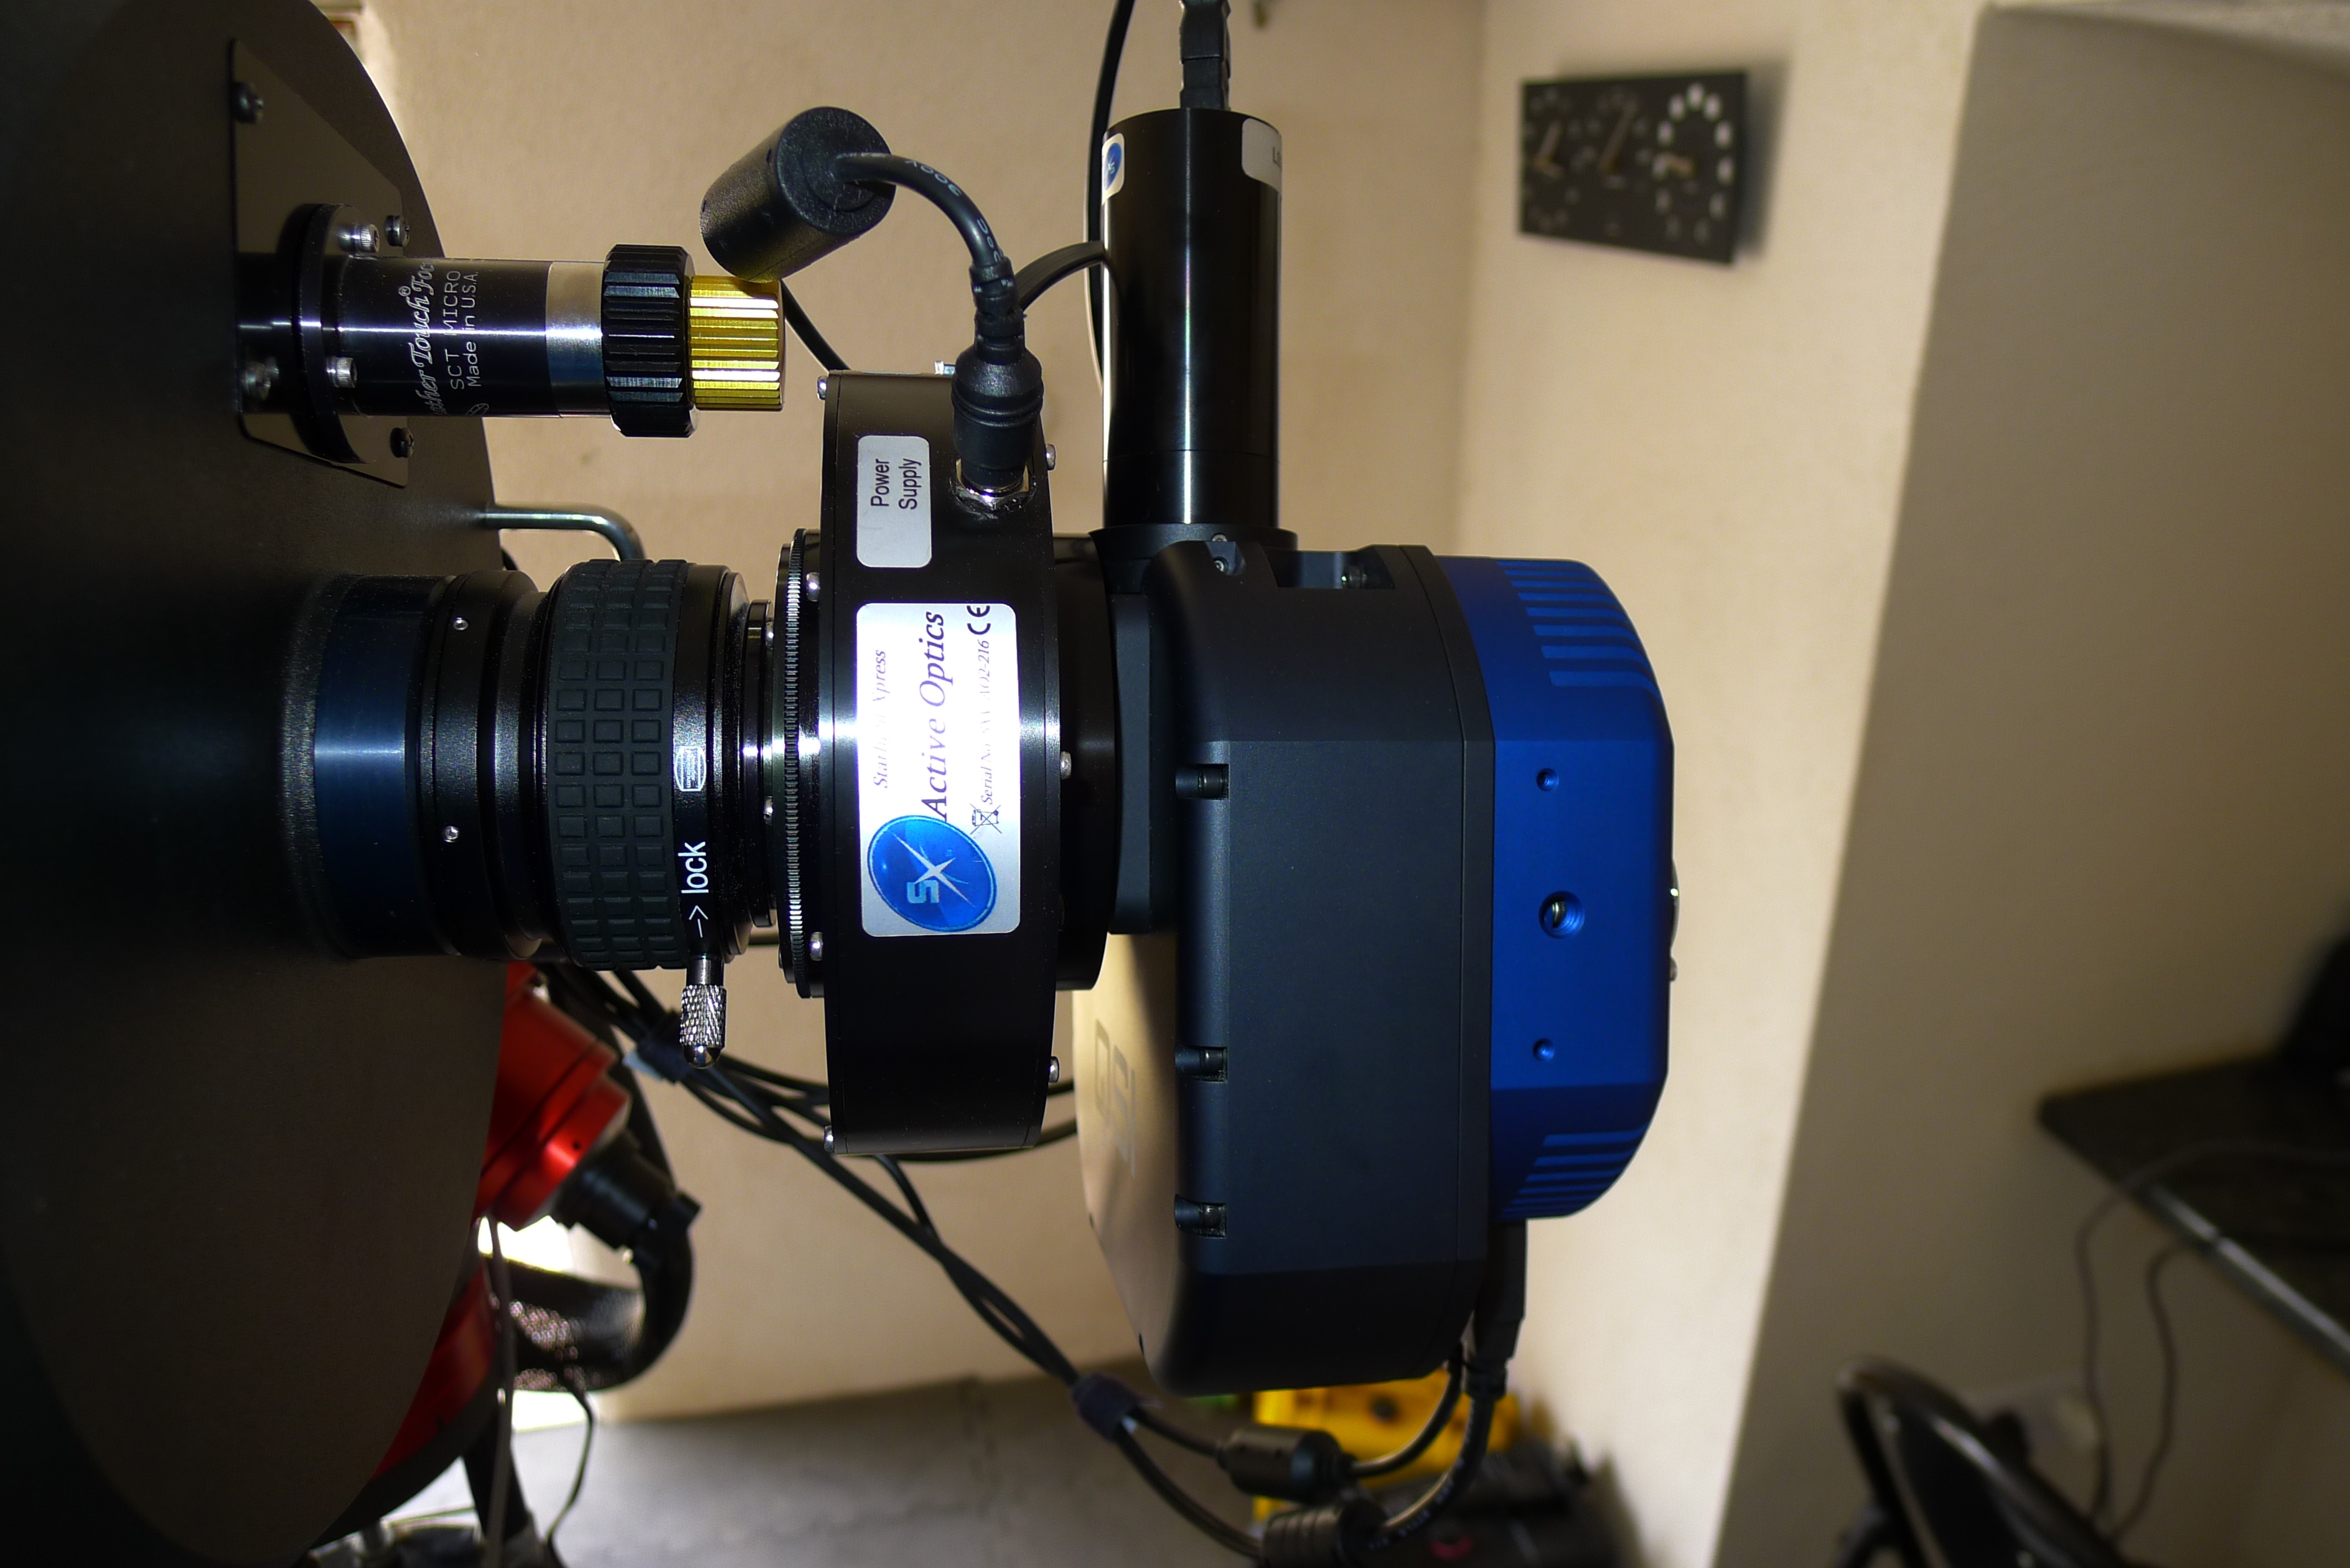
1) Feather Touch Micro focuser on the C9.25 - What a fantastic piece of hardware, really makes focusing easy.
2) Starlight Express Active Optics unit - This image tracking and stabilisation unit will ensure that I get the very best detail from my images with the long focal length telescope. Whereas with traditional guiding, the mount makes a correction every 3 seconds to keep the guide star central, the Active Optics unit will make corrections with it's own tilt mirror every 0.1 seconds, so the guiding is actually being done using the tilt mirror in the unit rather than through the mount.
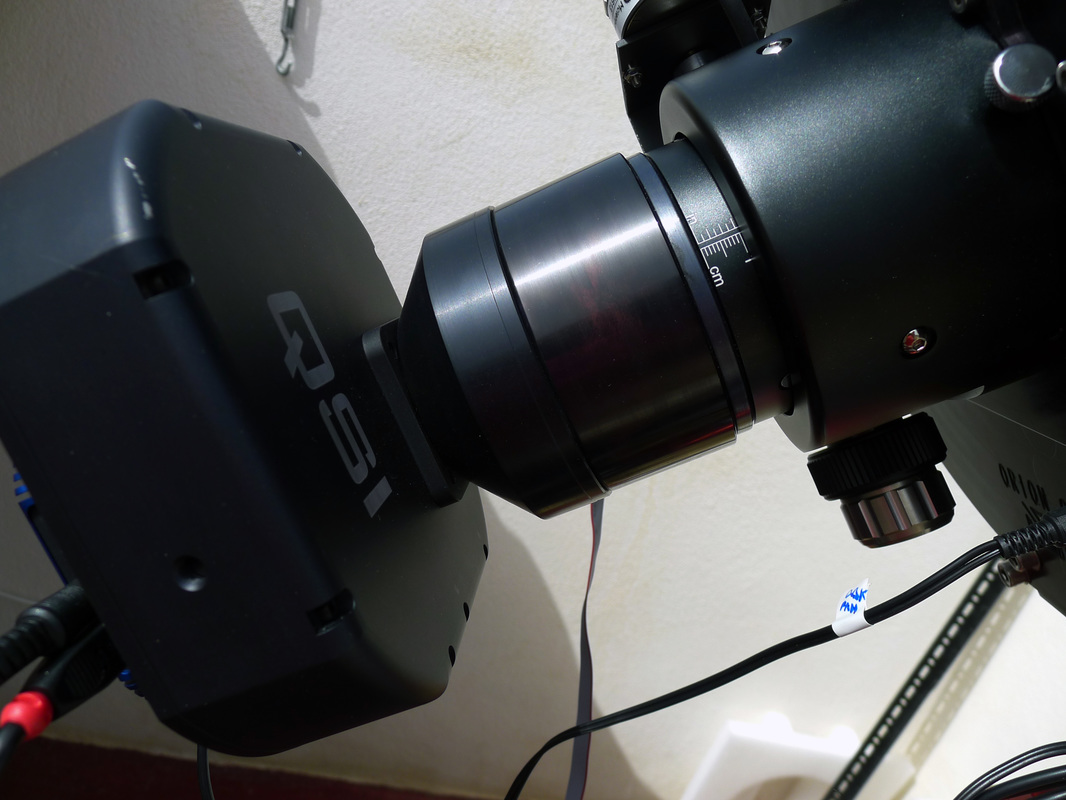
3) QSI690 mono camera with a built in filter wheel and Off Axis guider - While I have used Atik camera's until now and they have proved reliable, there were a couple of over riding factors that made me change my camera to a QSI.
i) It has the ability to cool to 40-45 degrees below ambient temperatures. Already in daytime temperatures of 28 degrees the camera has happily cooled to -10. This will be my default cooling temperature all year round.
ii) It has an integrated 8 position filter wheel, so I can put all of my filters in and forget about them! They will also stay more dust free as the whole unit is sealed.
iii) A built in Off Axis Guider makes life easier as well.
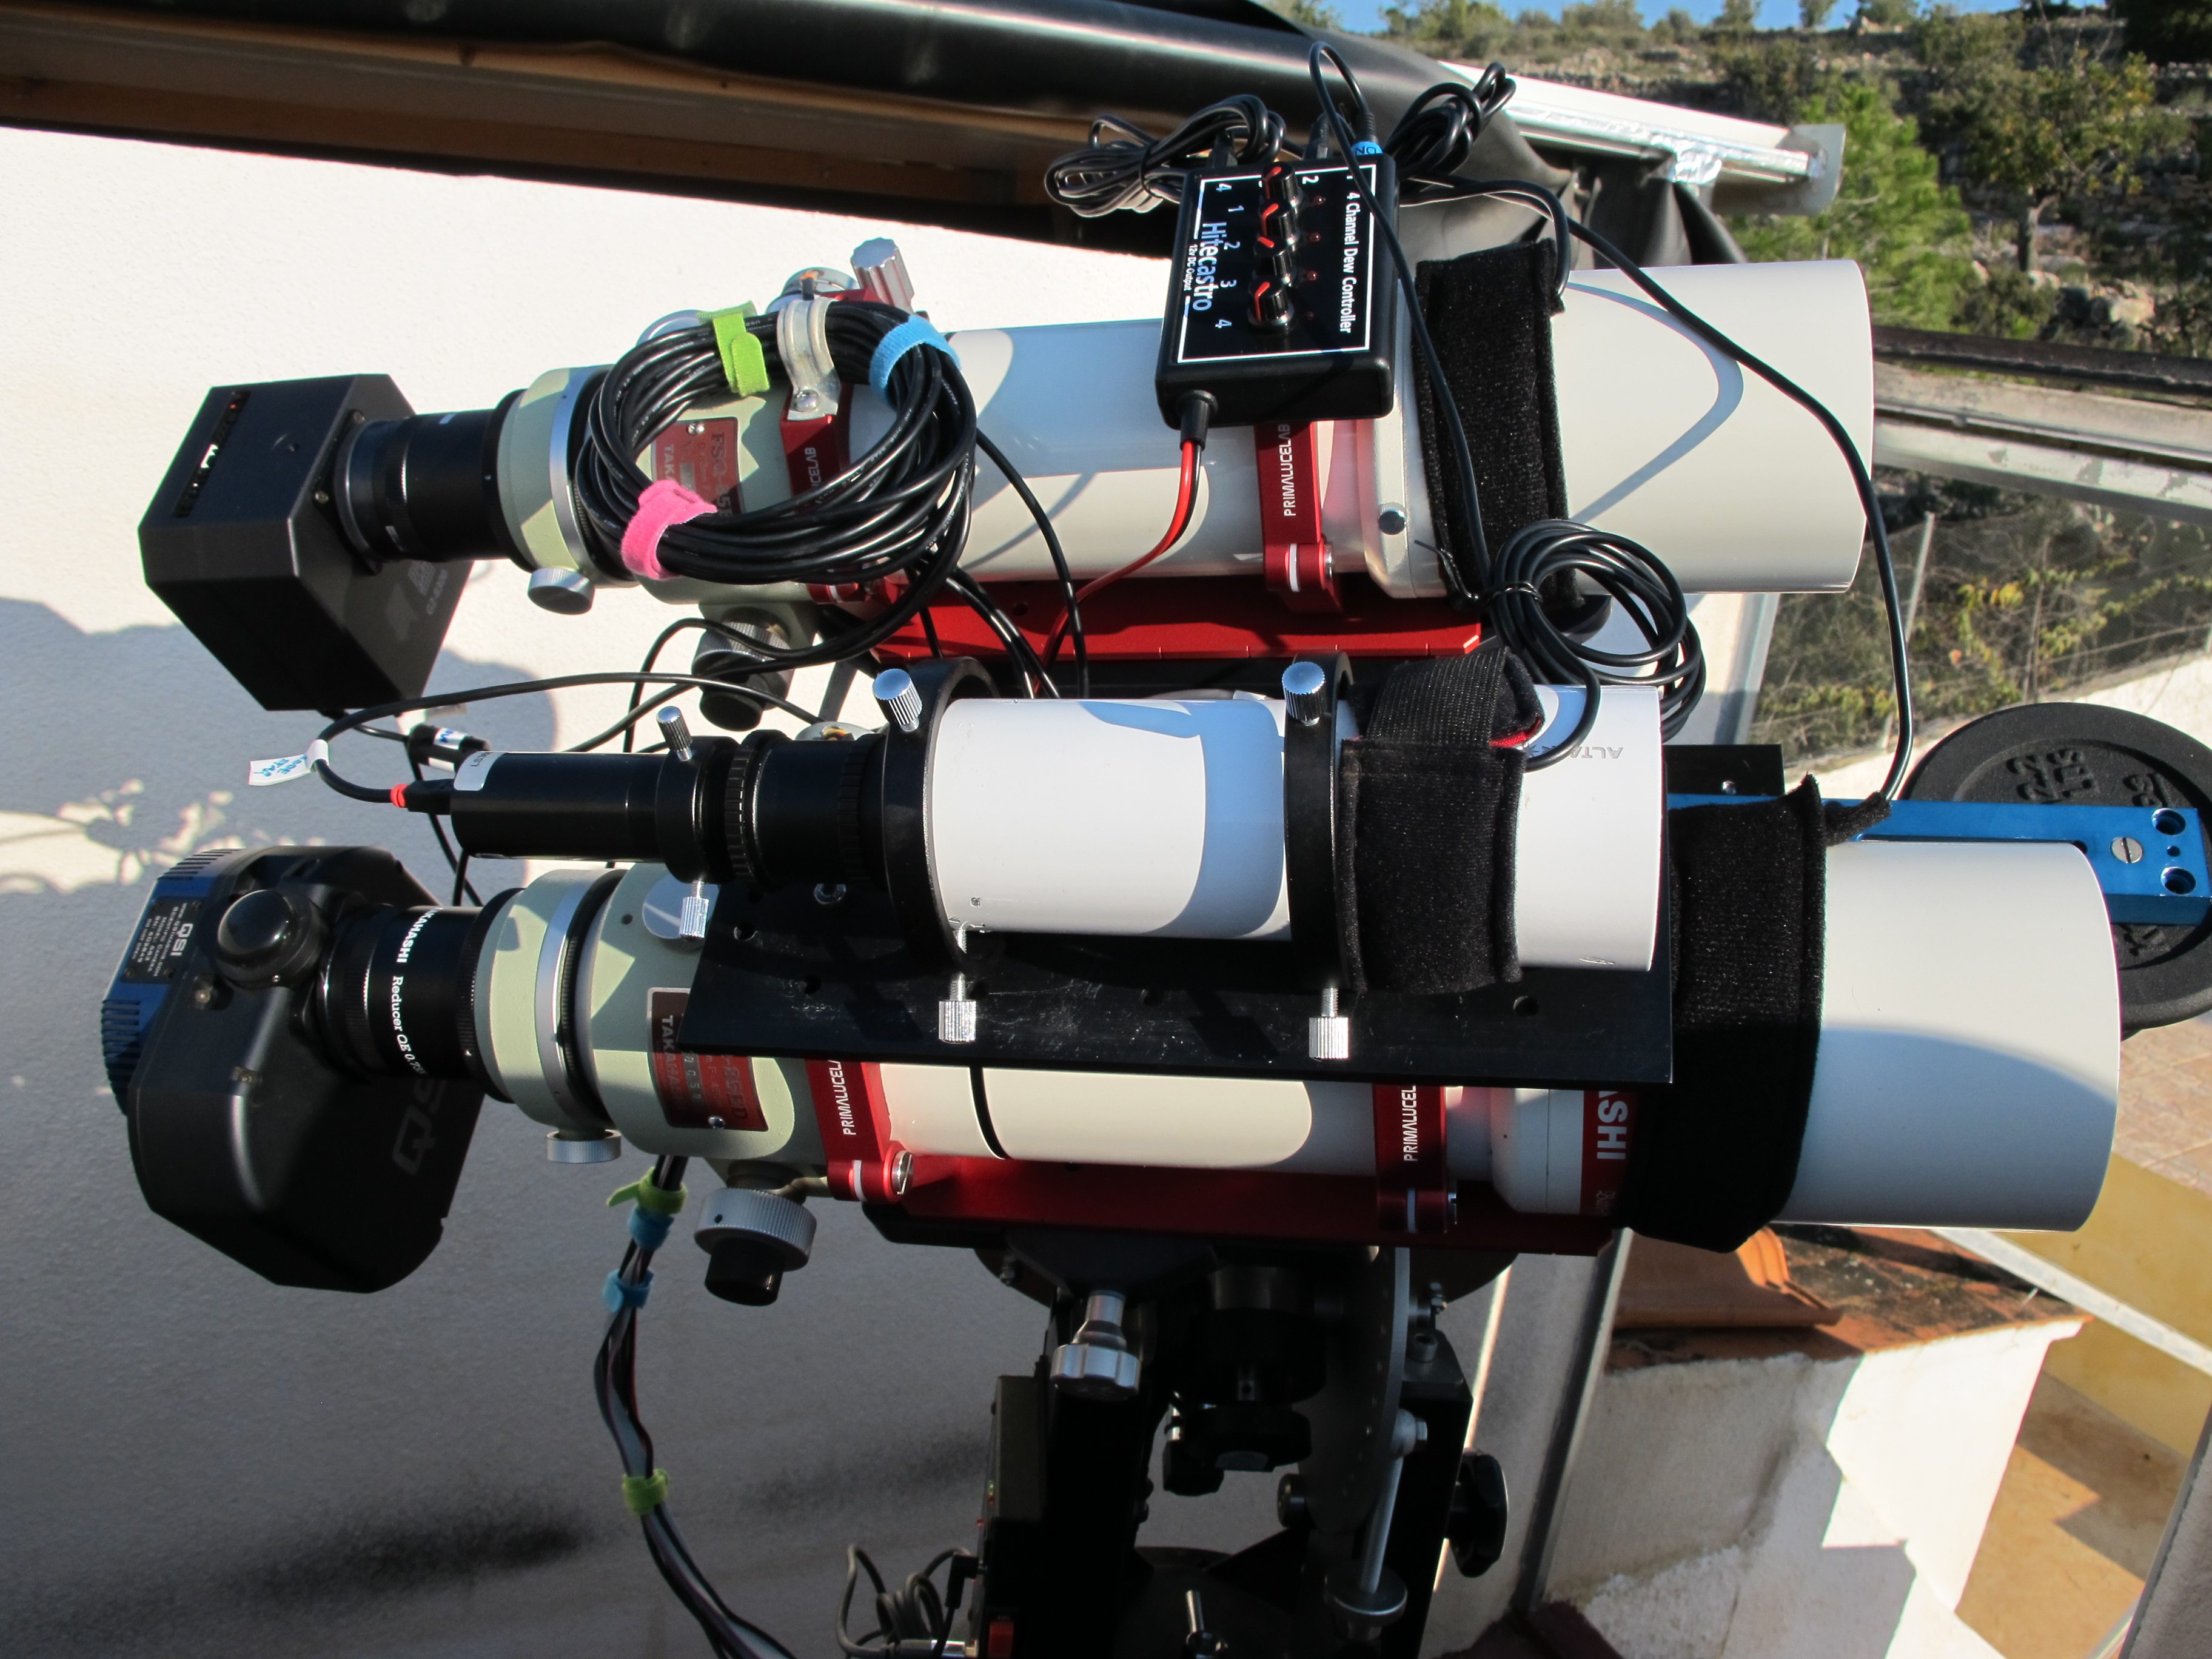
The three pictures above show the imaging train now. When I swap over telescopes it will be a simple case of attaching the camera and that will be all. I will not be using the SXAO unit with my shorter refractor as I will gain no benefits at that short a focal length. I thought I'd take a picture with no cables and then one with all the cables in situ so you can get a feel for the level of difficulty I think I have made for myself!
I hope to do some form of comparison with the Active optics unit in use and not in use soon.
1) Feather Touch Micro focuser on the C9.25 - What a fantastic piece of hardware, really makes focusing easy.
2) Starlight Express Active Optics unit - This image tracking and stabilisation unit will ensure that I get the very best detail from my images with the long focal length telescope. Whereas with traditional guiding, the mount makes a correction every 3 seconds to keep the guide star central, the Active Optics unit will make corrections with it's own tilt mirror every 0.1 seconds, so the guiding is actually being done using the tilt mirror in the unit rather than through the mount.
3) QSI690 mono camera with a built in filter wheel and Off Axis guider - While I have used Atik camera's until now and they have proved reliable, there were a couple of over riding factors that made me change my camera to a QSI.
i) It has the ability to cool to 40-45 degrees below ambient temperatures. Already in daytime temperatures of 28 degrees the camera has happily cooled to -10. This will be my default cooling temperature all year round.
ii) It has an integrated 8 position filter wheel, so I can put all of my filters in and forget about them! They will also stay more dust free as the whole unit is sealed.
iii) A built in Off Axis Guider makes life easier as well.
The three pictures above show the imaging train now. When I swap over telescopes it will be a simple case of attaching the camera and that will be all. I will not be using the SXAO unit with my shorter refractor as I will gain no benefits at that short a focal length. I thought I'd take a picture with no cables and then one with all the cables in situ so you can get a feel for the level of difficulty I think I have made for myself!
I hope to do some form of comparison with the Active optics unit in use and not in use soon.

Change 8:
|
This is the latest and I hope final upgrade!
I decided that I liked the field of view that I got with my previous C9.25 scope, but never really found the stars satisfactory or the overall sharpness of the image. I sold this and replaced it with another second hand scope, an AstroTech 8" Ritchey Chretein Carbon Fibre scope. This has been fitted with a FeatherTouch focuser which is a good solid addition to the over all package. I bought a Dual mounting bar from Altair Astro and decided that I'd try dual mounting both my scopes on the Avalon mount. |
|
To be honest, I think I am massively over the stated imaging weight for the Avalon, so I wasn't sure how it would cope with it. I am pleased to say that it's happily doing 30 minute subs as per normal in both scopes and producing round stars across the entire frame.
This scope needed collimation, but after speaking to people on forums and also Ian King, I was pointed in the right direction for adjusting the Secondary mirror, Primary mirror and the focuser. All this was done with a Cheshire eye piece - No lasers etc. I will be moving the camera between the two scopes as needed, so I don't need to accurately align the two scopes as I won't be using them imaging the same target at the same time. |

Change 9:
I have decided that the mount was probably very close to it;s weight limit with both scopes on it, so I have decided to just put one scope on at a time. I will mark up all the dovetails and weight positioning so that it's as easy as possible to move between the two telescopes. I will store them with everything on the imaging train, so that the only other swap over is the camera.
I am currently looking at SGPro software - This enables me to do automatic meridian flips, and will plate solve to get the image back in the right place. When I get my auto focusers I can add that as well, so that it will be a complete capture package. So far, I have been very impressed with it.
The Framing and Mosaic wizard is incredible - Download an image from anywhere on the net and you can set the part that you want to image and hey presto, you will be moved there ...... exactly.

The image on the right is taken from the internet. The square is the target that I wanted to image, just that small area of the Soul nebula. On the left is a 30 minute sub of the area - as you can see, the software has plate solved it and matched it perfectly.
The Framing Wizard is an extra, but I would say it is the best part of SGPro - Now I can select any area of any nebula with my 8" scope and it will put me exactly where I want. Framing made easy!!
The Framing Wizard is an extra, but I would say it is the best part of SGPro - Now I can select any area of any nebula with my 8" scope and it will put me exactly where I want. Framing made easy!!

Change 10:
|
|
This is the Lakeside Automatic focuser fitted to the scope. It replaces one of the focuser knobs and connects into the computer and the new SGPro software that I am running. The scope now will focus without any manual input required from me - So no more sitting in the cold! I have it set up in SGPro to re focus after every exposure (every 30 minutes) - So far the focus has been excellent.
The focuser itself was fairly easy to fit and it loaded onto the computer without any issues. This has been a massive improvement over all to my imaging. Coupled with the SGPro software, I set a target, then the computer does everything else while I go to bed!!
The focuser itself was fairly easy to fit and it loaded onto the computer without any issues. This has been a massive improvement over all to my imaging. Coupled with the SGPro software, I set a target, then the computer does everything else while I go to bed!!

Change 11:

|

|
A new addition - An ODK10 from Orion Optics. This telescope has a focal length of 1700mm and is f6.8, so a faster scope than the RC and SCT that I have used before. I have only done some initial testing, but so far, it all looks very good indeed. It comes as standard with a 3" focuser. I have fitted a Lakeside, so that I can use auto focus. It's all working well with software, plate solving and the automatic focus works a treat.

Change 12:
|
I had to send my QSI690 camera back to QSI as it had an issue that needed to be fixed. While it was there I asked the good folks of QSI if they would change the sensor to a Kodak 8300 - I wanted this as I'd realised that I found the smaller Sony chip just too restrictive for my imaging preferences.
The sensor was changed and so now I have a QSI683 - I can confirm that I am also using 1.25" filters and it works a treat. |

Change 13: What a mount!!!

|
|
I know that I said there would be no more change, but I was lucky enough to be able to get hold of a Mesu 200. Knowing that I may benefit from the extra weight capacity of this mount, I decided to get it and so that is now set up in the observatory. This is currently loaded up with my ODK10, but this will easily take the next exciting project that I have in store......... Watch this space!

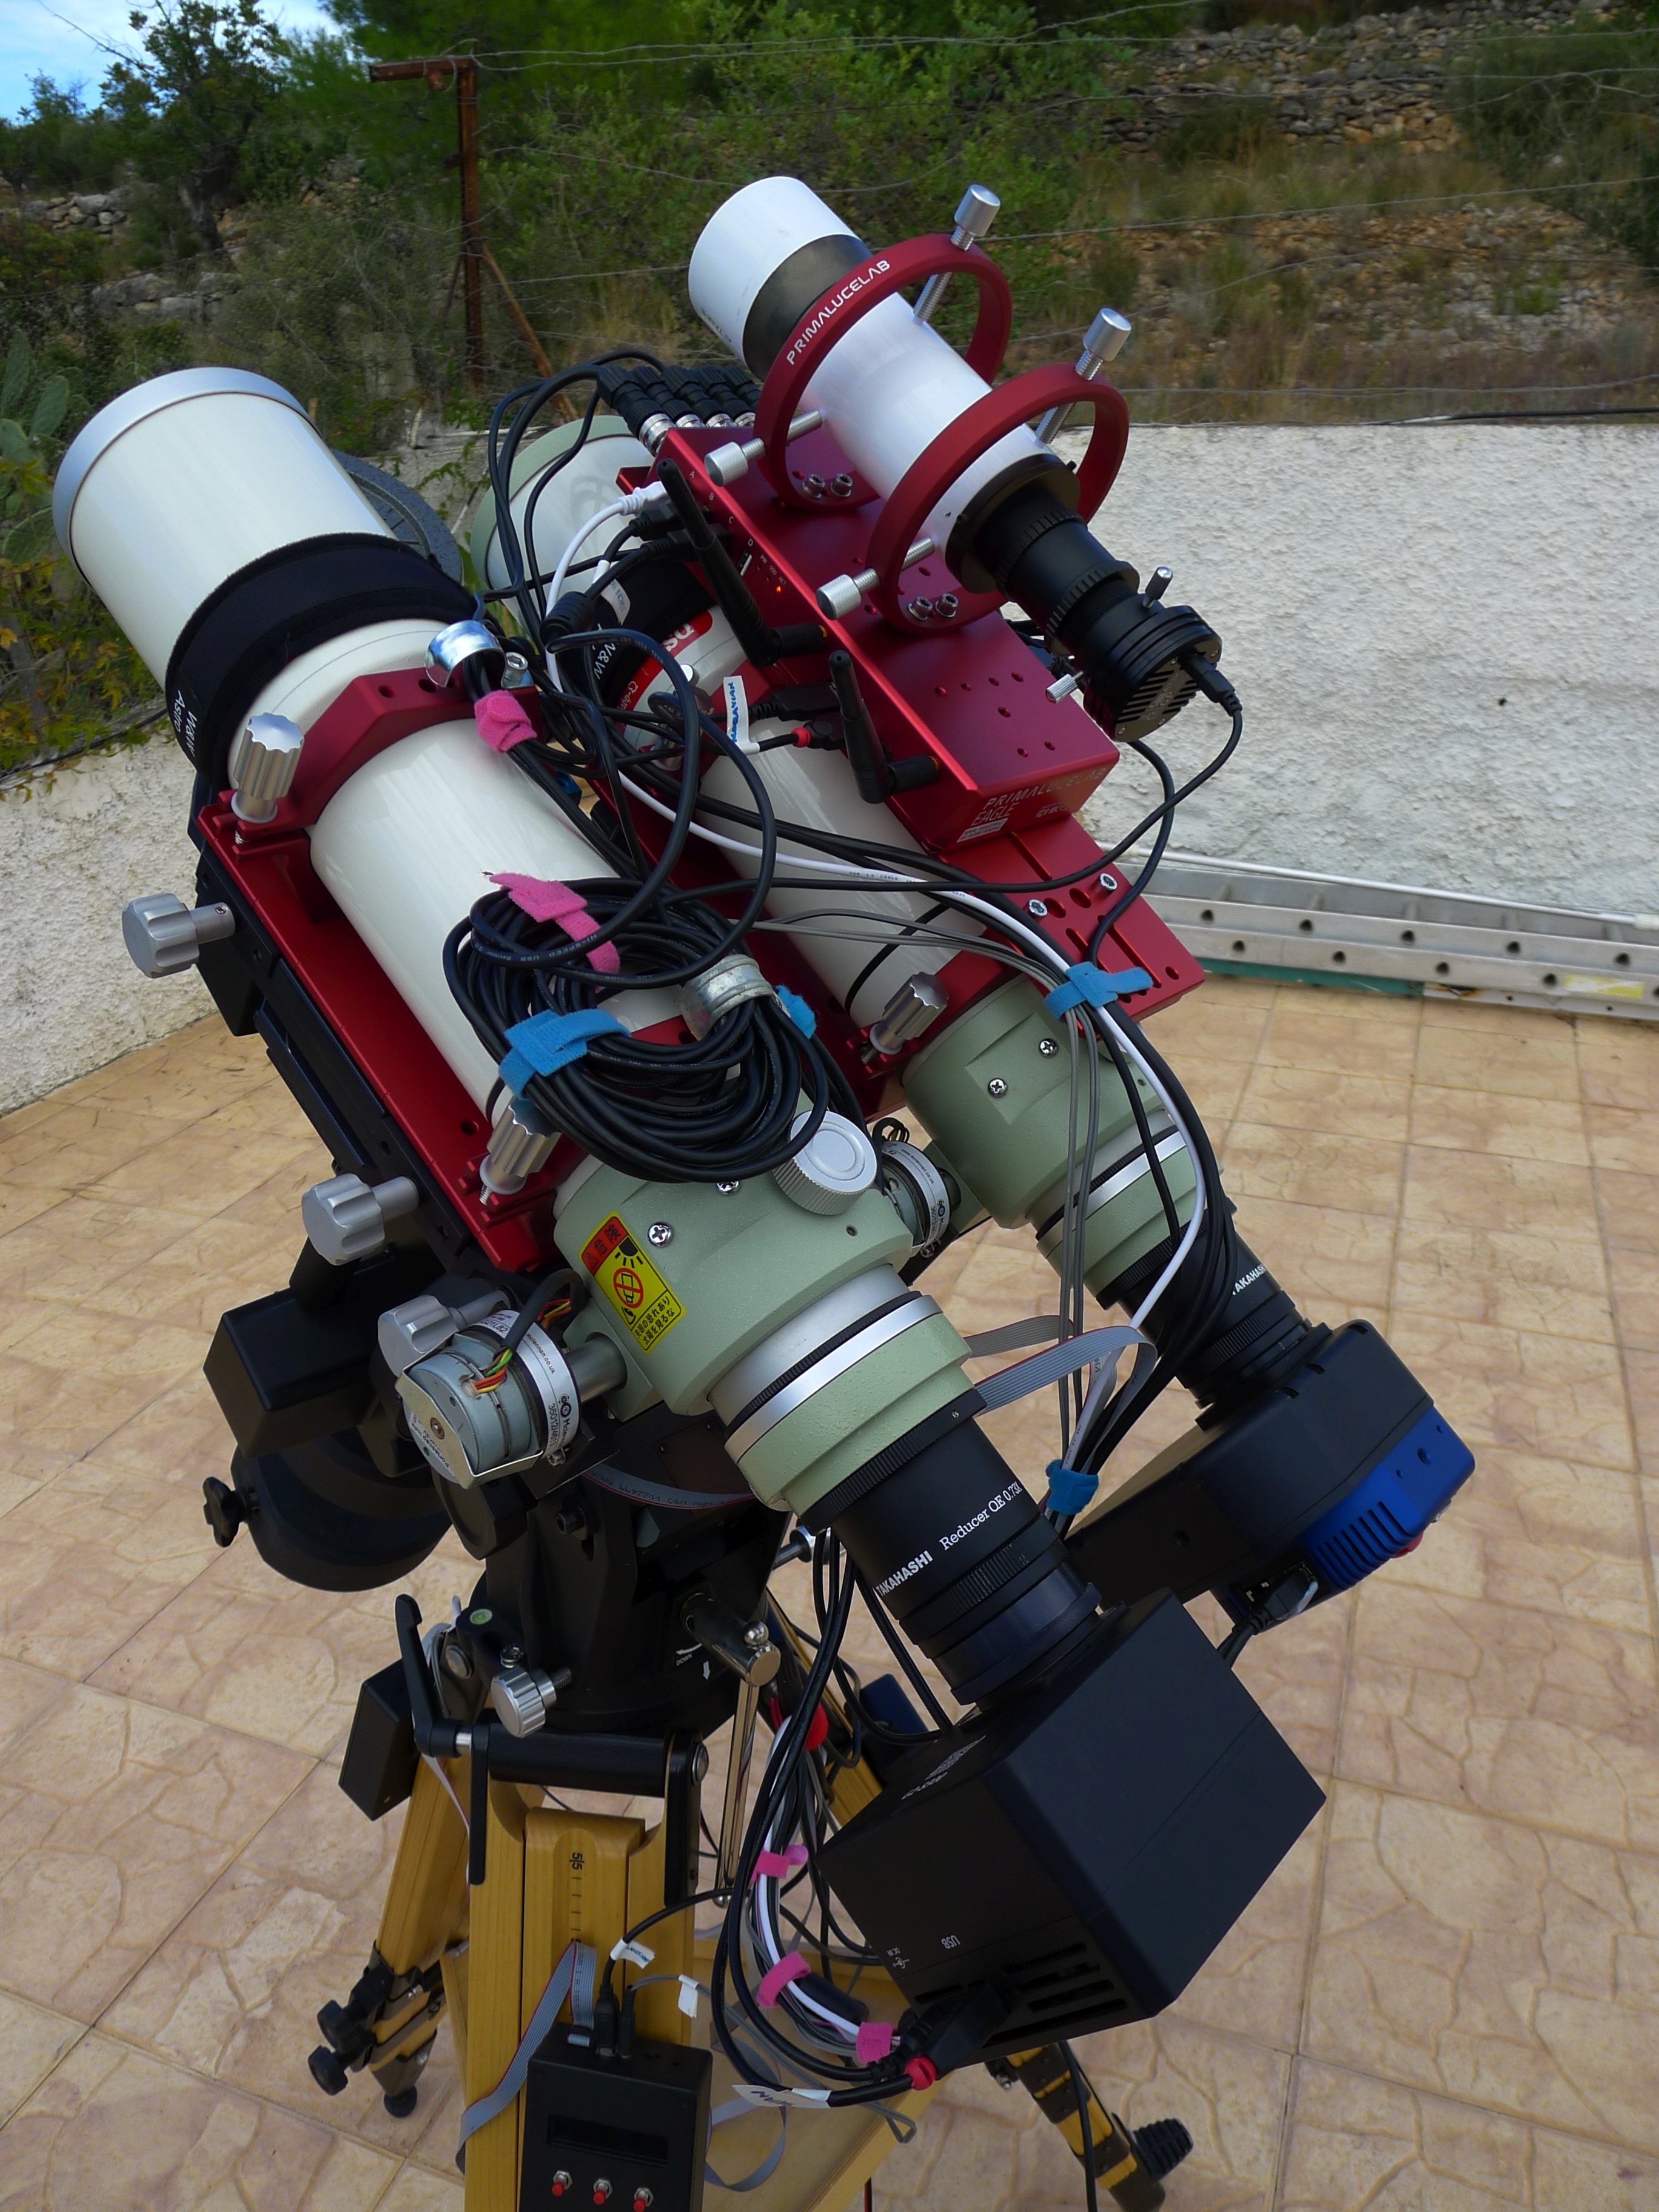
Change 14: A fantastic dual setup!

|
|
This change has been a long time coming ..... I've had the camera and the scope for over 6 months. But I was enjoying the long focal length work so much that I didn't want to put the short focal length on the mount!
This is 2x Takahashi FSQ85 (both reduced to 330mm and f3.9). The camera's are both Kodak 8300 sensors, one is a QSI683 and the other a G2-8300. This has been done for no other reason than cost. The G2-8300 has a built in 5 position filter wheel, so I have duplicated a couple of my filters as I didn't need a complete set in there.
The field of view is of course exactly the same and I have a JTD adjustment saddle on one of the scopes for ease of alignment so I can ensure that they are both pointing to the same area of the sky. This is an excellent piece of kit that I will soon do a review on as it has made life so very easy.
At the moment there's no software that can run the two scopes together, so one id running the mount and the plate solving etc while the other just acts as a 'slave' and takes pictures all night. In that way I lose one sub as it is taking an image throughout the meridian flip.... but that's OK!
You can see the Moravian camera on the furthest scope in the picture... it's of a solid build and I'm pleased with it. The cooling isn't quite as good as the QSI, but then it was almost half the price.
This system ensures that if there is for example 10 hours of clear darkness, then I will collect almost double that .... so potentially in the winter, 20 hours a night! That's almost a complete image in one night!!!
The guiding is being done by a separate guide scope. Off Axis guiders can't be used here as they will search around for the guide star when auto focusing for example and so that would ruin the images on the other scope. The alignment is critical to ensure that the maximum coverage between the 2 systems is achieved.
Both scopes are auto focused using a lakeside focuser.

Change 15: TMB 152/1200 LZOS refractor
|
|
Another scope and I have to ask why!!! Well this beautiful original TMB152/1200 refractor (Original Thomas Back number 109) would have been impossible to resist!! Yes its shorter than the ODK10 at 1200mm, but there are certainly some big benefits that I can see with this scope.
- A big refractor should offer some fantastic data opportunities with pinpoint stars
- There will be no diffraction spikes (which i really do struggle to like with reflectors)
- With the design it's a closed scope (unlike reflectors that are open to the elements with their mirrors) and so I have less worries about cleaning it during pollen season
- I'm hoping that flats will be more consistent as I always struggled with them using the ODK10.
I have all the original paperwork too including the optics report.... This is no slouch I can tell you!!
On the back of the scope is the QSI683 (Kodak KAF8300 sensor) - The field of view is larger than that of the ODK10 and so this is a bit of a trial in a couple of ways......
- Can I live with the FOV offered by the KAF8300 and 1200mm scope?
- Will the resolution and detail be better with the refractor as there's no central obstruction.
There's SO much to love about this scope!!! It's a monster weighing in at almost 20kgs and it's a beast to man-handle. It's so long that I've had to set limits on my mount to prevent wall collisions.
The focuser has been automated with a lakeside - It's a beautiful single speed MASSIVE rack and pinion focuser and I have no intention of changing it for anything else. It's runs like butter and is silky smooth. Everything about this scope involves superlatives ..... There is absolutely NOTHING negative to say about it.
With the camera on it's giving perfect round stars to the corners and there's no reducer or flattener involved. SGP is controlling it as it should and last night I got it all set up to auto focus and auto meridian flip.
The beautifully crafted focuser knob!! Everything about this scope screams utter quality.

|
|
The focuser draw tube itself is huge - At 4" it makes the QSI look rather small!!

The Lakeside is fitted and needed a specific bracket making - i supplied the relevant measurements to the guys at Lakeside and the bracket fits perfectly
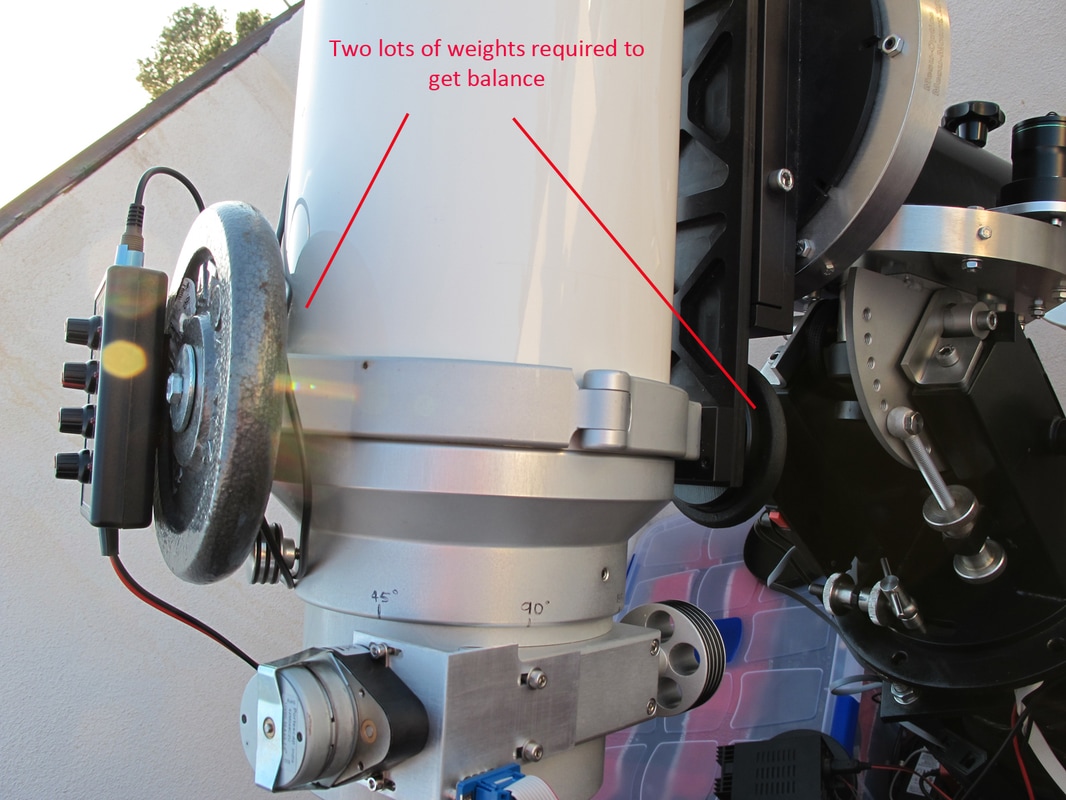
I've had to be a bit inventive with regards weight and balance....... In order to balance the scope and have the dew shield extended The back end has been too light and so needed to go backwards to get balance. This meant that there was potential wall collisions at the back of the scope when it was pointing to the south..... So I've added two lots of weights at the back of the scope..... It's now nicely balanced.

Change 16: Berlebach Planet tripod...... EQ8 ......
I wanted to run the dual rig and the TMB at the some time, but as it stood I only had one mount, the Mesu 200. I managed to get an EQ8 secondhand that I knew had a good history and decided that would run the dual rig (You can read all about the mount and why I choose it etc here ) . I decided that I didn't want a fixed pier, especially as initially this was going to go on the terrace...... so after much looking around I went for a Berlebach Planet tripod.
|
I bought this second hand and so had to purchase the pier top for the EQ8 separately. It was fairly easy to fix. These tripods have a load capacity of about 160kgs...... this was more than I needed!!
Here's the individual sum of the parts!!! You can see the tripod, EQ8 and dual setup on the dovetail bar. 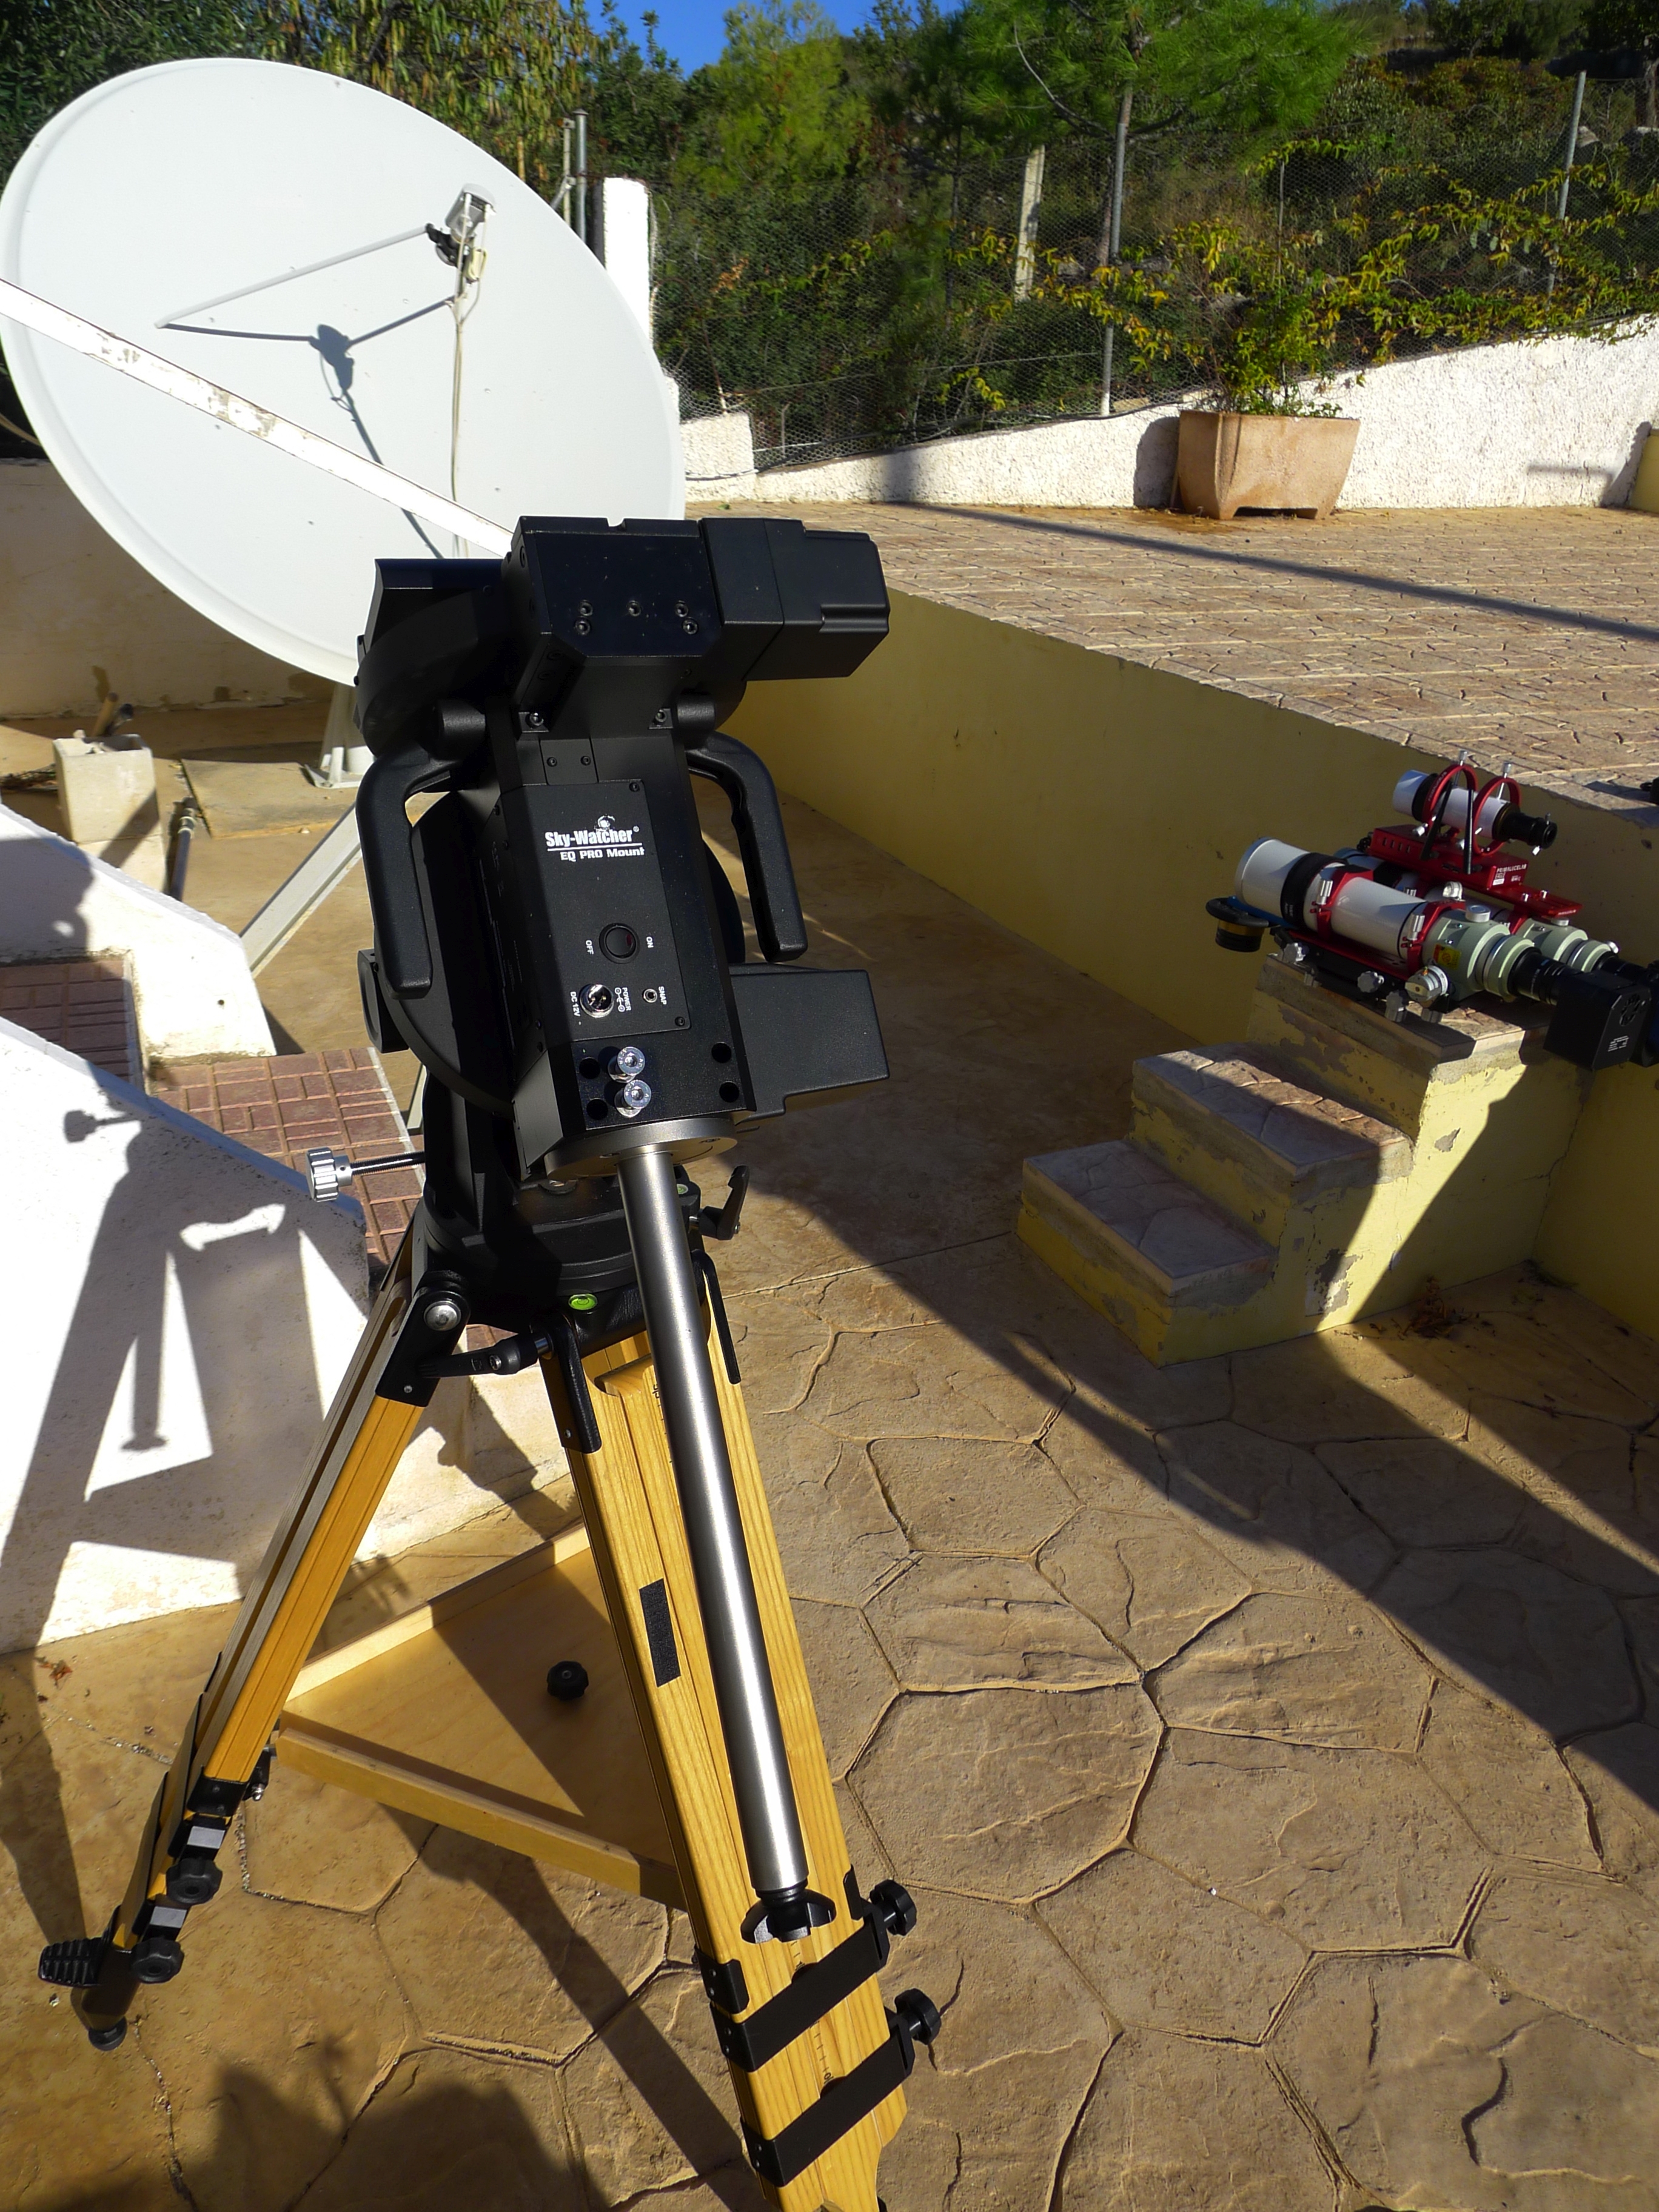
|
|
|
This is the dual rig that is all cabled up......... You can see more about it here . You can see everything that makes up the rig as I have listed it all on the specific page...... There's no more else to say about it here.

Change 17: QSI 690 ws-g on the TMB
With the advent of the two separate rigs, I needed to get another camera..... As I was using the KAF8300 chips on the dual rig I had a fairly open book with the camera for the TMB. I wanted to get another QSI as I very much like the integrated filter wheel and OAG solution....... I spent a lot of time with the FOV calculators, should I get another QSI683 or go for a smaller Sony chipped QSI690 sensor. Eventually I decided to got for the QSI690 as it gave me a similar field of view as I'd had with the ODK10 and the KAF8300. I also decided to go for Chroma 3nm narrowband filters instead of Astrodons. I have been pleased so far with the Chroma narrowband filters....... I went for 1.25" ones as they were the cheapest!!!!
Change 18 : Feathertouch focuser and FT Boss II autofocser on TMB
|
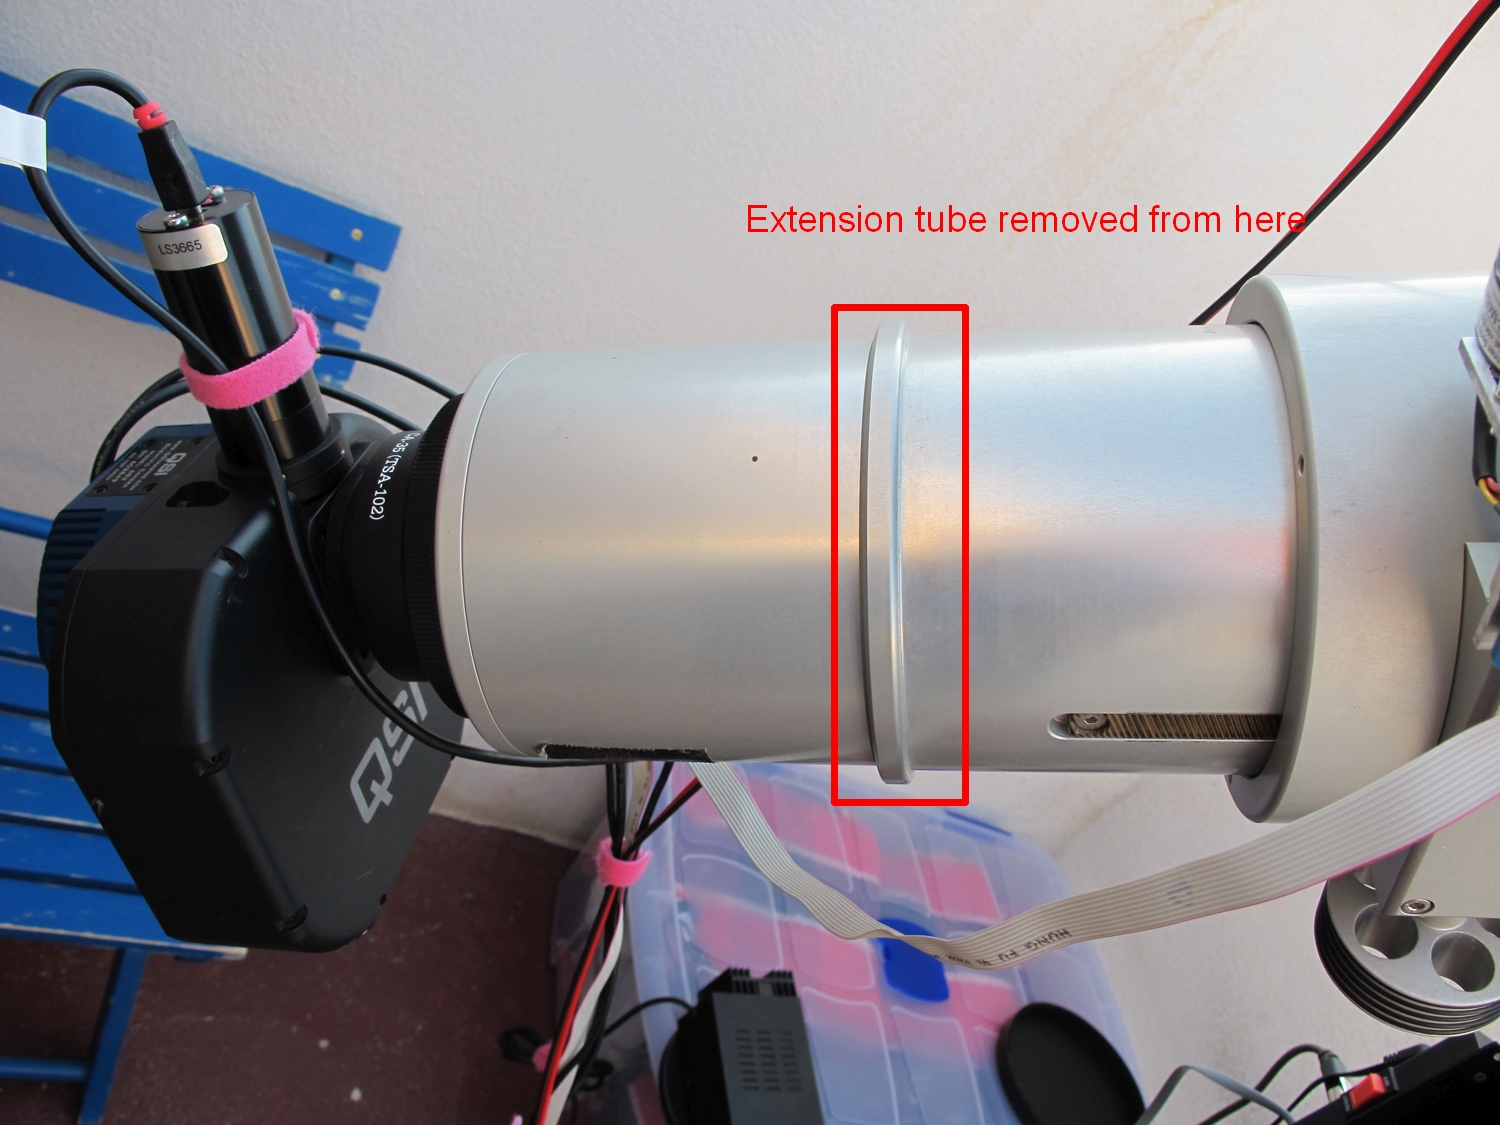
This is the new Starlight Instruments Feathertouch focuser that I have just put on the large TMB scope. The original focuser was getting a bit sloppy. Instead of replacing the entire focuser, which would have cost thousands of pounds, I removed the extension tube that was on the focuser and screwed the FT into where the extension tube was. It was easy to get focus. The original focuser in still there (tightly locked down) but just not in use.
|
|
|
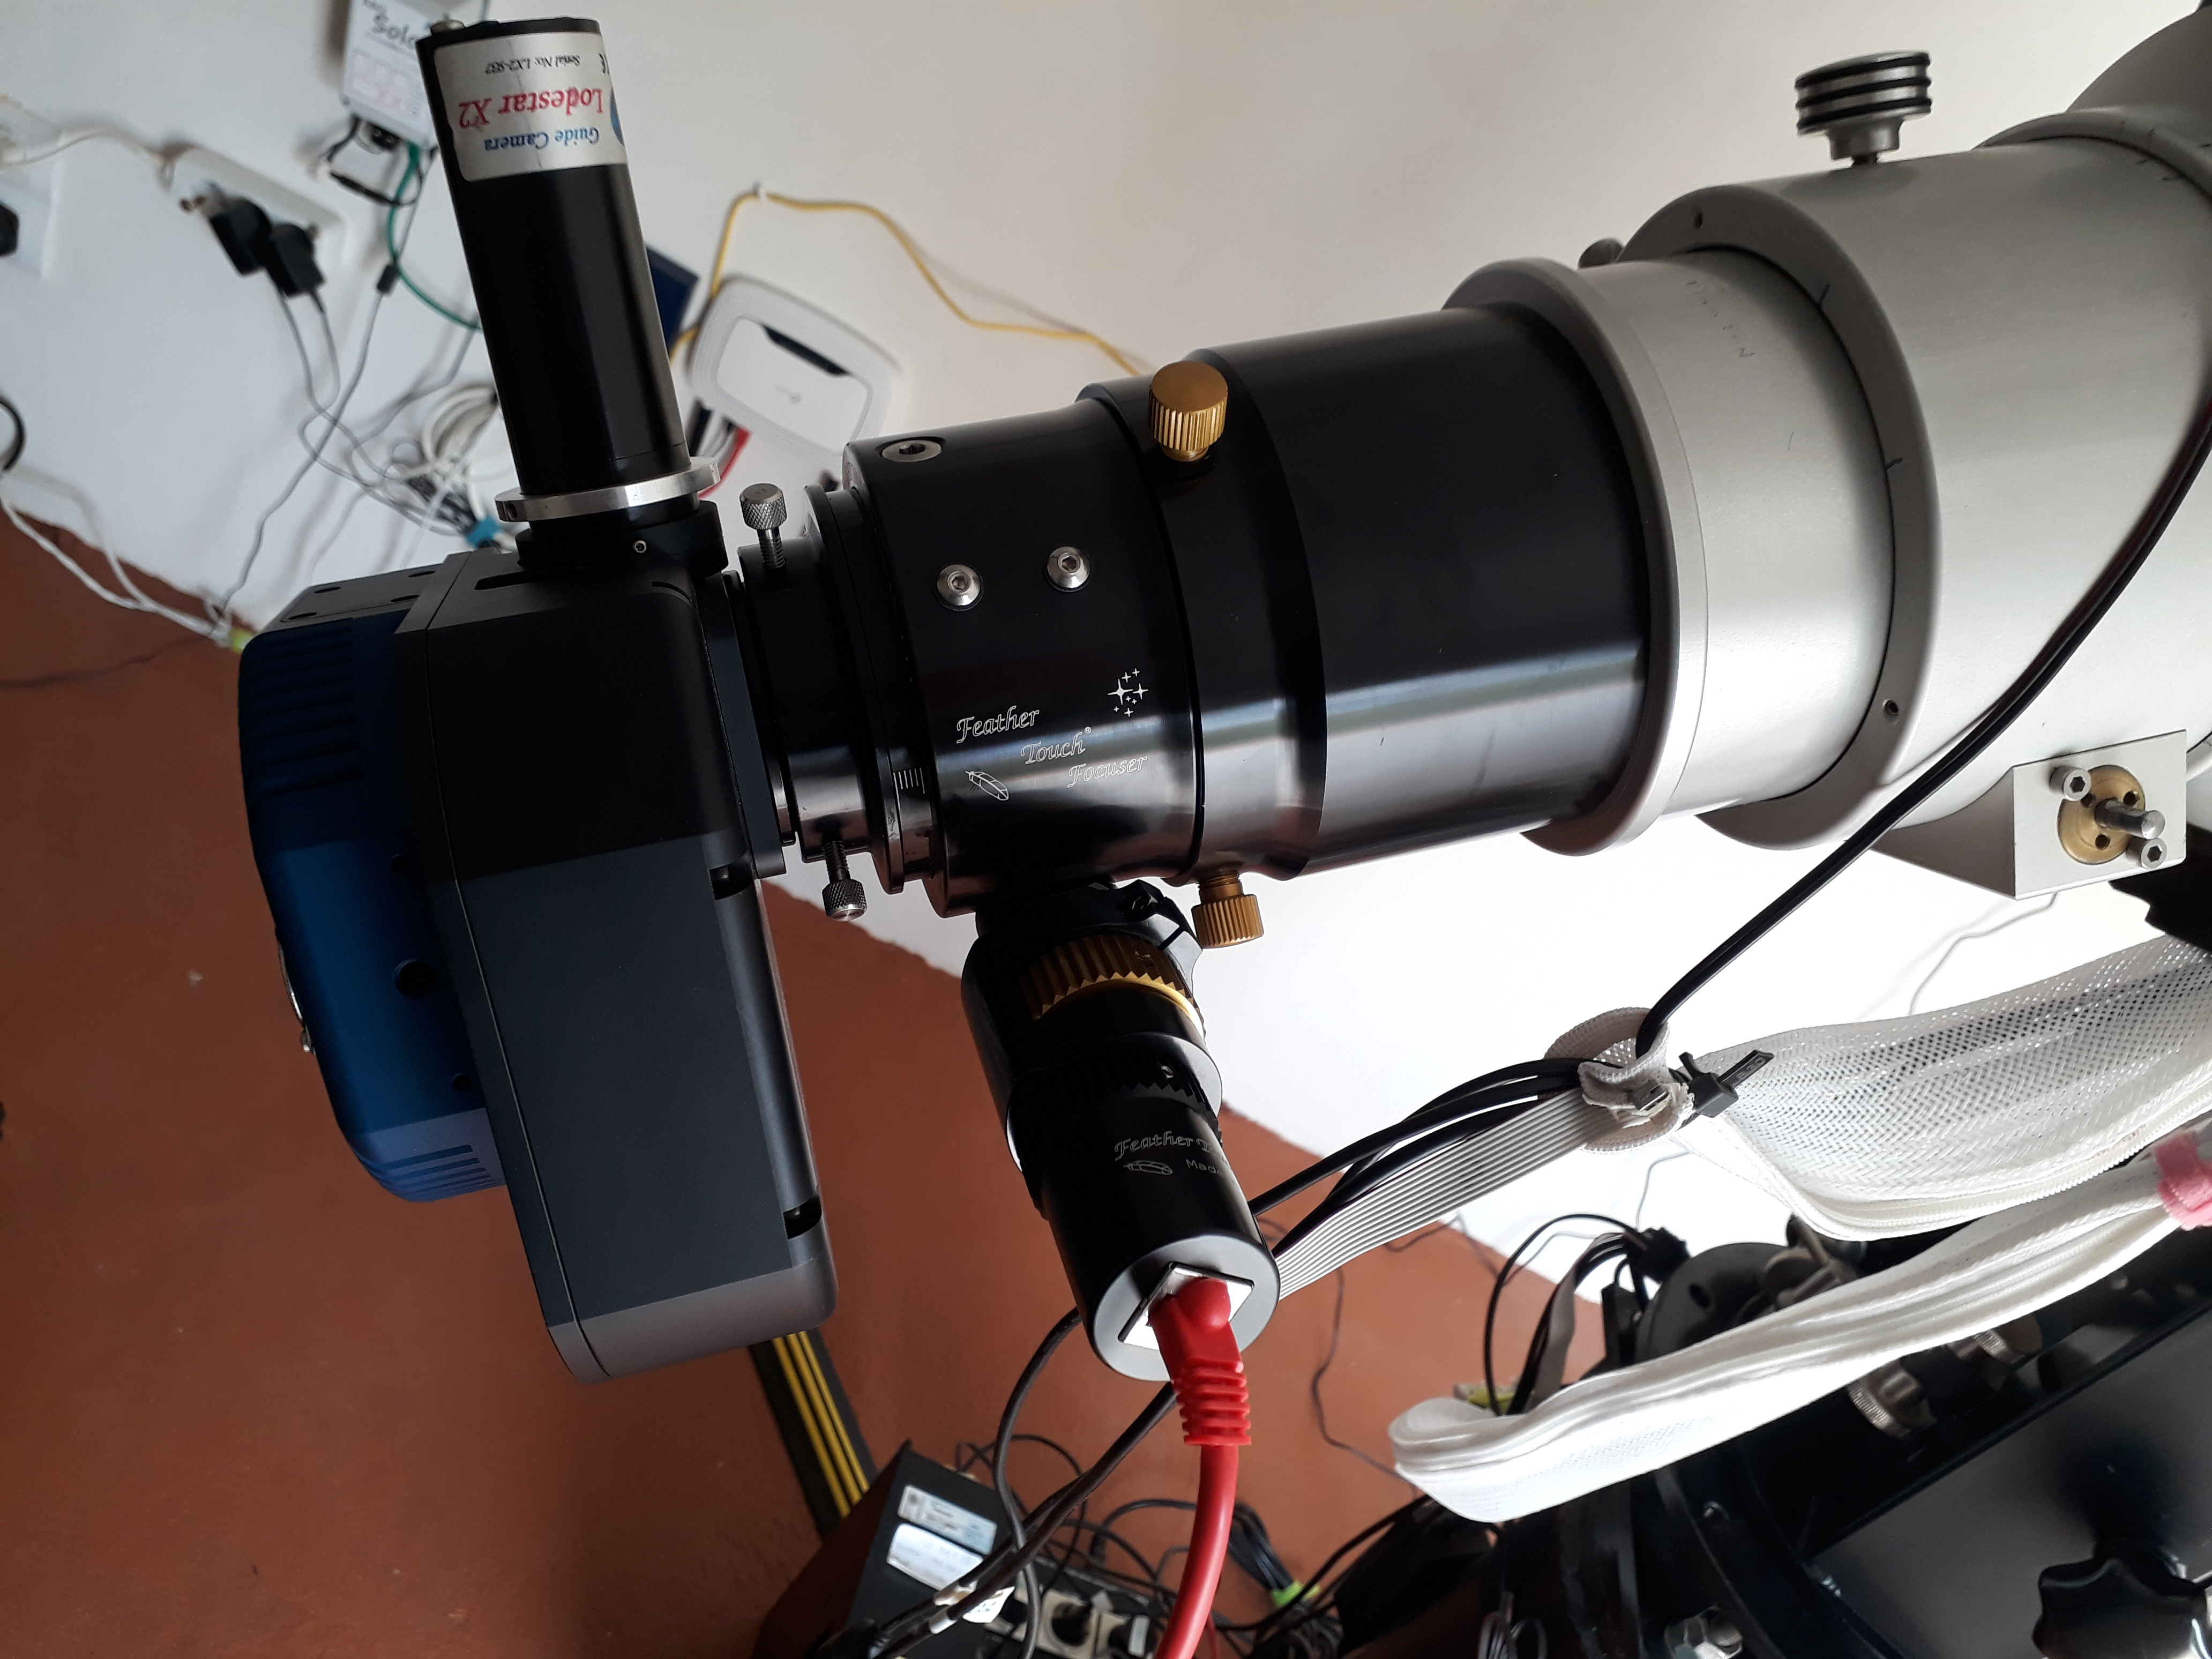
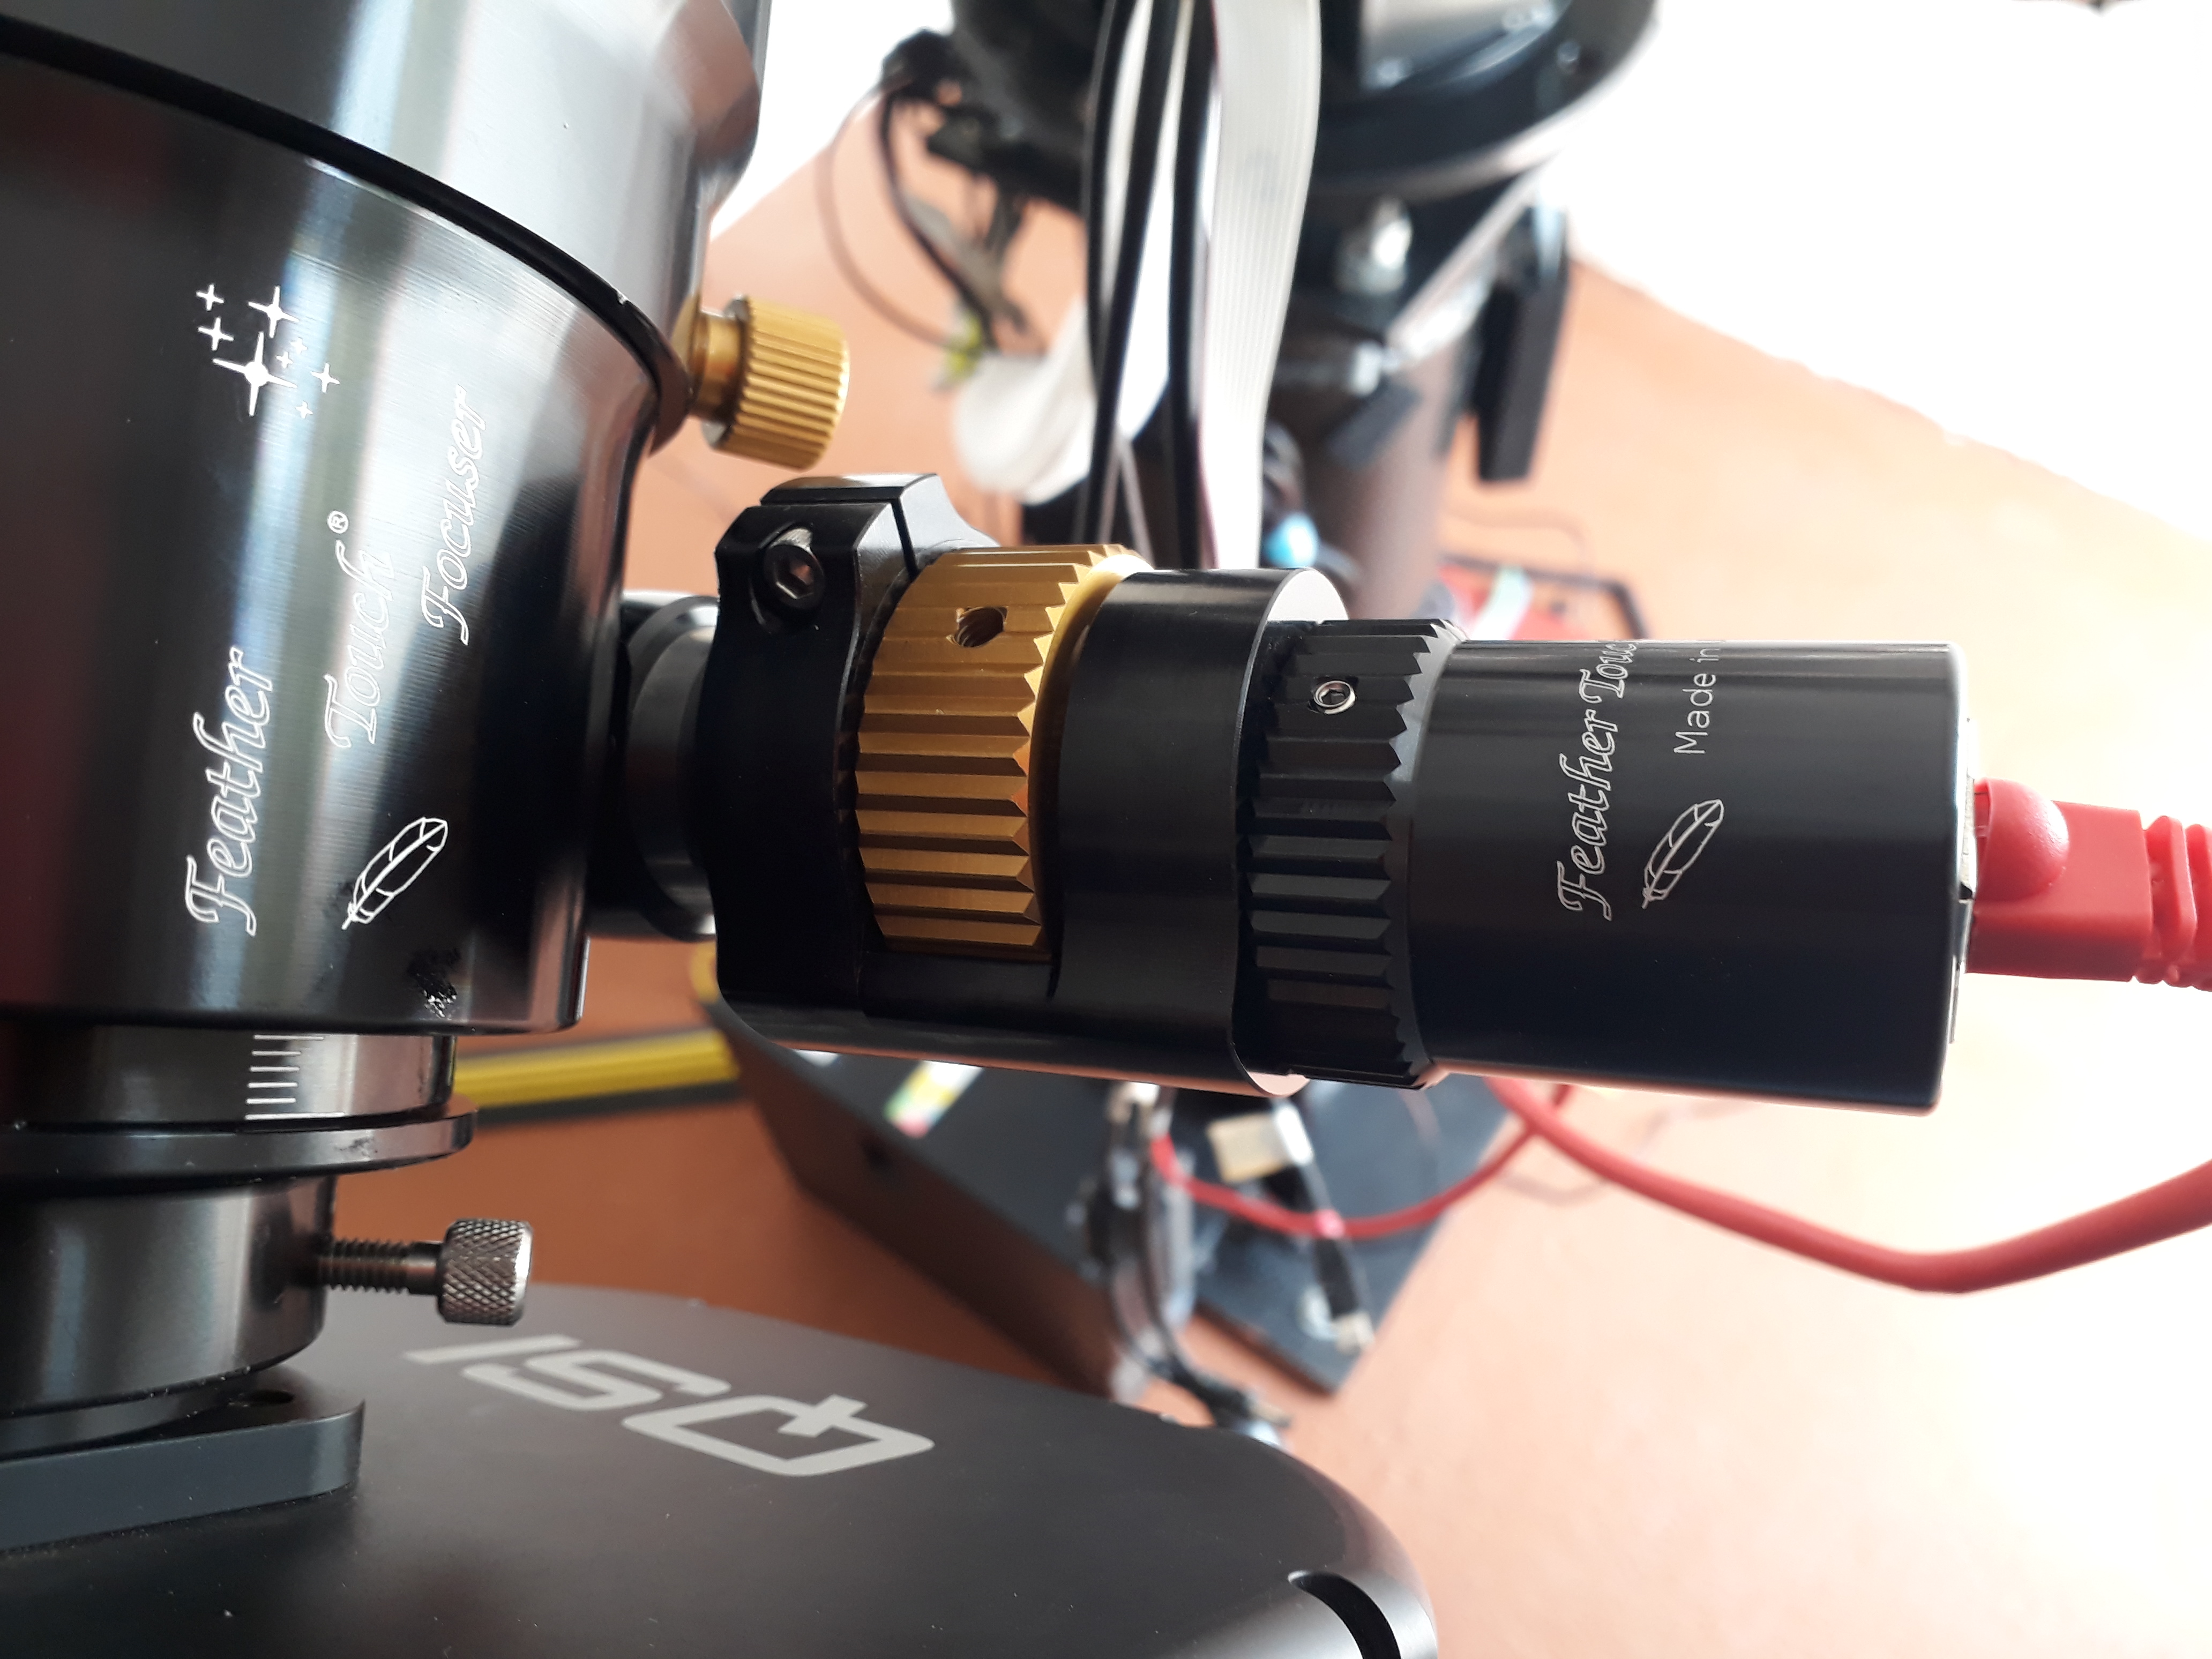
This is the BOSS II Feathertouch autofocuser. It easily connects to the FT focuser and has so far proved to be very accurate. The software needed to run it (in conjunction with SGP) was a little difficult to find, but it works well. It's a very well made piece of equipment in comparison to the Lakeside controls I was using before.
Everything is made of metal (junction box, hand control) whereas the Lakeside is all cheap looking plastic in comparison. |

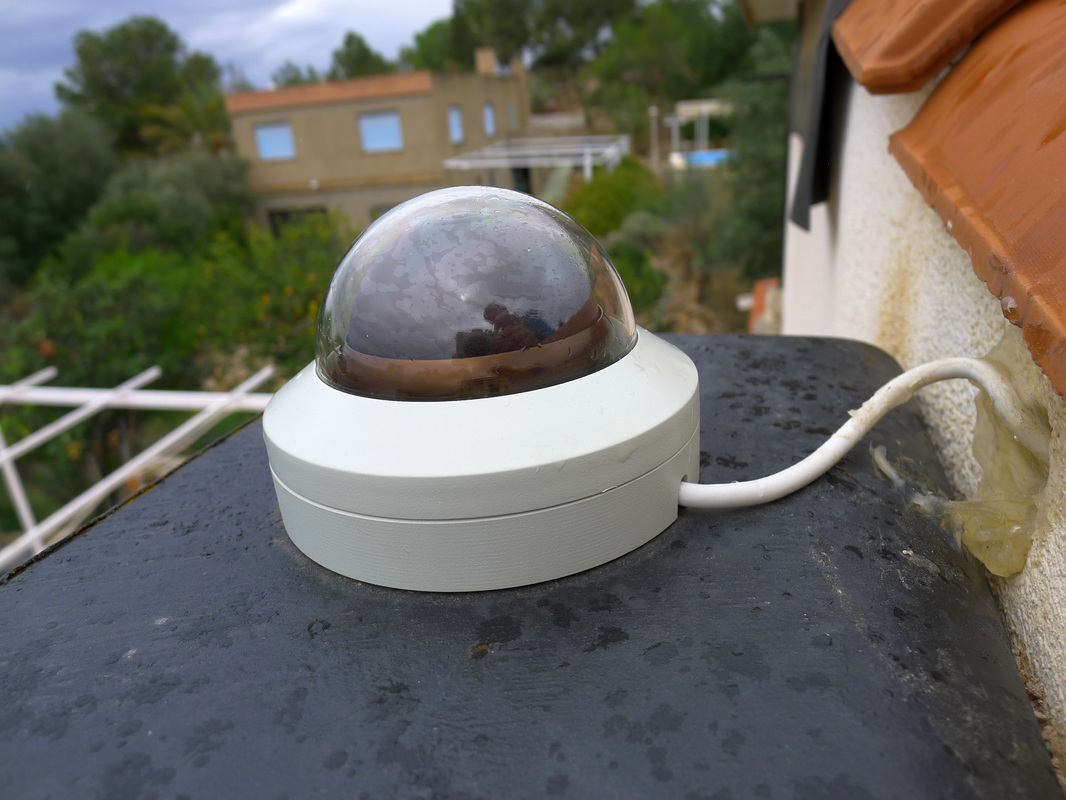
MallinCam All Sky camera
This has been a real joy to be able to watch the clouds / haze / stars from inside. It is definitely more sensitive than my own eyes and so really gives a great feel for sky conditions. Coupled with the SharpCap software it can record time lapse or video.
This has been reviewed here
This has been reviewed here

Other upgrades along the way: (I can no longer remember just where or when they happened!)
- PEMPro polar alignment software
- PixInsight processing software
- Maxim DL for guiding and capture
- Losmandy puck and saddle for the HEQ5
- Upgraded altitude bolts for the HEQ5
- Losmandy dovetails
- Dewstraps
- Atik 16HR OSC camera
